
PowerShell is one of the most powerful command-line and automation tools built into Windows. Unlike the traditional Command Prompt, PowerShell provides a rich set of commands called cmdlets that can work with files, processes, services, networking, system configuration, and much more.
In this tutorial, we’ll walk through 10 essential PowerShell commands for getting help, discovering commands, managing Windows services and processes, working with files, viewing file contents, and troubleshooting network connectivity.
Follow along with the examples and refer to the screenshots provided throughout the tutorial.
Prerequisites
Before getting started, make sure:
- PowerShell is installed on your Windows system. It is included by default in modern versions of Windows.
- You have permission to manage services or processes when performing administrative operations.
- PowerShell is opened with Administrator privileges when a command requires elevated permissions.
- You have a basic understanding of files, folders, and Windows applications.
Tip: You can open PowerShell by searching for PowerShell from the Windows Start menu. For administrative tasks, right-click PowerShell and select Run as administrator.
- Get Help with PowerShell Commands
- Discover Available Commands with Get-Command
- List and Manage Windows Services
- View and Stop Running Processes
- List Files and Directories
- Copy Files with Copy-Item
- Move Files with Move-Item
- Delete Files with Remove-Item
- Read, Create, and Append File Content
- Test Network Connectivity with Test-Connection
1. Get Help with PowerShell Commands
One of the first commands every PowerShell user should learn is Get-Help.
PowerShell contains extensive built-in documentation, and `Get-Help` allows you to access information about cmdlets directly from the terminal. It can show you what a command does, its syntax, available parameters, and examples.
This is particularly useful when you’re learning PowerShell because you don’t have to remember every command or parameter.
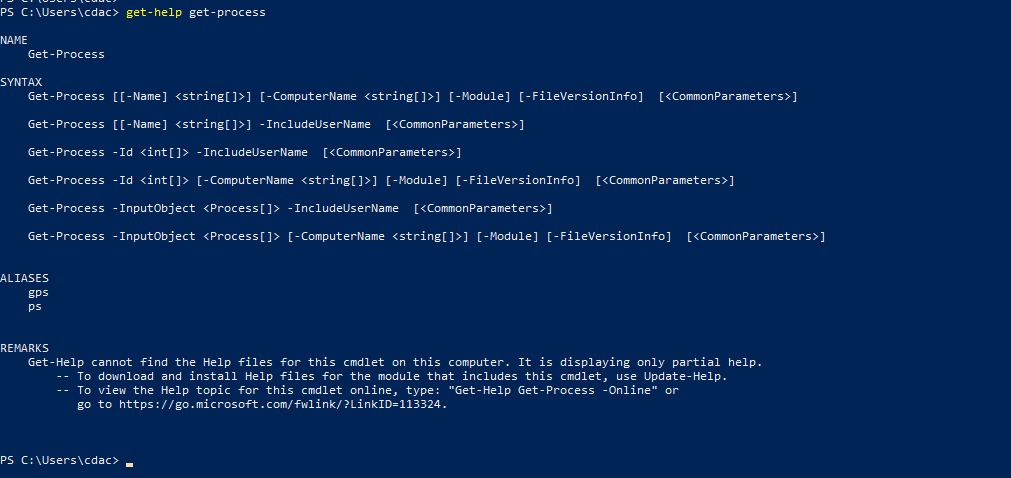
View Help for a Specific Command
Get-Help Get-ProcessThis displays documentation for the `Get-Process` cmdlet, including a description and information about its syntax.
View Examples
If you want to see practical examples of a command, use:
Get-Help Get-Process -ExamplesThis is often one of the most useful options for beginners because it shows how the command can be used in real situations.
Get Detailed Help
You can also request more detailed information:
Get-Help Get-Process -DetailedFor the most comprehensive information, use:
Get-Help Get-Process -FullUpdate PowerShell Help Files
PowerShell’s help documentation can be updated using:
Update-HelpKeeping the help files updated ensures that locally available documentation is refreshed. Depending on your Windows configuration, you may need to run PowerShell with administrative privileges.
2. Discover Available Commands with Get-Command
When you know what you want to accomplish but aren’t sure which PowerShell command to use, Get-Command can help. It searches for commands available in your current PowerShell environment, including cmdlets, functions, aliases, scripts, and applications.
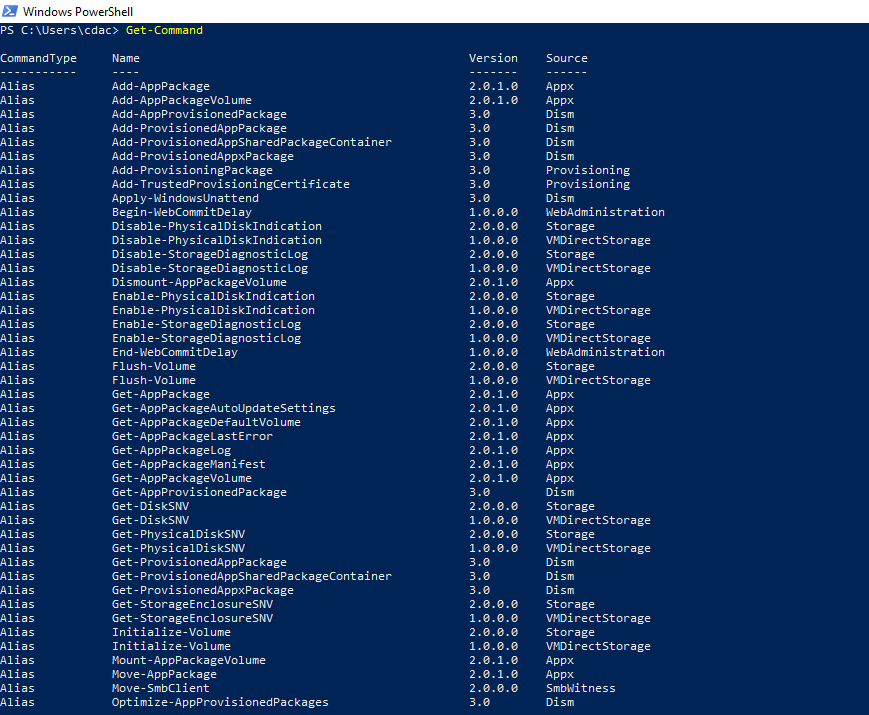
List Available Commands
Get-CommandThis displays commands available to your PowerShell session. Because there can be a large number of commands, you can filter the results.
Find Commands Related to a Keyword
For example:
Get-Command *process*This searches for commands containing the word `process`. You can also search for commands related to services:
Get-Command *service*Find Commands of a Specific Type
For example:
Get-Command -CommandType CmdletThis displays available PowerShell cmdlets.
`Get-Command` is particularly helpful when you know the general task you want to perform but don’t remember the exact cmdlet name. For example, instead of remembering whether the command is called `Get-Service`, `Show-Service`, or something else, you can search:
Get-Command *service*PowerShell will show matching commands.
3. List and Manage Windows Services
Windows services are background processes responsible for many operating system and application functions. Examples include services responsible for printing, networking, updates, security software, databases, and other applications.
PowerShell provides several commands for viewing and managing these services.
List All Services
Get-Service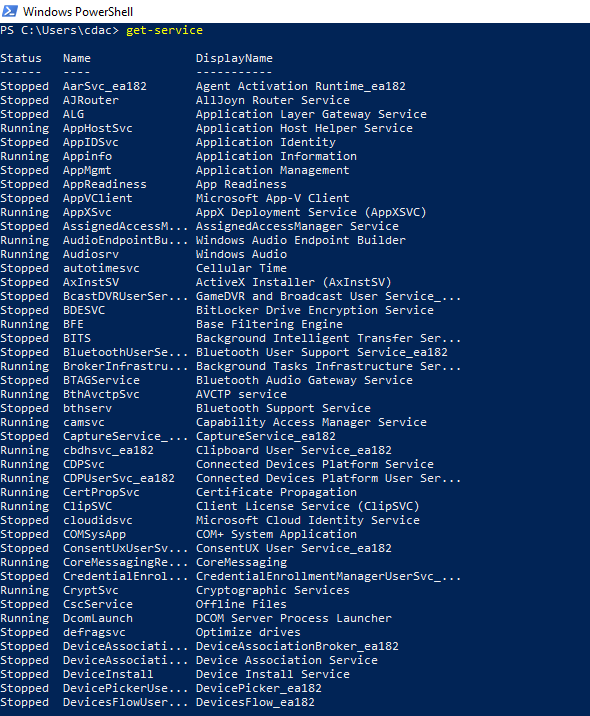
This displays services installed on the computer along with information such as:
- Service name
- Display name
- Current status
Common statuses include:
- `Running`
- `Stopped`
Find a Specific Service
You can search for a particular service:
Get-Service SpoolerYou can also search using wildcards:
Get-Service *print*This can be useful when you know only part of the service name.
Stop a Service
To stop a running service, use:
Stop-Service -Name Spooler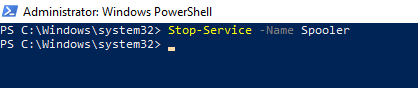
The `-Name` parameter specifies the service that should be stopped.
Warning: Stopping a critical Windows or application service can affect system functionality. Always verify what a service does before stopping it.
Start a Service
To start a stopped service:
Start-Service -Name SpoolerThis is useful when troubleshooting applications that depend on a particular Windows service.

Restart a Service
PowerShell also provides:
Restart-Service -Name SpoolerRestarting a service can be useful when a service is running but has stopped responding correctly.
4. View and Stop Running Processes
A process represents a running program or application on your computer. For example, when you open a web browser, text editor, or other application, Windows creates one or more processes associated with it.
PowerShell can be used to view these processes and, when necessary, terminate them.
List Running Processes
Get-ProcessThis displays currently running processes.
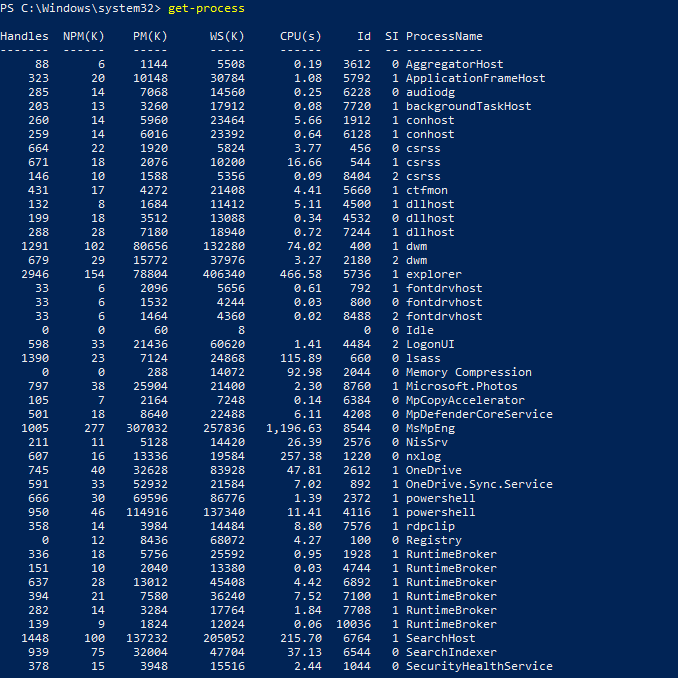
The output can include information such as:
- Process name
- Process ID (PID)
- CPU usage
- Memory usage
- Other process information
Find a Specific Process
For example:
Get-Process notepadThis displays information about the Notepad process if it is currently running. You can also search for a process by part of its name:
Get-Process *chrome*Stop a Process by Name
You can terminate a process using:
Stop-Process -Name notepadStop a Process Using Its Process ID
Every running process has a unique process ID.
For example:
Stop-Process -Id 1234Replace `1234` with the actual PID.

Important: Terminating a process can immediately close an application and may cause unsaved work to be lost. Use `Stop-Process` carefully, especially on production systems.
5. List Files and Directories
PowerShell makes it easy to browse files and folders directly from the command line. The primary cmdlet for this purpose is Get-ChildItem.
Using Get-ChildItem
Get-ChildItemThis displays the files and directories in the current location.
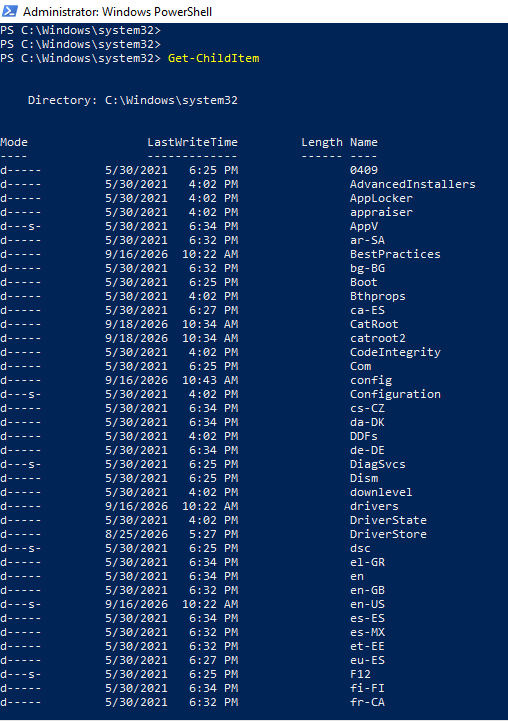
You can also specify a particular directory:
Get-ChildItem C:\UsersUsing dir
PowerShell also supports:
dir`dir` is an alias for `Get-ChildItem`.
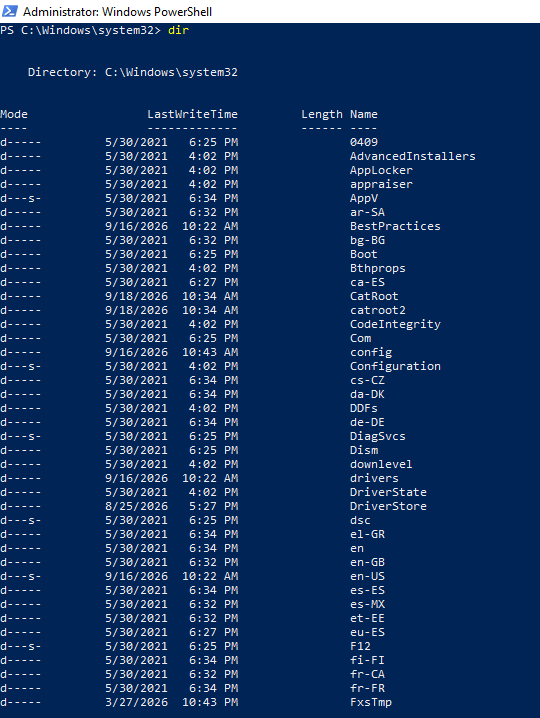
Using ls
You can also use:
lsThis is another commonly used alias for `Get-ChildItem`. Therefore, the following commands perform essentially the same basic operation:
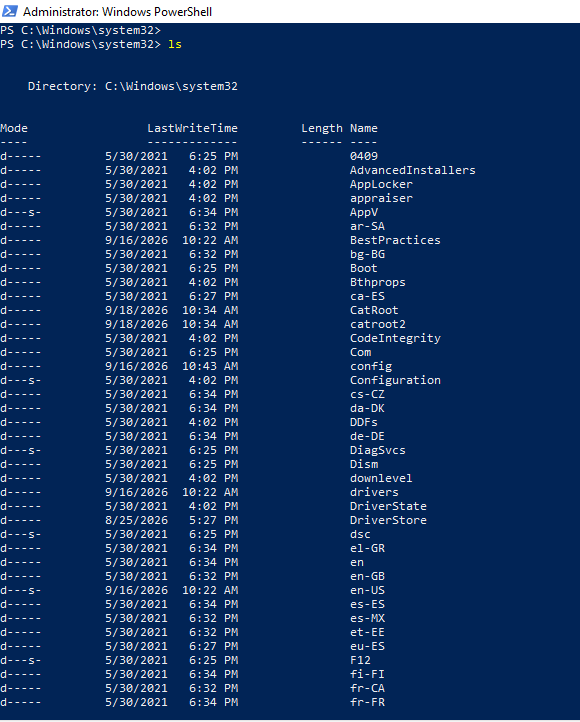
Get-ChildItem
dir
ls
Show Hidden Files
You can include hidden items with:
Get-ChildItem -ForceThe `-Force` parameter tells PowerShell to include hidden and system items that might otherwise be omitted.
6. Copy Files with Copy-Item
The Copy-Item cmdlet allows you to copy files and folders from one location to another. This is useful for creating backups, duplicating files, or moving data between directories while keeping the original copy.
Copy a File
Copy-Item .\test.txt .\test-copy.txt
In this example:
- `.\test.txt` is the source file.
- `.\test-copy.txt` is the destination file.
- `.\` represents the current directory.
The original `test.txt` remains unchanged, while a new copy named `test-copy.txt` is created.
Copy a File to Another Folder
For example:
Copy-Item .\test.txt .\extras\This copies `test.txt` into the `extras` directory.
Copy an Entire Folder
You can also copy directories:
Copy-Item .\Documents .\Backup -RecurseThe `-Recurse` parameter tells PowerShell to copy the contents of the directory, including files and subdirectories.
7. Move Files with Move-Item
The Move-Item cmdlet is used to move files or directories from one location to another. Unlike `Copy-Item`, moving a file removes it from its original location after the operation is completed.
Move a File to Another Folder
Move-Item .\test.txt "$HOME\Downloads\"
This moves `test.txt` from the current directory into the `Downloads` folder.
Move and Rename a File
`Move-Item` can also be used to rename a file:
Move-Item .\test.txt .\newname.txtBecause the source and destination are in the same directory, PowerShell effectively renames the file.
Move an Entire Folder
You can also move directories:
Move-Item .\OldFolder C:\Backup\8. Delete Files with Remove-Item
The Remove-Item cmdlet is used to delete files, directories, and other supported items.
Delete a File
Remove-Item .\testpic.jpg
After running the command, you can verify that the file has been removed:
Get-ChildItemDelete a Folder
To remove a folder, you can use:
Remove-Item .\OldFolder -RecurseThe `-Recurse` parameter is required when you want to remove a directory and its contents.
Warning: Be extremely careful when using `Remove-Item`, especially with `-Recurse`. Accidentally specifying the wrong path can result in the deletion of multiple files or directories.
You should always verify the path before executing a deletion command.
Preview Items Before Deleting
A useful safety option is `-WhatIf`:
Remove-Item .\OldFolder -Recurse -WhatIfThis shows what PowerShell would do without actually performing the deletion. This is especially useful when working with scripts or potentially large directories.
9. Read, Create, and Append File Content
PowerShell can work with text files directly from the command line. This makes it useful for viewing logs, creating configuration files, and modifying simple text files.
Three useful commands are:
- `Get-Content`
- `Set-Content`
- `Add-Content`
View File Contents
Get-Content .\textfile.txtThis reads the contents of the file and displays them directly in the PowerShell window. This can be particularly useful when inspecting log files or configuration files without opening a separate text editor.

Create or Overwrite a File
To write content to a file:
Set-Content .\textfile.txt "This is my first line."If the file does not exist, PowerShell creates it. If the file already exists, its existing contents are replaced.

For example:
Set-Content .\textfile.txt "New content"Important: `Set-Content` overwrites the existing contents of a file. Always be careful when using it with important files.
Append Content to a File
If you want to add content without deleting the existing contents, use:
Add-Content .\textfile.txt "This is another line."Unlike `Set-Content`, `Add-Content` adds the new text to the end of the file.
Example Workflow
You can create a file:
Set-Content .\textfile.txt "First line"Then add another line:
Add-Content .\textfile.txt "Second line"
Finally, display the contents:
Get-Content .\textfile.txtYou should see both lines in the output.
10. Test Network Connectivity with Test-Connection
The Test-Connection cmdlet is useful for checking whether your computer can communicate with another device or host over a network. It is similar to the traditional Windows `ping` command and is commonly used when troubleshooting network connectivity.
Test Connectivity Using an IP Address
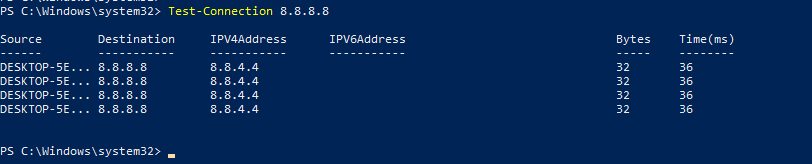
Test-Connection 8.8.8.8This sends network requests to the specified IP address and displays the response information. A successful response generally indicates that the destination is reachable through the network path being tested.
Test Connectivity Using a Domain Name
You can also specify a hostname:
Test-Connection google.comThis is useful because it tests connectivity using a domain name and therefore can also help identify potential DNS-related problems.

Specify the Number of Tests
You can control how many requests are sent using `-Count`:
Test-Connection google.com -Count 4This sends four connection tests.
Conclusion
These 10 PowerShell commands provide a solid foundation for anyone beginning to work with Windows from the command line.
By learning how to access built-in help, discover available commands, manage services and processes, browse and manipulate files, work with text files, and test network connectivity, you can perform many common administrative and troubleshooting tasks without relying entirely on graphical tools.
The real strength of PowerShell comes from combining these basic commands with parameters, pipelines, variables, scripts, and automation.
For example, once you’re comfortable with:
- Get-Process
- Get-Service
- Get-ChildItem
- Get-Content
- Test-Connection
you can start combining commands and filtering their output to perform much more advanced tasks.
PowerShell has a large ecosystem of commands and modules, so these 10 commands should be considered a starting point rather than a complete list. As you become more comfortable with the terminal, learning about pipelines (`|`), variables, filtering, formatting, PowerShell scripts, and automation will help you take your Windows administration skills to the next level.