

n8n is a powerful open-source workflow automation platform that helps you connect applications, APIs, databases, and services through visual workflows. Instead of writing custom integrations from scratch, you can build automated processes using a simple drag-and-drop interface.
In this tutorial, you’ll learn how to install n8n on Ubuntu using Docker Compose. The setup includes PostgreSQL for reliable data storage and Caddy as a reverse proxy with automatic HTTPS support. By the end of this guide, you’ll have a secure, self-hosted n8n instance running on your server.
Prerequisites
Before you begin, make sure you have:
- An Ubuntu LTS server
- Minimum: 1 vCPU and 2 GB RAM
- Recommended: 2 vCPU and 4 GB RAM
- A non-root user with sudo privileges
- A domain name pointing to your server’s public IP address (recommended for HTTPS)
- Basic Linux command-line knowledge
Note: If you do not have a domain name, you can still access n8n using your server IP address. However, the connection will use HTTP instead of encrypted HTTPS.
Step 1: Update Your Ubuntu Server
Start by connecting to your server through SSH and updating installed packages.
sudo apt update && sudo apt upgrade -y
This command:
- Refreshes package information (apt update)
- Installs available updates (apt upgrade -y)
- Ensures your server has the latest security patches before installation
Step 2: Install Required Packages
Install the packages needed to securely download and verify software repositories.
sudo apt install -y apt-transport-https ca-certificates curl gnupg
These packages provide:
- Secure HTTPS repository access
- Certificate validation
- File downloading capabilities
- GPG key management for package verification
Step 3: Install Docker and Docker Compose
n8n will run inside Docker containers, making deployment and maintenance much easier.
Add Docker’s Official GPG Key
Create the keyring directory and download Docker’s signing key.
sudo install -m 0755 -d /etc/apt/keyrings
sudo curl -fsSL https://download.docker.com/linux/ubuntu/gpg -o /etc/apt/keyrings/docker.asc
sudo chmod a+r /etc/apt/keyrings/docker.asc
This key allows Ubuntu to verify that Docker packages come from the official Docker repository.
Add the Docker Repository
Create the Docker repository configuration.
sudo tee /etc/apt/sources.list.d/docker.sources <<EOF
Types: deb
URIs: https://download.docker.com/linux/ubuntu
Suites: $(. /etc/os-release && echo "${UBUNTU_CODENAME:-$VERSION_CODENAME}")
Components: stable
Signed-By: /etc/apt/keyrings/docker.asc
EOF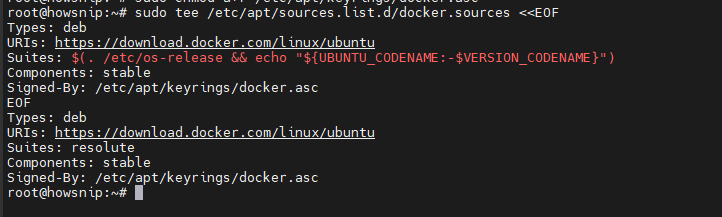
Install Docker Components
Update the package list and install Docker.
sudo apt update
sudo apt install docker-ce docker-ce-cli containerd.io docker-buildx-plugin docker-compose-plugin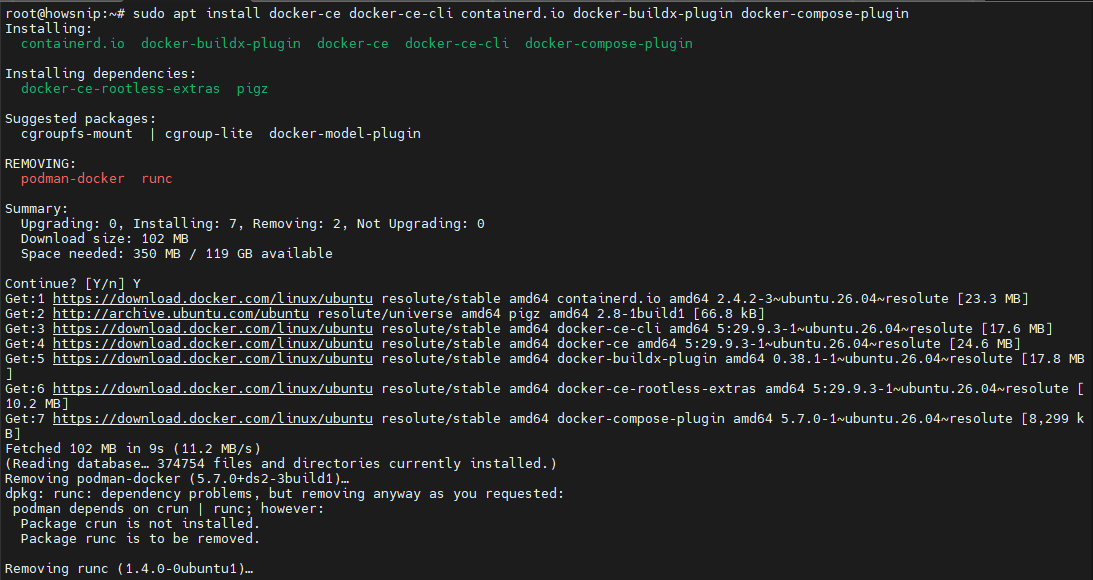
This installs:
- Docker Engine
- Docker CLI
- Container runtime
- BuildX
- Docker Compose plugin
Allow Docker Commands Without sudo
Add your user account to the Docker group.
sudo usermod -aG docker $USER
Apply the new group membership:
newgrp dockerRestart your shell session:
su - $USERVerify the Installation
Check that Docker and Docker Compose are installed successfully.
docker --version
docker compose version
Step 4: Create the n8n Project Directory
Create a dedicated directory for your n8n deployment.
sudo mkdir -p /opt/n8n
sudo chown -R $USER:$USER /opt/n8n
cd /opt/n8n
Using a dedicated directory makes backups and management easier.
Create a Local Storage Directory
mkdir local-filesThis folder will be used when workflows need access to local files.
Set the correct permissions:
sudo chown -R 1000:1000 local-files
sudo chmod -R 755 local-files
The n8n container runs under user ID 1000, so this directory must be writable by that user.
Step 5: Configure Environment Variables
Environment variables store configuration settings, database credentials, and encryption keys.
Generate an Encryption Key
Run:
openssl rand -base64 32
Save the generated key in a secure location.
Important: If you lose this encryption key, you can lose access to saved credentials stored in n8n.
Create the .env File
nano .env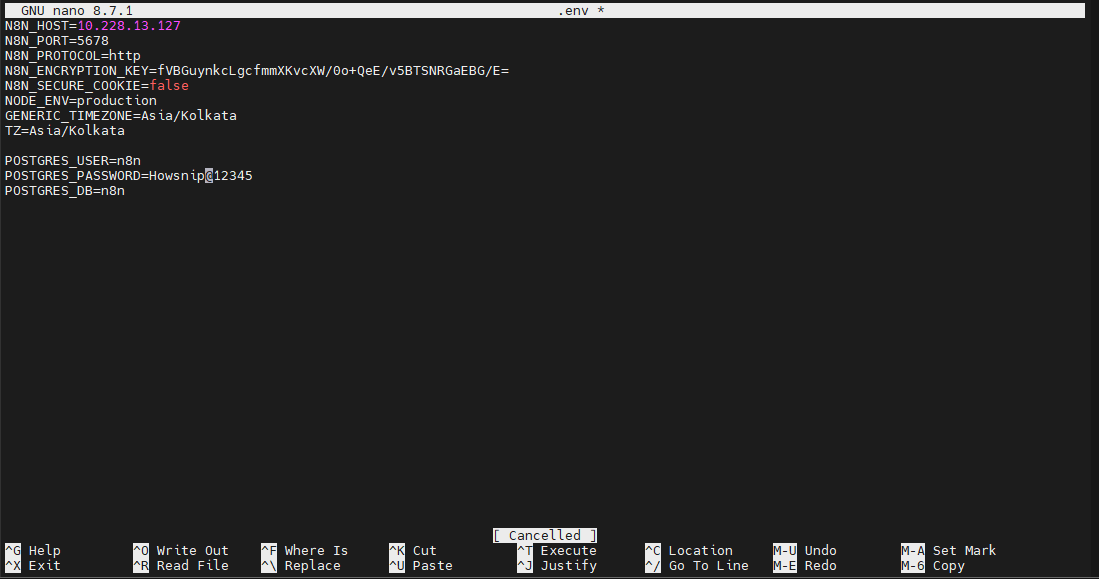
Choose the configuration that matches your setup.
Option A: Domain Name Setup (Recommended)
DOMAIN_NAME=example.com
SUBDOMAIN=n8n

N8N_PROTOCOL=https
N8N_PORT=5678
N8N_ENCRYPTION_KEY=REPLACE_WITH_BASE64_KEY

# Secure Cookie: Must be true for HTTPS
N8N_SECURE_COOKIE=true
NODE_ENV=production

# Timezone
GENERIC_TIMEZONE=America/New_York
TZ=America/New_York

POSTGRES_USER=n8n
POSTGRES_PASSWORD=YOUR_SECURE_PASSWORD
POSTGRES_DB=n8n

SSL_EMAIL=user@example.com

Replace the placeholders with your own values:

DOMAIN_NAME → Your domain name
SUBDOMAIN → The subdomain used for n8n
N8N_ENCRYPTION_KEY → Generated encryption key
POSTGRES_PASSWORD → Strong database password
GENERIC_TIMEZONE and TZ → Your timezone
SSL_EMAIL → Email used for SSL certificate notifications
Option B: Server IP Setup
If you are not using a domain name:
N8N_HOST=YOUR_SERVER_IP
N8N_PORT=5678
N8N_PROTOCOL=http
N8N_ENCRYPTION_KEY=REPLACE_WITH_YOUR_GENERATED_KEY

N8N_SECURE_COOKIE=false
NODE_ENV=production

GENERIC_TIMEZONE=YOUR_TIMEZONE
TZ=YOUR_TIMEZONE

POSTGRES_USER=n8n
POSTGRES_PASSWORD=YOUR_SECURE_PASSWORD
POSTGRES_DB=n8n
Save and exit Nano:
- Press CTRL + X
- Press Y
- Press Enter
Step 6: Create the Docker Compose Configuration
Docker Compose allows you to manage multiple containers as a single application stack.
Create the configuration file:
nano docker-compose.yml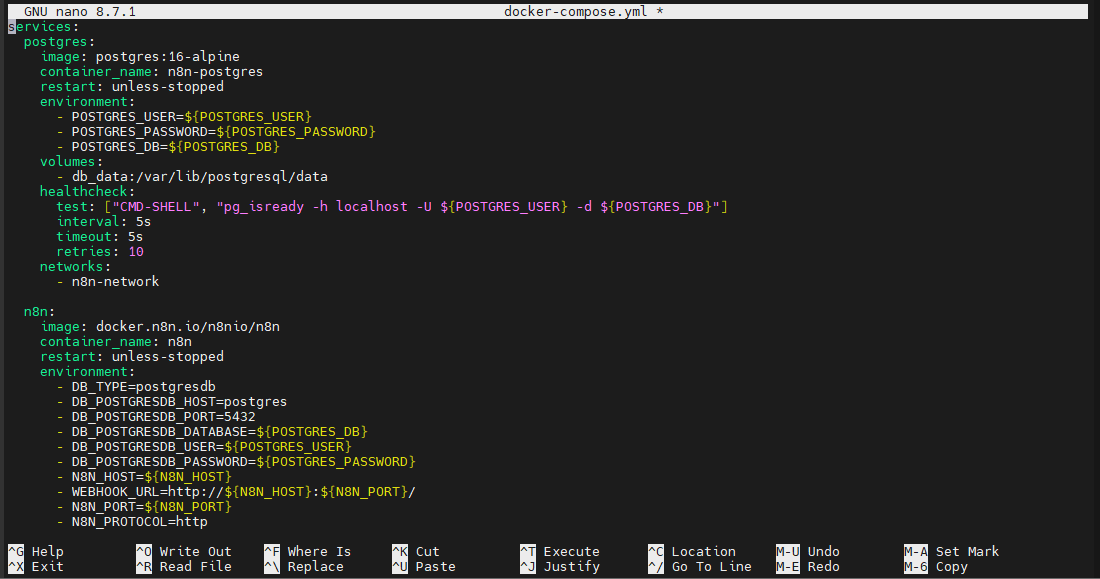
Option A: Docker Compose Configuration for Domain Setup
services:
postgres:
image: postgres:16-alpine
container_name: n8n-postgres
restart: unless-stopped
environment:
- POSTGRES_USER=${POSTGRES_USER}
- POSTGRES_PASSWORD=${POSTGRES_PASSWORD}
- POSTGRES_DB=${POSTGRES_DB}
volumes:
- db_data:/var/lib/postgresql/data
healthcheck:
test: ["CMD-SHELL", "pg_isready -h localhost -U ${POSTGRES_USER} -d ${POSTGRES_DB}"]
interval: 5s
timeout: 5s
retries: 10
networks:
- n8n-network

n8n:
image: docker.n8n.io/n8nio/n8n
container_name: n8n
restart: unless-stopped
environment:
- DB_TYPE=postgresdb
- DB_POSTGRESDB_HOST=postgres
- DB_POSTGRESDB_PORT=5432
- DB_POSTGRESDB_DATABASE=${POSTGRES_DB}
- DB_POSTGRESDB_USER=${POSTGRES_USER}
- DB_POSTGRESDB_PASSWORD=${POSTGRES_PASSWORD}
- N8N_HOST=${SUBDOMAIN}.${DOMAIN_NAME}
- WEBHOOK_URL=${N8N_PROTOCOL}://${SUBDOMAIN}.${DOMAIN_NAME}/
- N8N_PORT=${N8N_PORT}
- N8N_PROTOCOL=${N8N_PROTOCOL}
- NODE_ENV=${NODE_ENV}
- N8N_ENCRYPTION_KEY=${N8N_ENCRYPTION_KEY}
- N8N_SECURE_COOKIE=${N8N_SECURE_COOKIE}
- GENERIC_TIMEZONE=${GENERIC_TIMEZONE}
- TZ=${TZ}
volumes:
- n8n_data:/home/node/.n8n
- ./local-files:/files
depends_on:
postgres:
condition: service_healthy
networks:
- n8n-network

caddy:
image: caddy:2-alpine
container_name: caddy
restart: unless-stopped
ports:
- "80:80"
- "443:443"
- "443:443/udp"
environment:
- DOMAIN_NAME=${DOMAIN_NAME}
- SUBDOMAIN=${SUBDOMAIN}
- SSL_EMAIL=${SSL_EMAIL}
volumes:
- caddy_data:/data
- caddy_config:/config
- ./Caddyfile:/etc/caddy/Caddyfile:ro
depends_on:
- n8n
networks:
- n8n-network

volumes:
caddy_data:
caddy_config:
db_data:
n8n_data:

networks:
n8n-network:
driver: bridge
What Does This Configuration Do?
- PostgreSQL stores workflow data, credentials, and execution history.
- n8n runs the workflow automation platform.
- Caddy handles incoming traffic and automatically provisions SSL certificates.
Option B: Docker Compose Configuration for Server IP Setup
Use the configuration from the original guide when deploying without a domain name.
Save and exit Nano.
Step 7: Configure Caddy as a Reverse Proxy
Caddy will route traffic to n8n and can automatically manage HTTPS certificates.
Create the configuration file:
nano Caddyfile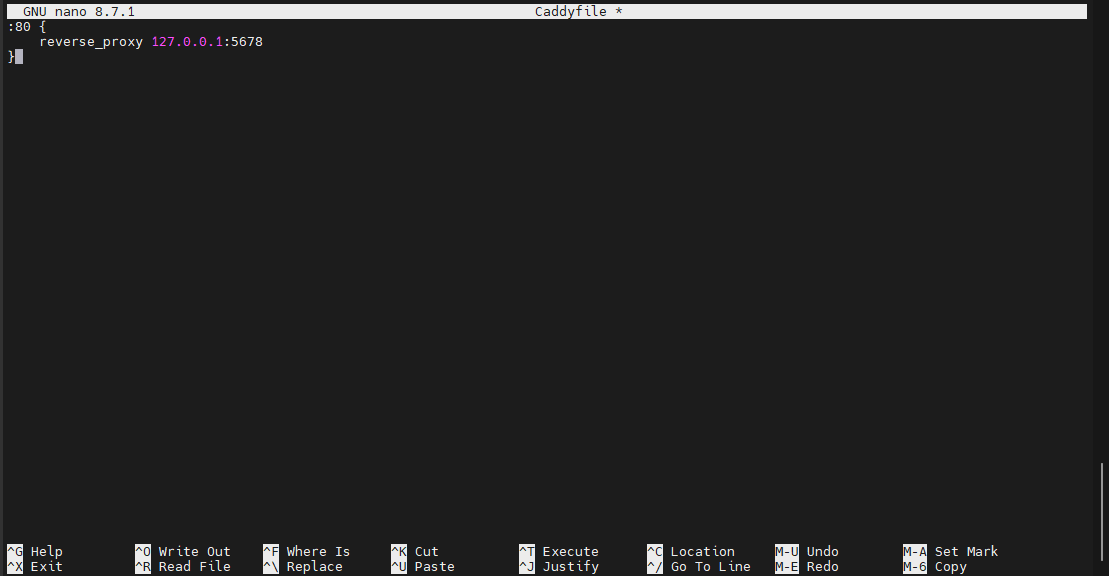
Option A: With a Domain Name
{
email {$SSL_EMAIL}
}

{$SUBDOMAIN}.{$DOMAIN_NAME} {
reverse_proxy n8n:5678
}
This configuration:
- Routes traffic to the n8n container
- Automatically requests and renews SSL certificates
- Enables HTTPS without additional manual configuration
Option B: With a Server IP
:80 {
reverse_proxy n8n:5678
}
This setup provides access over HTTP only.
Save the file and exit Nano.
Step 8: Start n8n with Docker Compose
Launch all containers in the background.
docker compose up -d
During the first startup, Docker downloads the required container images. This may take several minutes depending on your network speed.
Verify the Containers
Check that all services are running:
docker ps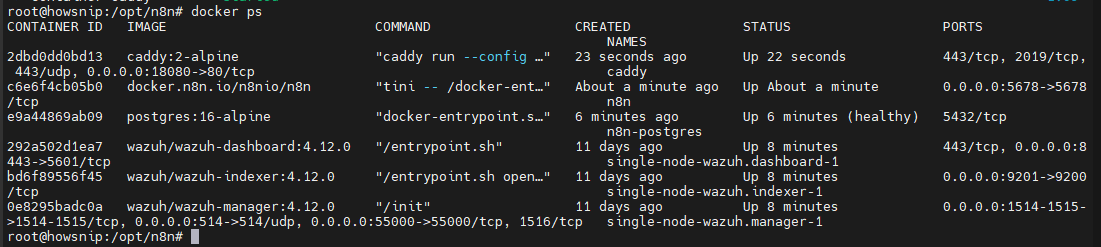
You should see:
- n8n
- n8n-postgres
- caddy
All containers should show an Up status.
Step 9: Configure the Firewall
Allow web traffic while keeping SSH access available.
sudo ufw allow 22
sudo ufw allow 80
sudo ufw allow 443
Enable UFW if it is not already active:
sudo ufw enableVerify the firewall rules:
sudo ufw status verbose
You should see ports 22, 80, and 443 listed as allowed.
Warning: Always ensure SSH (port 22) is allowed before enabling UFW. Otherwise, you may lose remote access to your server.
Step 10: Access n8n in Your Browser
Open your browser and navigate to:
If Using a Domain
https://your-subdomain.your-domain.com
If Using a Server IP
http://YOUR_SERVER_IP
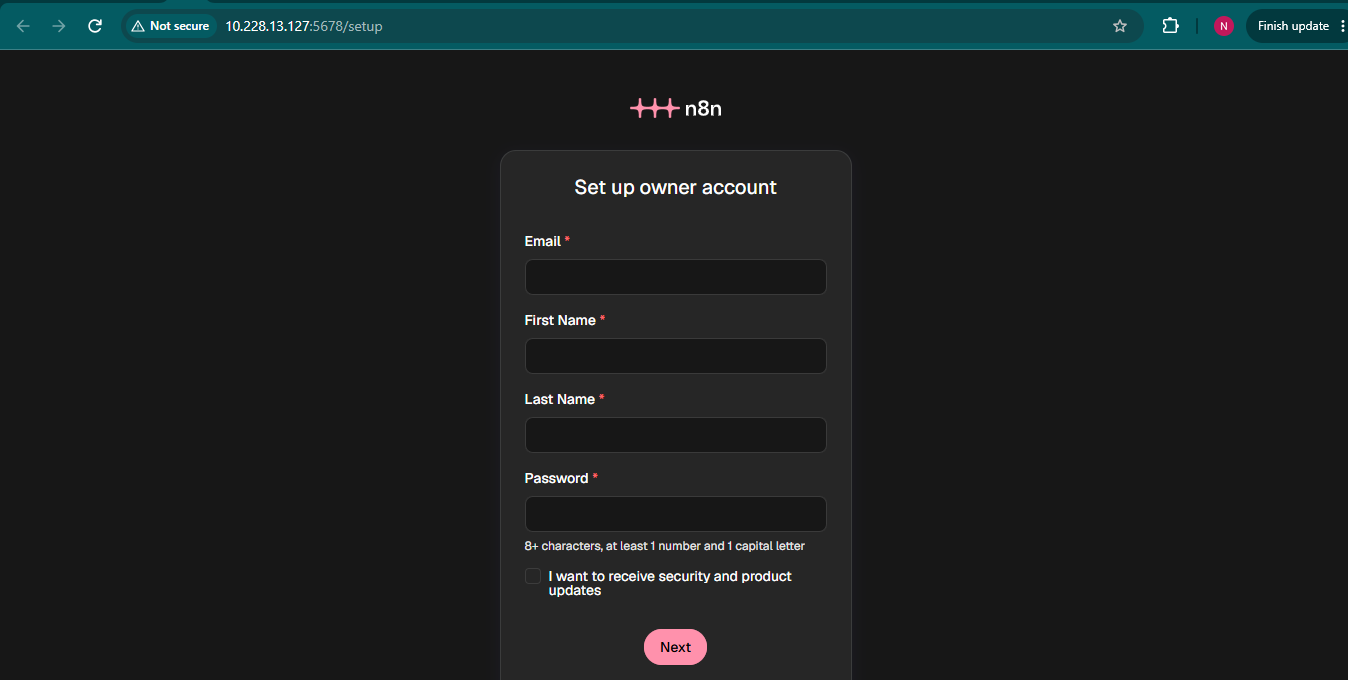
The first time you access n8n, you’ll be asked to create an owner account.
Enter:
- Email address
- Name
- Password
Once completed, you’ll be taken to the n8n dashboard.
Managing Your n8n Installation
After deployment, you’ll occasionally need to stop, update, or maintain the installation.
How to Stop n8n
Navigate to the project directory and run:
docker compose downThis stops and removes the running containers while keeping your data stored in the Docker volumes.
How to Check the Installed n8n Version
docker exec n8n n8n --version
This displays the version currently running inside the container.
How to Upgrade n8n
Before upgrading, move to the n8n project directory:
cd /opt/n8nPull the latest container images:
docker compose pull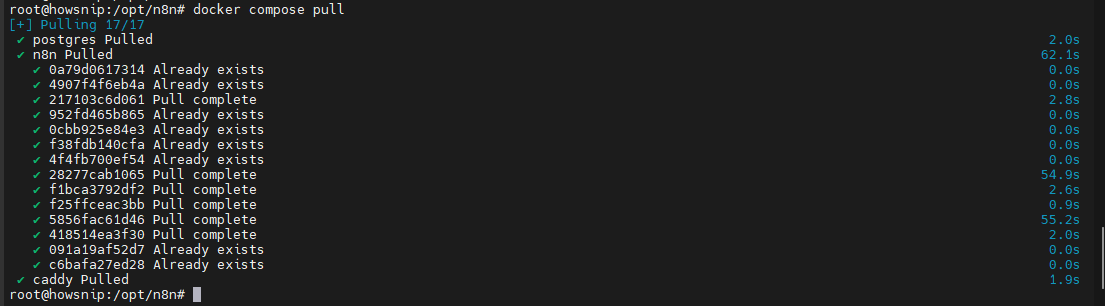
Restart the stack using the new images:
docker compose up -d
Optionally remove unused Docker images to recover disk space:
docker image prune -f
Conclusion
You now have a fully functional n8n installation running on Ubuntu using Docker, PostgreSQL, and Caddy. This setup provides reliable data storage, persistent workflow data, and automatic HTTPS when used with a domain name.
With the platform deployed, you can start building workflows that automate repetitive tasks, connect your favorite services, and reduce manual work. Explore the n8n node library and create your first workflow to begin taking advantage of self-hosted automation.