

Apache Kafka is one of the most popular distributed event-streaming platforms used for building real-time applications, data pipelines, and messaging systems. Starting with Kafka 4.0, KRaft (Kafka Raft Metadata mode) is the default metadata management system, eliminating the need for Apache ZooKeeper.
In this tutorial, you’ll learn how to install Apache Kafka 4.0 on Ubuntu, configure it in KRaft mode, run it as a systemd service, and verify the installation by producing and consuming messages.
Prerequisites
Before you begin, make sure you have:
- An Ubuntu server or VPS
- A user account with sudo privileges
- SSH access to the server
- At least 2 GB RAM available
Step 1: Install Java
Apache Kafka requires Java to run. Ubuntu includes OpenJDK 21 in its default package repositories, making installation straightforward.
Update Package Repositories
Start by refreshing the package index:
sudo apt update
This ensures that Ubuntu installs the latest available package versions.
Install OpenJDK 21
Install Java with the following command:
sudo apt install openjdk-21-jdk -y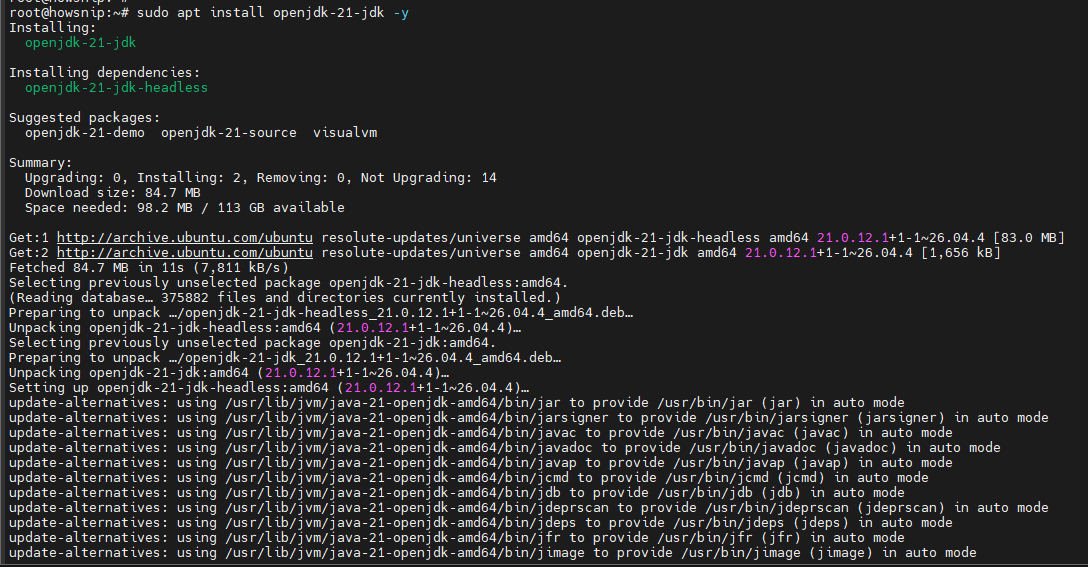
The -y option automatically confirms the installation prompt.
Verify the Java Installation
After installation, confirm that Java is available:
java -version
The output should indicate that Java 21 is installed.
With Java installed successfully, you’re ready to proceed with Kafka.
Step 2: Create a Dedicated Kafka User and Directories
Running Kafka under a dedicated system account improves security and keeps application files organized.
Create the Kafka User
Run the following command:
sudo useradd -r -m -U -d /opt/kafka -s /bin/false kafkaThis command:
- Creates a system user named kafka
- Sets /opt/kafka as its home directory
- Prevents direct login by using /bin/false
Create the Kafka Installation Directory
Create the directory where Kafka will be installed:
sudo mkdir -p /opt/kafkaAssign Ownership
Grant ownership of the directory to the Kafka user:
sudo chown -R kafka:kafka /opt/kafkaThis allows Kafka to manage its files and data without requiring root privileges.
Verify Permissions
Check the ownership and permissions:
ls -ld /opt/kafkaThe output should show the kafka user and group as owners.

Step 3: Download and Extract Apache Kafka
Next, download the Kafka binary package and extract it into the installation directory.
Move to a Temporary Directory
cd /tmpUsing /tmp keeps downloaded files separate from the final installation location.
Download Kafka 4.0.0
wget https://archive.apache.org/dist/kafka/4.0.0/kafka_2.13-4.0.0.tgz
This downloads the Apache Kafka 4.0.0 binary release for Scala 2.13.
Extract Kafka
sudo tar -xzf kafka_2.13-4.0.0.tgz -C /opt/kafka --strip-components=1
The –strip-components=1 option removes the top-level directory from the archive so the files are extracted directly into /opt/kafka.
Update File Ownership
sudo chown -R kafka:kafka /opt/kafkaThis ensures the Kafka user can access and manage all extracted files.
Verify the Installation
List the contents of the Kafka directory:
sudo ls -l /opt/kafka
You should see directories such as:
- bin – Kafka executable scripts
- config – Configuration files
- libs – Required Java libraries
- licenses – Third-party license information
- site-docs – Local Kafka documentation
Step 4: Configure Kafka in KRaft Mode
Kafka 4.0 uses KRaft mode by default, which removes the dependency on ZooKeeper. In this section, you’ll configure Kafka to operate as a standalone broker and controller.
Update the Configuration File
Open the Kafka configuration file:
sudo nano /opt/kafka/config/server.properties
Verify that the following settings exist and are configured correctly:
process.roles=broker,controller
node.id=1
controller.quorum.bootstrap.servers=localhost:9093
listeners=PLAINTEXT://:9092,CONTROLLER://:9093
advertised.listeners=PLAINTEXT://localhost:9092,CONTROLLER://localhost:9093
controller.listener.names=CONTROLLER
listener.security.protocol.map=CONTROLLER:PLAINTEXT,PLAINTEXT:PLAINTEXT,SSL:SSL,SASL_PLAINTEXT:SASL_PLAINTEXT,SASL_SSL:SASL_SSL
These settings instruct Kafka to:
- Act as both a broker and controller
- Listen for client connections on port 9092
- Use port 9093 for internal controller communication
Add Controller Quorum Configuration
Under the Server Basics section, ensure the following line exists:
controller.quorum.voters=1@localhost:9093This setting identifies the controller node and its communication endpoint. Without this configuration, Kafka cannot initialize its metadata storage correctly.
Configure the Data Directory
Locate the log.dirs setting and update it:
log.dirs=/opt/kafka/data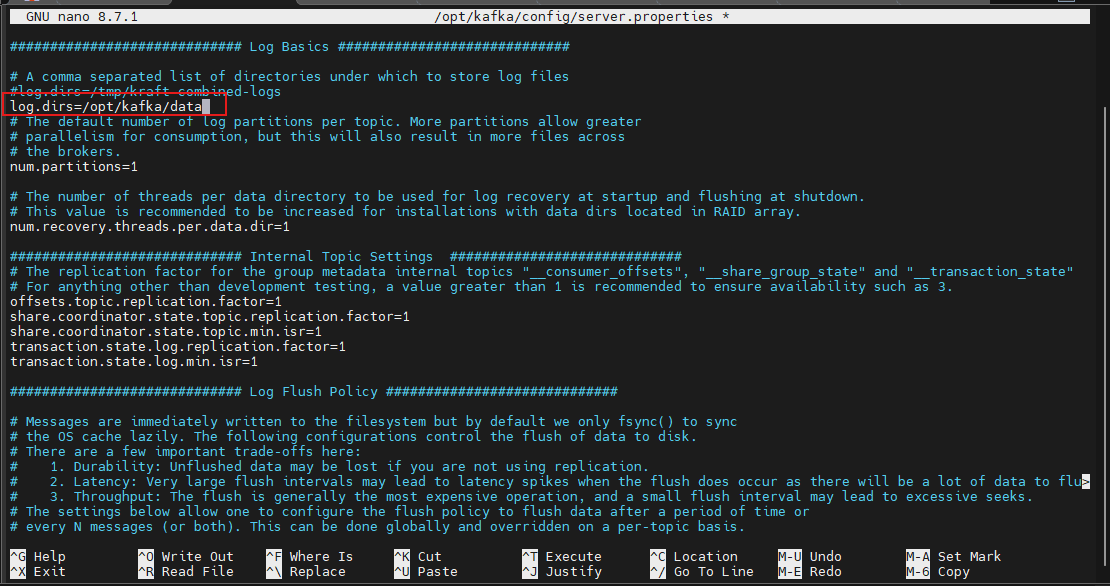
This stores Kafka data in a persistent location instead of /tmp, which may be automatically cleared.
Save the file and exit the editor.
Step 5: Generate a Kafka Cluster ID
Kafka requires a unique cluster identifier before storage can be initialized.
Run:
sudo /opt/kafka/bin/kafka-storage.sh random-uuid
Example output:
phUlS7GvRlaFwSNC_orOmw
Copy and save the generated Cluster ID. It will be required in the next step.
Step 6: Format the Kafka Storage Directory
Initialize Kafka storage using the Cluster ID you generated.
Run:
sudo /opt/kafka/bin/kafka-storage.sh format -t <your-cluster-id> -c /opt/kafka/config/server.propertiesReplace <your-cluster-id> with the actual ID from the previous step.
Example:
sudo /opt/kafka/bin/kafka-storage.sh format -t phUlS7GvRlaFwSNC_orOmw -c /opt/kafka/config/server.properties

This command prepares Kafka’s metadata and local storage for operation.
If successful, Kafka will display a confirmation message indicating that storage was formatted correctly.
Step 7: Create a systemd Service for Kafka
Running Kafka through systemd provides easier management and automatic startup after reboots.
Create the Service File
Open a new service file:
sudo nano /etc/systemd/system/kafka.service
Add the following content:
[Unit]
Description=Apache Kafka Server
After=network.target

[Service]
Type=simple
User=kafka
ExecStart=/opt/kafka/bin/kafka-server-start.sh /opt/kafka/config/server.properties
ExecStop=/opt/kafka/bin/kafka-server-stop.sh
Restart=on-abnormal

[Install]
WantedBy=multi-user.target
Save the file and exit.
Step 8: Create the Kafka Data Directory
Create the data directory configured earlier:
sudo mkdir -p /opt/kafka/dataAssign proper ownership:
sudo chown -R kafka:kafka /opt/kafka/dataKafka stores its logs, metadata, and topic data here.

Important: If this directory does not exist, Kafka may fail to start.
Step 9: Enable and Start Kafka
Reload systemd
Make systemd aware of the new service:
sudo systemctl daemon-reloadEnable Kafka at Boot
sudo systemctl enable kafkaThis configures Kafka to start automatically whenever the server boots.
Start or Restart Kafka
sudo systemctl restart kafkaVerify Service Status
Check whether Kafka is running:
sudo systemctl status kafka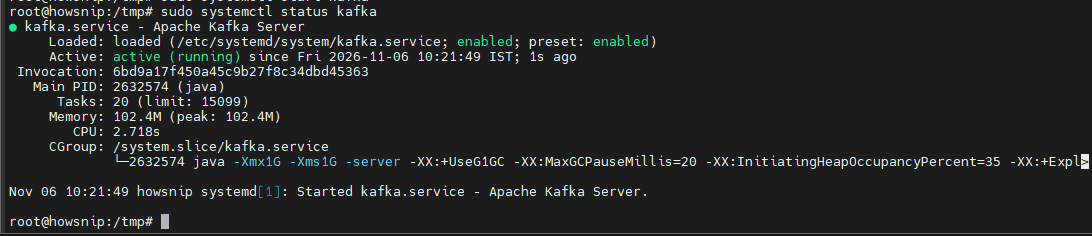
You should see the service reported as active and running.
Step 10: Test Kafka
Now it’s time to verify that Kafka can successfully send and receive messages.
Create a Test Topic
Create a topic named test-topic:
sudo /opt/kafka/bin/kafka-topics.sh --create --topic test-topic --bootstrap-server localhost:9092 --partitions 1 --replication-factor 1
If successful, Kafka confirms the topic creation.
Start a Producer
Launch a console producer:
sudo /opt/kafka/bin/kafka-console-producer.sh --topic test-topic --bootstrap-server localhost:9092
The terminal will wait for input.
Enter a few messages:
Hello Kafka!
Testing…
Each line entered becomes a separate Kafka message.
Start a Consumer
Open a second terminal and run:
sudo /opt/kafka/bin/kafka-console-consumer.sh --topic test-topic --from-beginning --bootstrap-server localhost:9092
This consumer reads messages from the start of the topic.
You should see the messages sent through the producer:
Hello Kafka!
Testing…
Successful message delivery confirms that Kafka is functioning correctly.
Conclusion
You have successfully installed Apache Kafka 4.0 on Ubuntu, configured it to run in KRaft mode, initialized its storage, and set it up as a systemd-managed service. Finally, you verified the installation by creating a topic and exchanging messages between a producer and consumer.
This setup provides a solid foundation for local development, testing, and learning Kafka before moving on to multi-broker deployments, replication, and advanced event-streaming architectures.