

FTP (File Transfer Protocol) is a widely used method for transferring files between systems. On Ubuntu, one of the most popular FTP server solutions is VSFTPD (Very Secure FTP Daemon), known for its speed and reliability.
In this tutorial, you’ll learn how to install VSFTPD, configure FTP access for local and anonymous users, secure connections using FTPS (FTP over SSL/TLS), and allow remote connections through your firewall and router.
Important: Standard FTP traffic is not encrypted. If you plan to transfer sensitive data, consider enabling FTPS as described later in this guide.
Prerequisites
Before starting, make sure you have:
- An Ubuntu server or desktop system
- A user account with sudo privileges
- Access to the terminal
- An internet connection for package installation
Step 1: Open a Terminal
If you’re using Ubuntu Desktop, press:
Ctrl + Alt + Tto open a terminal window.
If you’re connected to a remote Ubuntu server through SSH, you can skip this step.
Step 2: Update the Package List
Before installing new software, update Ubuntu’s package index:
sudo apt update
This ensures you install the latest available package versions from your configured repositories.
Step 3: Install VSFTPD
Install the VSFTPD package using:
sudo apt install vsftpd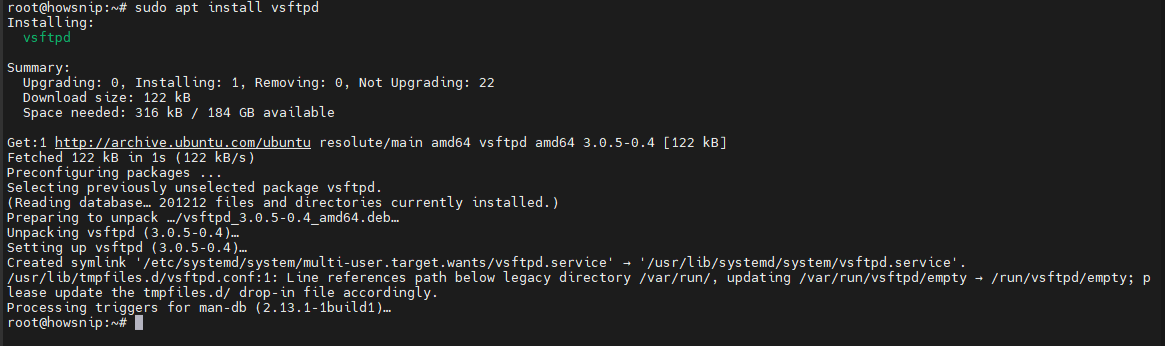
VSFTPD is a fast and lightweight FTP server commonly used on Linux systems.
Step 4: Enable VSFTPD at Startup
To make sure the FTP service starts automatically whenever the server boots, run:
sudo systemctl enable vsftpd
Step 5: Start the FTP Service
Start the VSFTPD service:
sudo systemctl start vsftpdVerify that the service is running:
sudo systemctl status vsftpd
If you want Ubuntu user accounts to be able to log in through FTP, edit the VSFTPD configuration file.
Step 6: Open the Configuration File
Before making changes, create a backup:
sudo cp /etc/vsftpd.conf /etc/vsftpd.conf_backupOpen the configuration file:
sudo nano /etc/vsftpd.confStep 7: Enable Local User Login
Find the following line:
local_enable=YESIf the line begins with a #, remove the # to uncomment it.

Step 8: Allow File Uploads (Optional)
To permit authenticated users to upload files, locate: write_enable=YES
If it is commented out, remove the # symbol.
write_enable=YES
Step 9: Restrict Users to Their Home Directories (Recommended)
Restricting users to their own home folders improves security.
Restrict All Users
Uncomment:
chroot_local_user=YESRestrict Selected Users Only
Uncomment:
chroot_list_enable=YES
chroot_list_file=/etc/vsftpd.chroot_list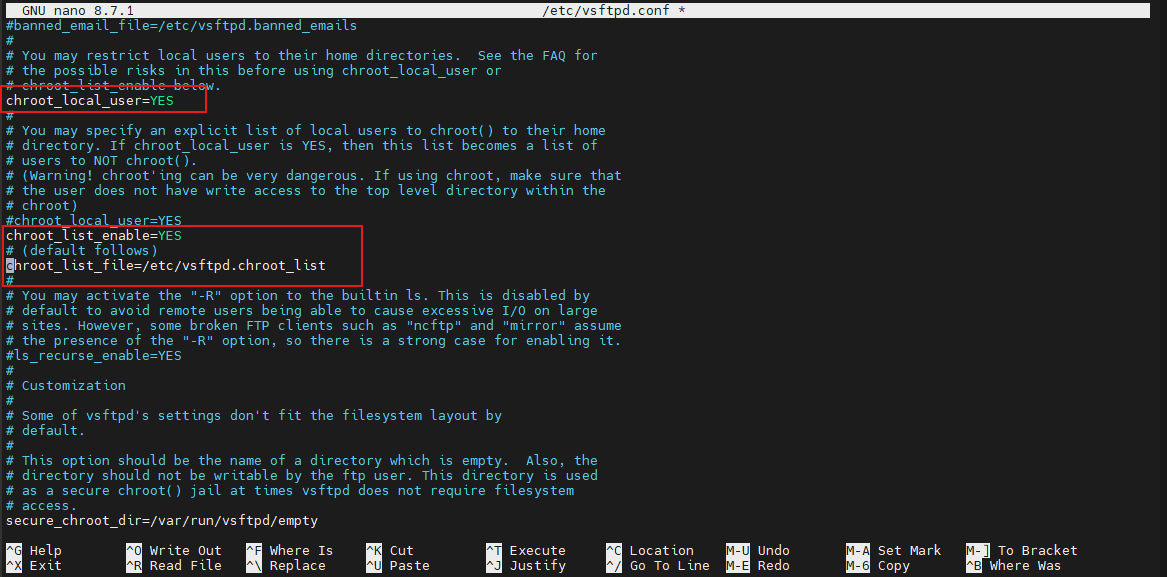
Save the configuration and create the user list:
sudo nano /etc/vsftpd.chroot_listAdd one username per line and save the file.
Step 10: Block FTP Access for Specific Users (Optional)
Open the FTP user restriction file:
sudo nano /etc/ftpusersAdd usernames that should not be allowed to connect through FTP. System accounts such as root, daemon, and sys are typically already restricted.

Step 11: Restart VSFTPD
Apply your changes:
sudo systemctl restart vsftpd.service
Local users can now connect to the FTP server using their Ubuntu credentials.
Configure Anonymous FTP Access (Optional)
Anonymous FTP allows anyone to download files without creating a user account.
Warning: Anonymous access should only be enabled when public file access is required.
Step 12: Edit the Configuration File
Create a backup if needed:
sudo cp /etc/vsftpd.conf /etc/vsftpd.conf_backupOpen the file:
sudo nano /etc/vsftpd.confStep 13: Enable Anonymous Access
Find:
anonymous_enable=NOChange it to:
anonymous_enable=YES
If you want only anonymous users to connect, disable local logins:
local_enable=NOOptional: Allow Anonymous Uploads
Uncomment:
anon_upload_enable=YES
write_enable=YES
Warning: Allowing anonymous uploads can introduce security risks.
Step 14: Change the Anonymous FTP Directory (Optional)
VSFTPD creates an FTP user whose default home directory is: /srv/ftp
Create a new directory:
mkdir -p /directory/nameExample:
mkdir -p /srv/ftp/myCompany/filesAssign the directory to the FTP user:
sudo usermod -d /srv/ftp/myCompany/files ftp
Step 15: Restart VSFTPD
After saving your changes, restart the service:
sudo systemctl restart vsftpd
Step 16: Add Downloadable Files
Place any files you want anonymous users to access inside the FTP user’s home directory. These files will then be available for public download through FTP.
Since standard FTP is unencrypted, enabling FTPS helps protect user credentials and transferred data.
Step 17: Create a Self-Signed SSL Certificate
Generate a certificate and private key:
openssl req -x509 -nodes -days 365 -newkey rsa:2048 \
-keyout /etc/ssl/private/vsftpd.key \
-out /etc/ssl/certs/vsftpd.crt
During certificate creation, provide the requested information, including:
- Country Name
- State or Province
- Locality (City)
- Common Name (hostname or organization name)
Generated files:
- /etc/ssl/certs/vsftpd.crt
- /etc/ssl/private/vsftpd.key
Step 18: Enable SSL/TLS in VSFTPD
Open the configuration file:
sudo nano /etc/vsftpd.confLocate:
ssl_enable=NOChange it to:
ssl_enable=YES
If anonymous FTP is enabled, add:
allow_anon_ssl=YESMake SSL mandatory:
force_local_data_ssl=YES
force_local_logins_ssl=YES
require_ssl_reuse=NO
ssl_ciphers=HIGH
To allow only TLS connections:
ssl_tlsv1=YES
ssl_sslv2=NO
ssl_sslv3=NO
Step 19: Specify the Certificate Paths
Set the certificate file paths:
rsa_cert_file=/etc/ssl/certs/vsftpd.crt
rsa_private_key_file=/etc/ssl/private/vsftpd.key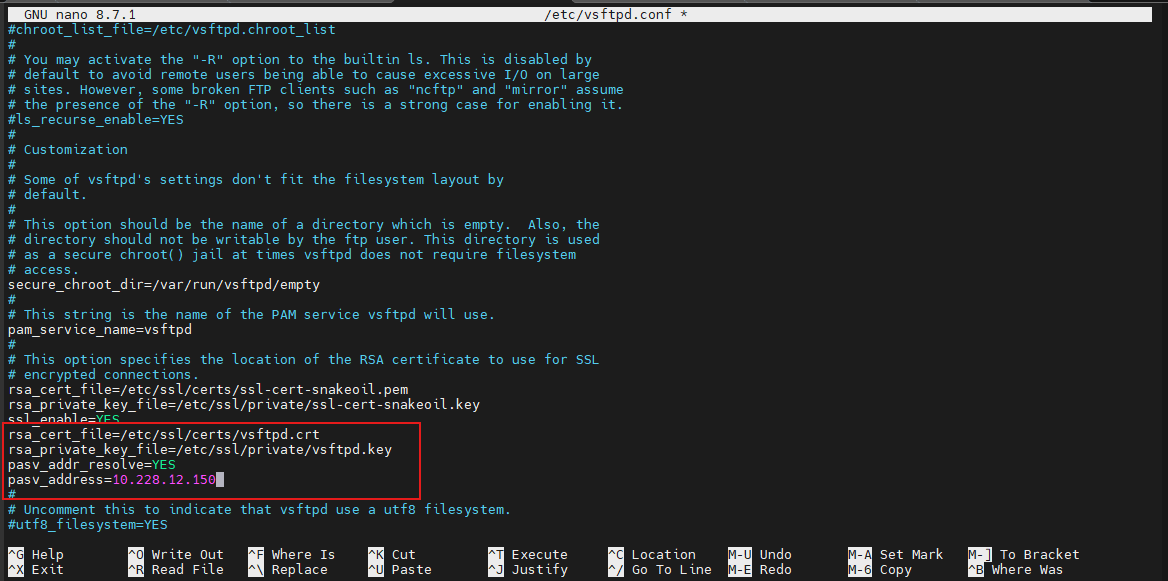
Step 20: Configure NAT Settings (If Required)
If your FTP server is behind a NAT router, add:
pasv_address=externalIPaddressReplace externalIPaddress with your public IP address.
If using a domain name:
pasv_addr_resolve=YES
pasv_address=your.domain.name
You can also change the listening port if needed:
listen_port=portnumberStep 21: Restart VSFTPD
Apply the SSL/TLS changes:
sudo systemctl restart vsftpd.service
Note: FTPS and SFTP are different protocols. Users must use an FTPS-compatible client when SSL/TLS is enabled.
Step 22: Find Your Server Address
For internet-accessible servers, find the public IP address:
dig TXT +short o-o.myaddr.l.google.com @ns1.google.com
For local network access:
ip addrUsers may also connect using a domain name that points to the server.
Step 23: Allow FTP Through UFW Firewall
Check current firewall rules:
sudo ufw status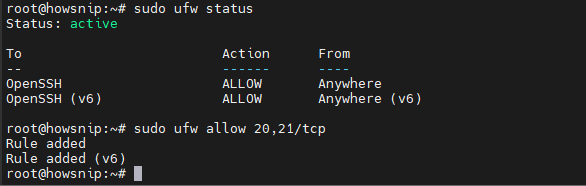
Allow FTP traffic on ports 20 and 21:
sudo ufw allow 20,21/tcpStep 24: Configure Router Port Forwarding
If the server is behind a home or office router, forward:
TCP Port 20
TCP Port 21
The process varies by router model, so consult your router’s documentation for exact instructions.
Connect to the FTP Server
1) Using FileZilla
Enter:
- Server hostname or IP address
- Username
- Password
For anonymous access:
- Username: anonymous
- Password: Your email address
For FTPS connections:
- Transfer Mode: Passive
- Encryption: Require explicit FTP over TLS
2) Using the Command Line
Connect as a regular user:
ftp username@hostnameOr:
ftp username@IP-address
For anonymous access:
- ftp anonymous@hostname
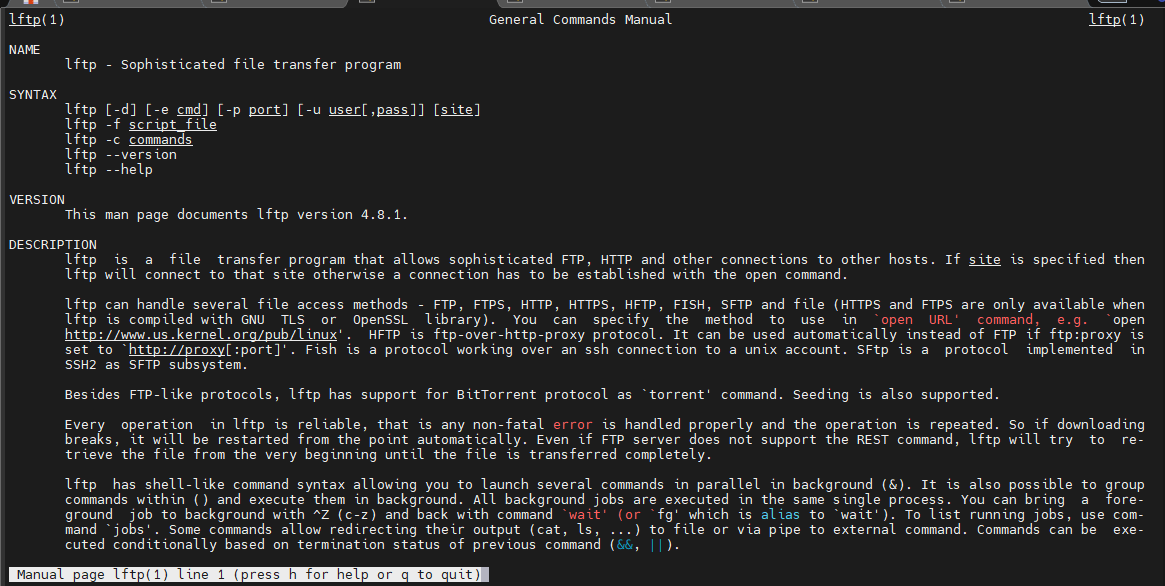
If FTPS is required, install lftp:
- sudo apt install lftp
View the manual:
- man lftp
Upload and Download Files
Once connected, these commands are commonly used:
Change Directories
Remote directory:
cd <directory>Local directory:
lcd <directory>List Files
Remote system:
lsLocal system:
!lsDownload a File
get <filename>Upload a File
put <filename>Conclusion
You have successfully installed and configured a VSFTPD FTP server on Ubuntu. The setup can support authenticated users, anonymous file downloads, and secure FTPS connections using SSL/TLS.
After configuring firewall rules and network access, users can connect with clients such as FileZilla or command-line FTP tools to transfer files efficiently.