

Managing sudo access is a common Linux administration task. Whether you’re granting administrative privileges to a new user or creating custom permission rules, it’s important to do it safely to avoid locking yourself out of administrative functions.
This tutorial explains several ways to grant sudo privileges on Linux, including adding users to the sudo group, creating custom sudoers rules, validating configurations, and removing sudo access when it’s no longer needed.
Prerequisite: Use an account that already has sudo privileges or access to a root shell. Keep an existing privileged terminal session open while testing changes. This provides a recovery option if a sudo configuration mistake prevents administrative access.
Understanding Sudo Access
Users can only execute privileged commands through sudo if they have a matching sudo policy rule. Without a valid rule, sudo commands will be denied. In most Linux distributions, administrative access is typically granted by adding a user to the system’s sudo group.
Method 1: Add a User to the Sudo Group
This is the simplest and most common approach when a user needs the same administrative permissions as existing sudo users.
Run the following command:
sudo usermod --append --groups sudo username
or
sudo usermod -a -G sudo username
Replace username with the actual account name.
The –append option ensures that existing supplementary group memberships are preserved while adding the user to the sudo group.
Verify the Change
After updating group membership, start a new login session and run:
id usernameYou can also check members of the sudo group:
getent group sudo
The first command displays the user’s group memberships, while the second lists users currently assigned to the sudo group.
Method 2: Use adduser for an Interactive Experience
On Debian-based distributions, you can use the adduser utility as a more user-friendly alternative.
Run:
sudo adduser test sudo
This interactive tool handles the group assignment without requiring the full set of usermod options.
Test the New Access
After logging out and back in, verify sudo functionality with a simple command such as:
sudo -lThis confirms that the account can use sudo and shows the available privileges.
Note: This method modifies group membership only. It does not directly edit the sudoers configuration.
Method 3: Edit the Sudoers File Safely with visudo
Sometimes a user requires permissions that differ from the default sudo group policy. In that case, create a direct sudoers rule.
Always edit sudo policy files using visudo.
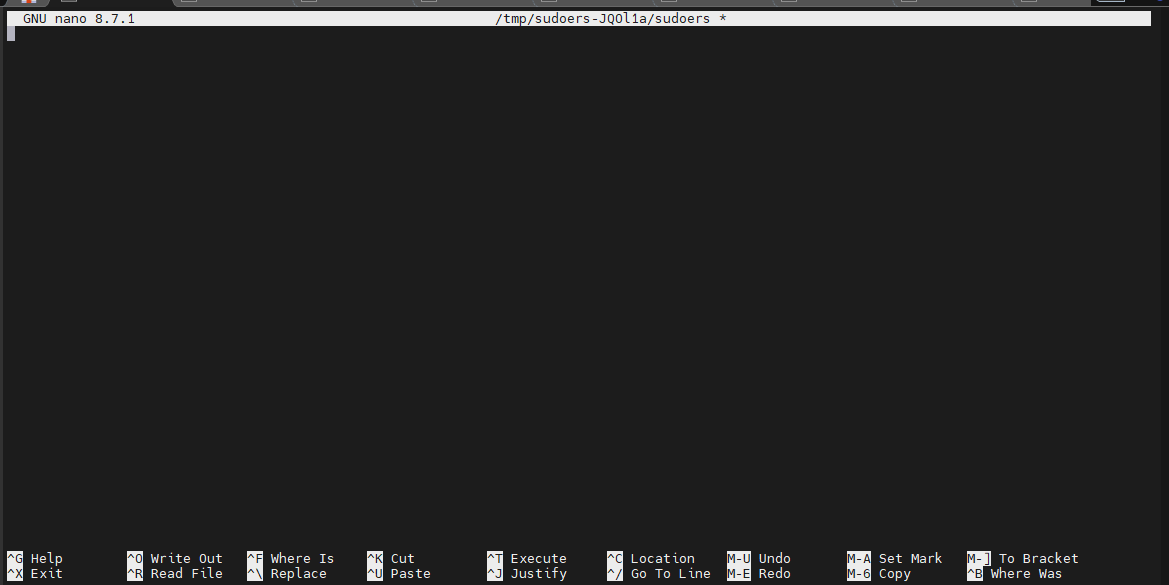
sudo visudoThe visudo utility locks the file during editing and performs syntax validation before saving, helping prevent configuration errors.
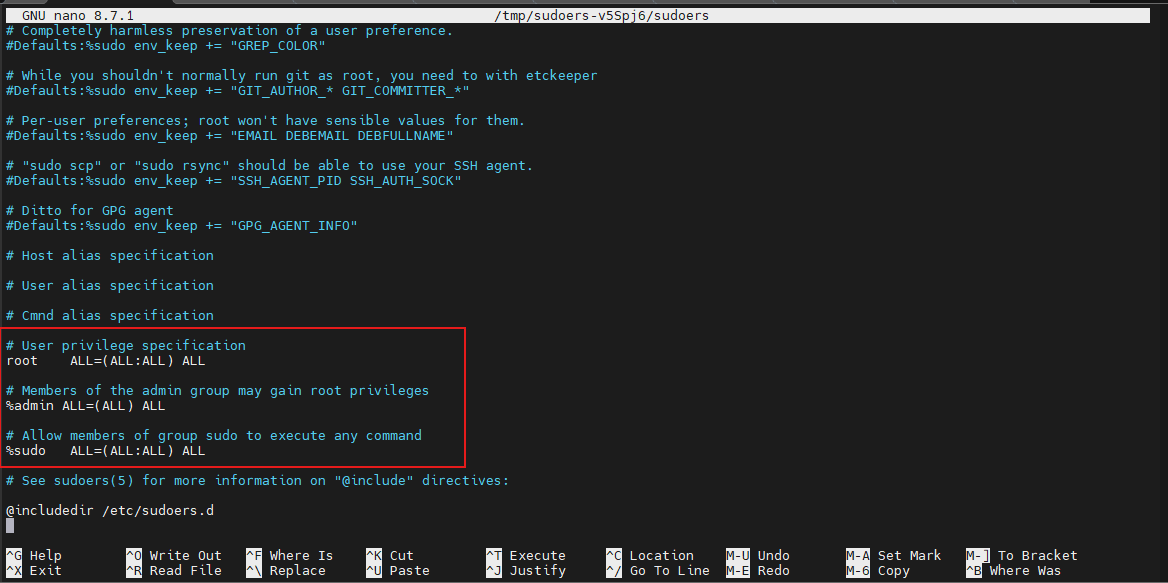
Add a User-Specific Rule
A typical full-access sudo rule looks like this:
username ALL=(ALL:ALL) ALLReplace username with the target account.
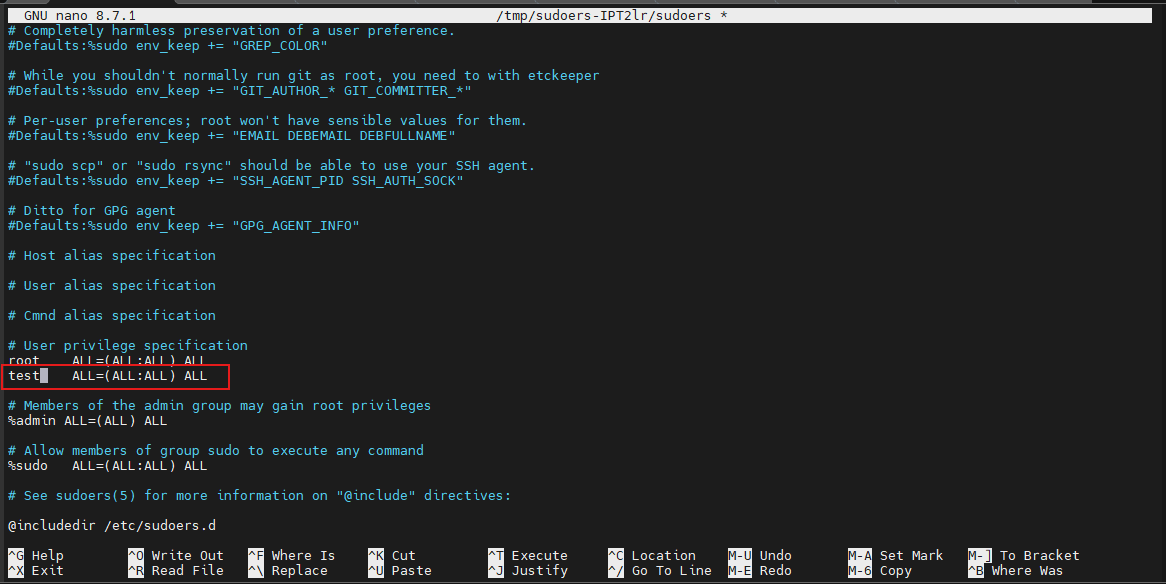
What This Rule Means
- The first ALL applies the rule to all hosts.
- (ALL:ALL) allows commands to run as any user and group.
- The final ALL permits execution of all commands.
This grants broad administrative authority and should only be used when full access is required.
Important: If a user only needs access to specific commands, consider creating a more restrictive rule instead of granting full privileges.
Method 4: Create a Separate Rule in sudoers.d
For better organization, store custom sudo policies in separate files under /etc/sudoers.d. This makes rules easier to review, maintain, and remove without modifying the main sudoers file.
Create a new rule file with:
sudo visudo --file=/etc/sudoers.d/usernameAdd the required policy line and save the file.
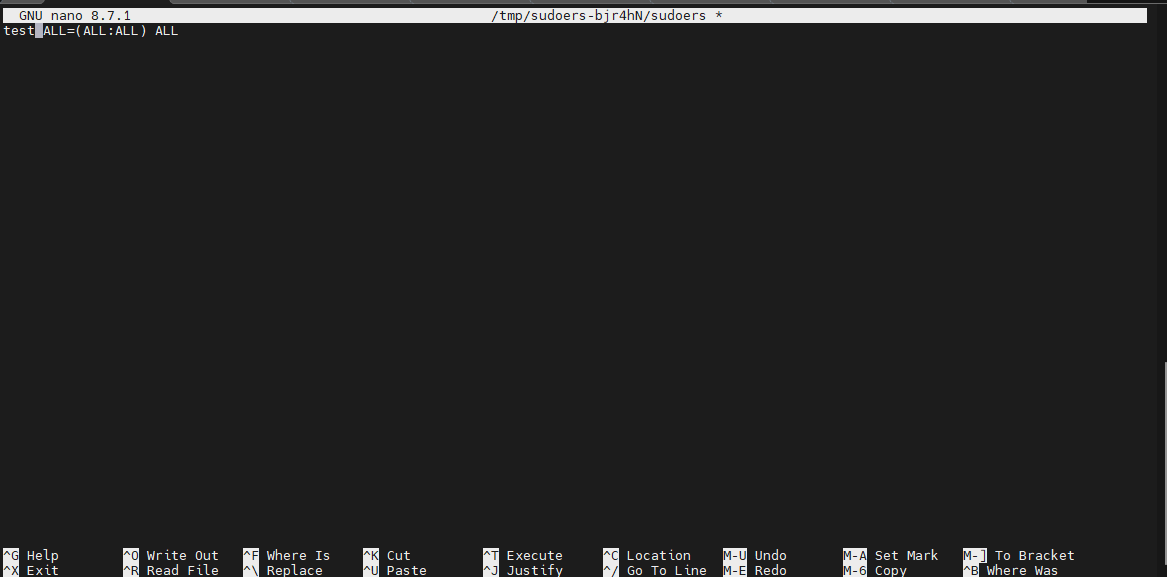
Filename Requirements
Use only:
- Letters
- Numbers
- Underscores (_)
- Hyphens (-)
Avoid filenames containing dots (.) or ending with a tilde (~), as sudo may ignore them.
Create a Group-Based Rule
To apply a rule to an entire Unix group, prefix the group name with %.
Example:
%admins ALL=(ALL:ALL) ALLThis grants full sudo privileges to every member of the admins group.

Validate the Configuration Before Testing
Before relying on a new sudoers file, check it for syntax errors.
Run:
sudo visudo --check --file=/etc/sudoers.d/usernameValidation helps identify configuration issues without modifying the active sudo policy.

Review Effective Permissions
To see the privileges assigned to a specific user:
sudo -l -U username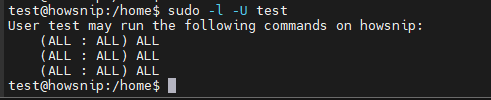
The -U option displays sudo permissions for another account, making it useful when testing from an administrator session.
Tip: Always validate and review permissions before asking users to rely on the new configuration.
Troubleshooting Sudo Access Issues
If the user receives permission errors after the change:
Confirm the account is in the correct group:
id usernameLog out and start a new session.
Verify that any file inside /etc/sudoers.d has a valid filename.
Check the configuration syntax with:
sudo visudo --check --file=/etc/sudoers.d/usernameMost sudo access problems are caused by stale login sessions, incorrect group membership, or configuration syntax errors.
Remove Sudo Access
When administrative access is no longer required, remove it promptly.
Remove a User from the Sudo Group
If sudo access was granted through group membership, run:
sudo gpasswd --delete username sudo
This removes the user from the sudo group while leaving other group memberships unchanged.
Remove Direct Sudoers Rules
If access was granted through a custom sudoers configuration, edit or remove the rule.
For a dedicated sudoers.d file:
sudo visudo --file=/etc/sudoers.d/usernameRemove the rule or delete the file after confirming that no other required permissions depend on it.
Conclusion
Adding a user to the sudoers configuration can be as simple as assigning the account to the sudo group, or as flexible as creating custom rules in the sudoers policy. For most environments, using the sudo group is the quickest and safest option.
When specialized permissions are needed, use visudo and /etc/sudoers.d files to maintain a secure and manageable configuration. Always validate changes before testing and keep a privileged session open until you’re sure the new permissions work correctly.