
Kali Linux is one of the most widely used operating systems for cybersecurity training, penetration testing, digital forensics, and security operations.
This Kali Linux cheat sheet covers important commands for file management, navigation, networking, security analysis, and system administration, along with practical examples you can safely practice in your own lab environment.
- pwd – Display Your Current Directory
- ls – View Directory Contents
- cd – Navigate Between Directories
- mkdir – Create New Directories
- mv – Move or Rename Files
- cp – Copy Files
- rm – Delete Files and Directories
- cat – Display File Contents
- less – Browse Large Files
- more – Basic File Viewer
- grep – Search Within Files
- find – Locate Files
- chmod – Modify File Permissions
- man – Access Command Documentation
- ping – Test Connectivity
- traceroute – Track Network Paths
- netstat – View Connections and Ports
- nmap – Network Scanner
- ifconfig – View Network Interfaces
- tcpdump – Capture Network Traffic
- Wireshark – Graphical Packet Analysis
- arp – View ARP Cache
- SSH – Secure Remote Access
- Wireless Security Basics
- iptables – Linux Firewall
- Nessus – Vulnerability Assessment
- df – Check Disk Usage
- free – Check Memory Usage
- top – Monitor Processes
- ps – View Running Processes
- uname – Display System Information
- uptime – System Runtime Information
- systemctl – Manage Services
- chown – Change File Ownership
- crontab – Schedule Tasks
- useradd – Create Users
- userdel – Delete Users
- groupadd – Create Groups
- groupdel – Delete Groups
1. pwd
Use the pwd command to see your current location in the Linux filesystem.
pwd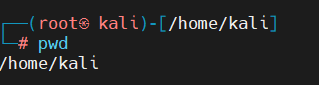
The pwd command displays the complete path of the directory you are currently working in. It helps you confirm your exact location before creating, modifying, or accessing files.
/home/kali
This shows that the current working directory is /home/kali.
2. ls
The ls command is used to view files and directories in your current location.
ls
The basic ls command displays the names of files and directories in the current working directory. It is one of the most frequently used commands when navigating a Linux system.
Show detailed information
ls -l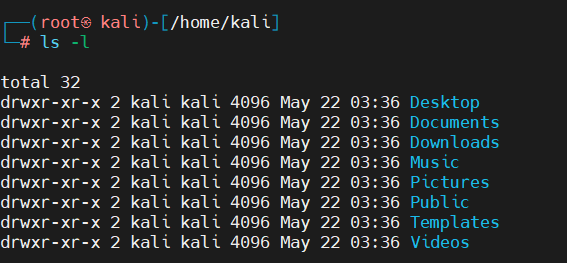
The -l option displays a detailed listing containing file permissions, ownership, file size, modification time, and filename. This format is useful when checking file permissions and ownership.
Include hidden files and directories
ls -la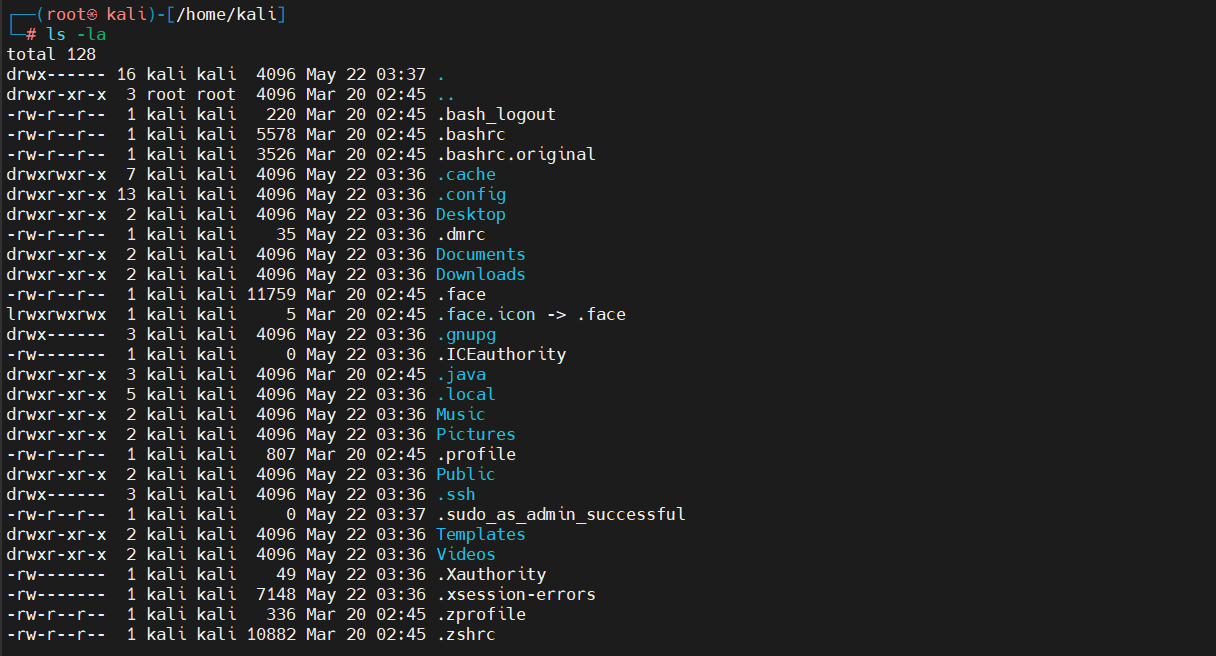
The -a option includes hidden files and directories in the listing, while -l provides detailed information. Linux hidden files generally begin with a period (.), such as .bashrc.
3. cd
The cd command is used to move between directories in the Linux filesystem.
Move to your home directory
cd ~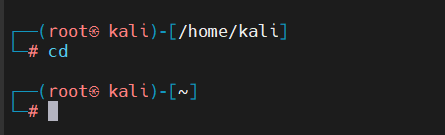
The ~ symbol represents the current user’s home directory. Using cd ~ provides a quick way to return to your home directory from another location.
Verify your location
pwd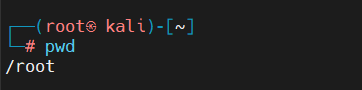
The pwd command confirms your current directory after navigating to another location. It is useful for making sure you are working in the intended directory.
Enter the Downloads folder
cd Downloads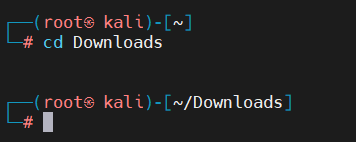
This command changes the current directory to the `Downloads` folder. The folder must exist in the current location for the command to work.
Move back one directory
cd ..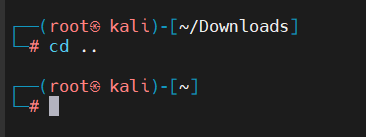
The .. symbol represents the parent directory. Using cd .. moves you one level upward in the directory structure.
4. mkdir
The mkdir command is used to create new directories.
Create a practice folder
mkdir howsnip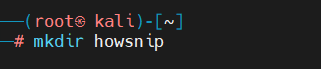
This command creates a new directory named howsnip in the current location. Directories can be used to organize files, scripts, tools, and cybersecurity lab material.
Check that it was created
ls
The ls command displays the contents of the current directory, allowing you to confirm that the new howsnip directory was successfully created.
Enter the directory
cd howsnip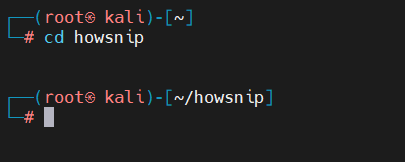
This command moves your terminal session into the newly created `howsnip` directory. You can now create or manage files inside this directory.
Verify the location
pwd
Running pwd confirms that you are currently inside the howsnip directory. This is useful before performing further file operations.
5. mv
The mv command is used to move files and directories or rename them.
Create a file
touch howsnip1.txt
The touch command creates an empty file named howsnip1.txt if it does not already exist. It can also update the modification timestamp of an existing file.
Rename it
mv howsnip1.txt howsnip2.txt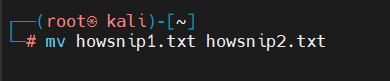
Here, mv is being used to rename howsnip1.txt to howsnip2.txt. Linux does not require a separate rename command because mv performs this operation.
Move the file into another directory
mv howsnip2.txt howsnip/
This command moves howsnip2.txt into the howsnip directory. The same mv command can therefore be used for both moving and renaming files.
Validate the move
ls howsnip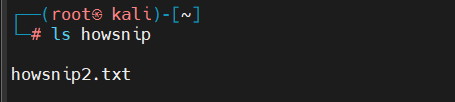
This command lists the contents of the `howsnip` directory so you can confirm that the file was moved successfully.
6. cp
The cp command is used to create copies of files and directories.
Create a sample file
echo "This is my Linux practice file" > original.txt
The echo command outputs the specified text, while the > operator redirects that output into original.txt. If the file already exists, its existing contents will be overwritten.
Copy it
cp original.txt copy.txt
The cp command creates a separate copy named copy.txt while leaving original.txt unchanged. It is commonly useful for creating backups or working copies of files.
Confirm both files exist
ls
The ls command displays the files in the current directory, allowing you to verify that both original.txt and copy.txt exist.
7. rm
The rm command is used to remove files and directories.
Delete a file
rm copy.txt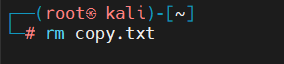
This command removes copy.txt from the filesystem. Linux normally does not move deleted files to a recycle bin, so always verify the filename before running rm.
Remove a directory and its contents
rm -r howsnip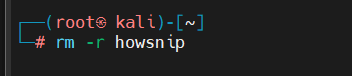
The -r option means recursive and allows rm to remove a directory along with its contents. Use this option carefully because files inside the directory can also be deleted.
Important Warning
The rm command can permanently remove files in most Linux environments. Always confirm the target before deleting files or directories, especially when working with administrator privileges.
8. cat
The cat command is commonly used to display the contents of text files.
View a file
cat original.txt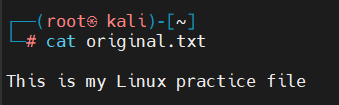
This command displays the complete contents of original.txt directly in the terminal. It is useful for quickly inspecting small text files, scripts, configuration files, and logs.
Append new text
echo "Learning Linux commands" >> original.txt
The >> operator appends the specified text to the end of the file without removing existing content. This differs from >, which replaces the existing contents.
Display the updated file
cat original.txt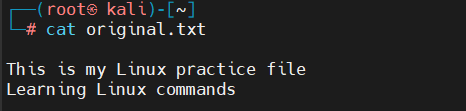
Running cat again displays the updated file so you can verify that the new text was successfully added.
9. less
The less command allows you to view files interactively, making it particularly useful for large files and logs.
Create a larger file
seq 1 100 > numbers.txt
The seq command generates a sequence of numbers from 1 to 100. The > operator saves those numbers into a file named numbers.txt.
Open it
less numbers.txt
The less command opens the file in an interactive viewer instead of printing the entire file at once. It is useful when working with large log files that contain many lines.
10. more
The more command displays the contents of a file one screen at a time.
more numbers.txt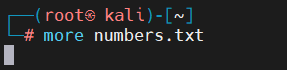
This command is useful for viewing text files without displaying the entire file at once. It provides basic navigation and is suitable for simple file-viewing tasks.
11. grep
The grep command searches files for lines matching a specified text pattern.
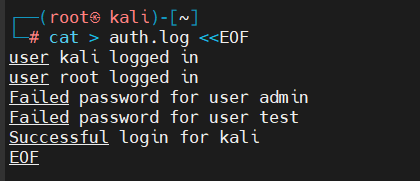
Search for “Failed”
grep "Failed" auth.log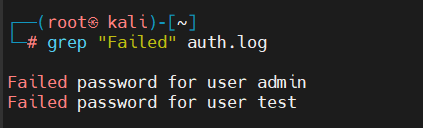
This command searches auth.log for lines containing the exact text Failed. By default, the search is case-sensitive.
Case-insensitive search
grep -i "failed" auth.log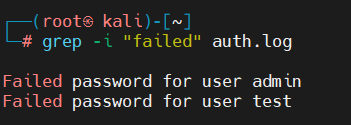
The -i option makes the search case-insensitive, so it can match failed, Failed, FAILED, and other capitalization variations.
Count matching results
grep -c "Failed" auth.log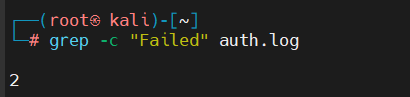
The -c option counts the number of lines that match the specified pattern. This provides a quick way to determine how many matching entries are present in the file.
12. find
The find command searches for files and directories based on conditions such as name, type, size, or modification time.
Search for text files
find . -name "*.txt"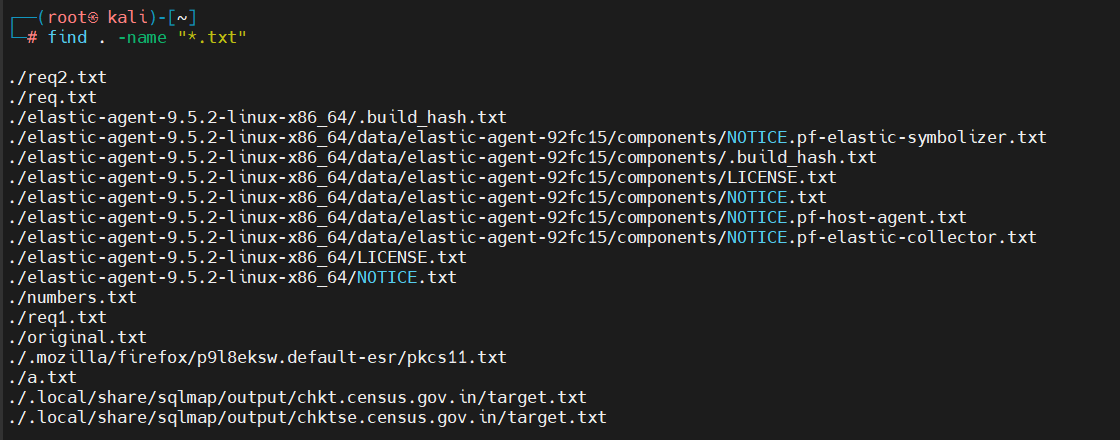
The . tells find to start searching from the current directory, while -name searches for filenames matching the specified pattern. The *.txt pattern matches files ending with .txt.
Search for log files
find /home/kali -name "*.log"
This command searches the /home/kali directory and its subdirectories for files ending in .log. It can be useful when locating log files during troubleshooting or investigation.
Find a specific file
find . -name "original.txt"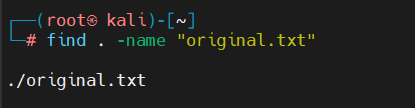
This searches from the current directory for a file named exactly original.txt. It is useful when you know the filename but are unsure where it is located.
13. chmod
The chmod command changes the permissions assigned to files and directories.
Create a script
echo '#!/bin/bash' > test.sh
echo 'echo "Hello Kali"' >> test.sh
These commands create a simple Bash script and add a command that displays `Hello Kali`. The `>>` operator adds the second line without overwriting the first line.
View permissions
ls -l test.sh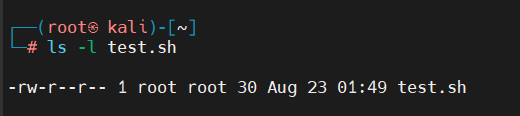
The -l option displays the file’s permission information along with ownership and other details. This allows you to see whether the script currently has execute permission.
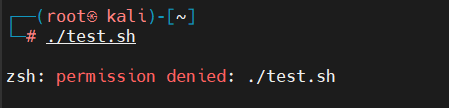
Make it executable
chmod +x test.sh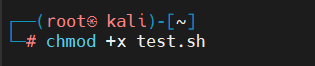
The +x option adds execute permission to the file. After this change, the script can be executed directly using ./test.sh.
Run it
./test.sh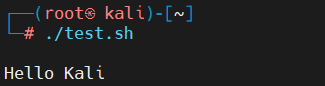
The ./ tells Linux to execute test.sh from the current directory. The command runs the script using the permissions assigned to the file.
14. man
The man command displays the manual page for a Linux command.
View help for ls
man ls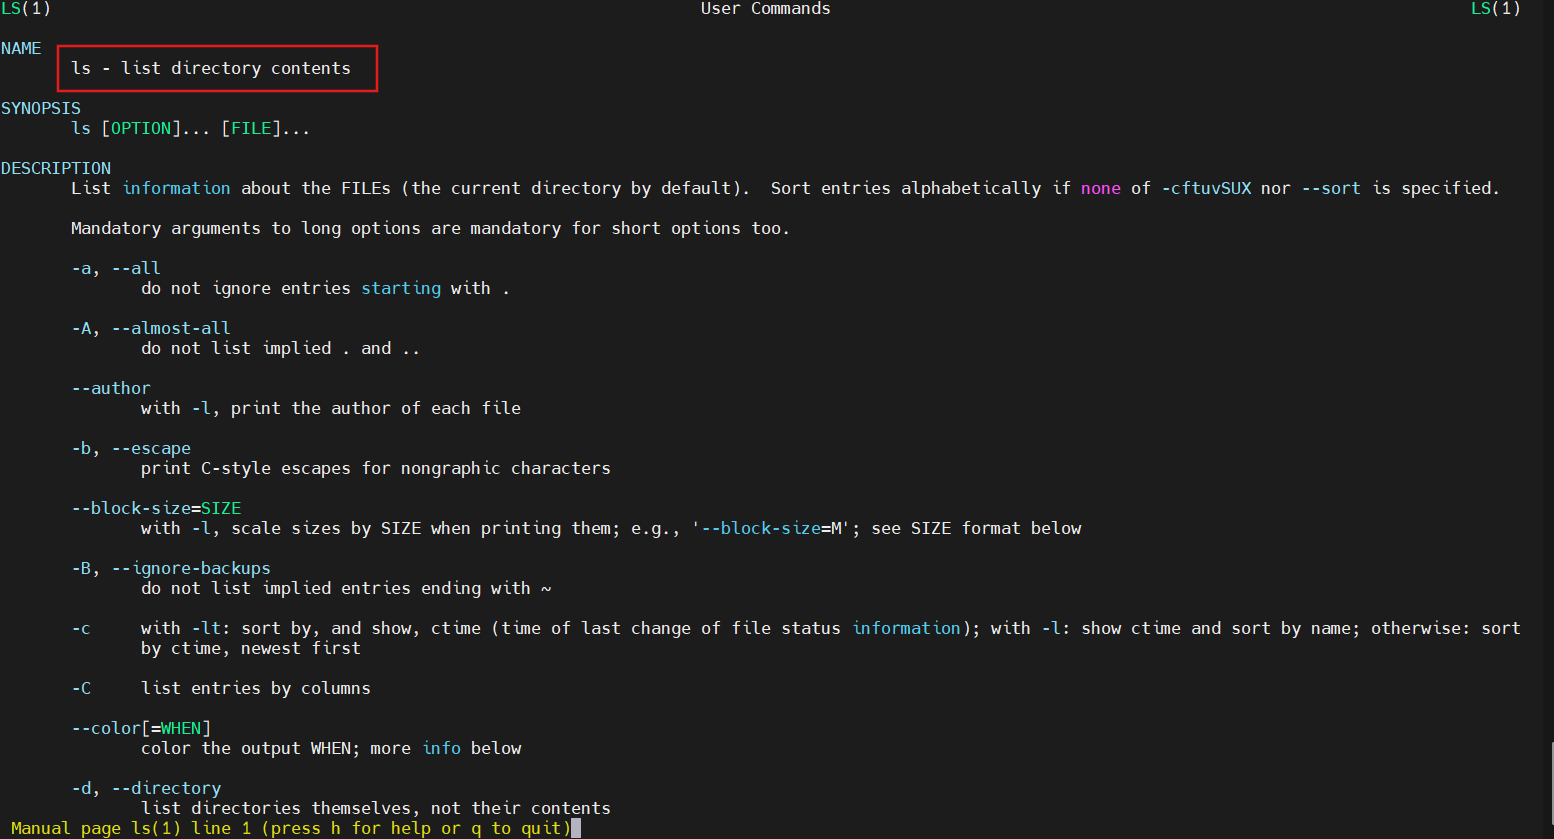
This opens the manual page for the ls command, including its available options, syntax, and descriptions. The manual is one of the most reliable sources for understanding a command.
Additional examples
man grep
man chmod
man find
These commands open the respective manual pages for grep, chmod, and find. You can use `man` with many built-in Linux commands and utilities.
The manual pages can be navigated directly from the terminal. Press / followed by a word to search for specific information and q to exit.
15. ping
The ping command is used to test network connectivity between your system and another host.
Check internet access
ping google.com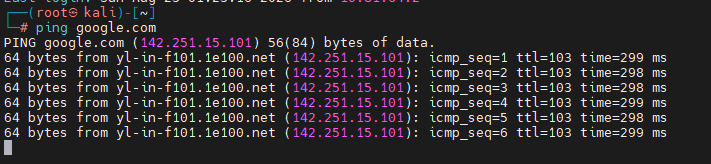
This sends ICMP Echo Requests to the specified hostname and displays the responses. It can help determine whether the destination is reachable and provide basic latency information.
Ping a specific IP
ping 8.8.8.8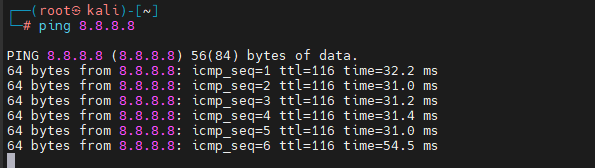
This sends ICMP requests directly to the specified IP address instead of using a hostname. It can help determine whether connectivity exists without relying on DNS name resolution.
Send only four packets
ping -c 4 google.com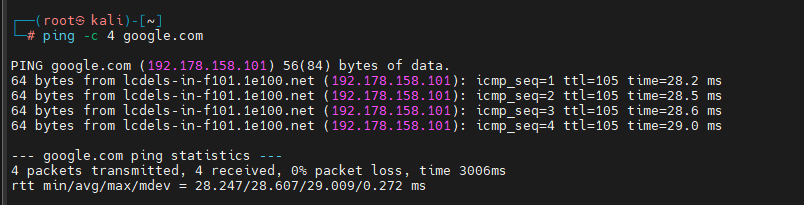
The -c option specifies the number of packets to send, with 4 meaning four packets in this example. After sending the specified packets, the command exits automatically.
Note: A failed ping does not always mean that a host is offline because firewalls may block ICMP traffic.
16. traceroute
The traceroute command shows the network hops between your system and a destination.
View the route
traceroute google.com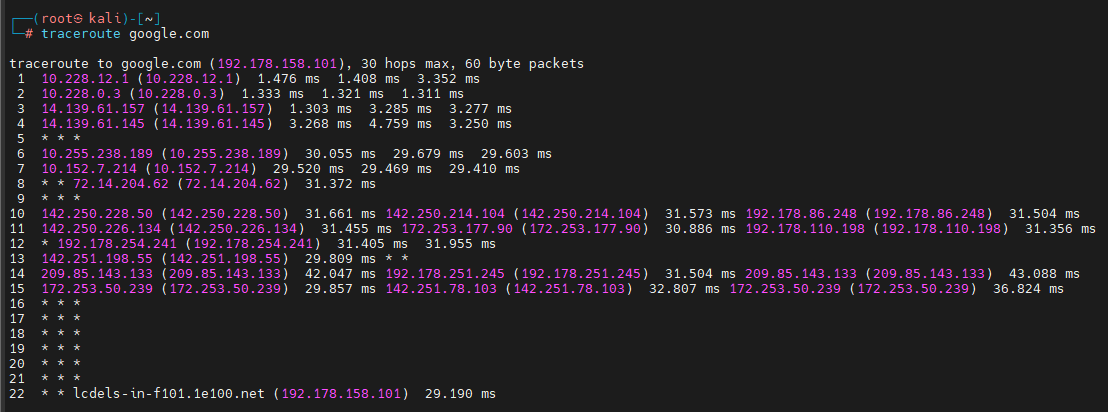
This command attempts to display the intermediate network hops between your computer and the destination. It can help identify routing paths and locate potential points of network delay.
Disable DNS lookups
traceroute -n google.com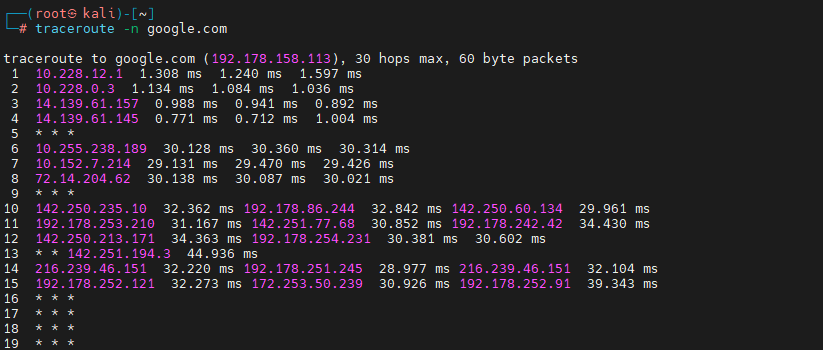
The -n option prevents traceroute from performing DNS lookups for the discovered IP addresses. This can make the output faster and display the hop addresses directly.
17. netstat
The netstat command displays information about network connections, listening ports, and network statistics.
Display active connections
netstat -an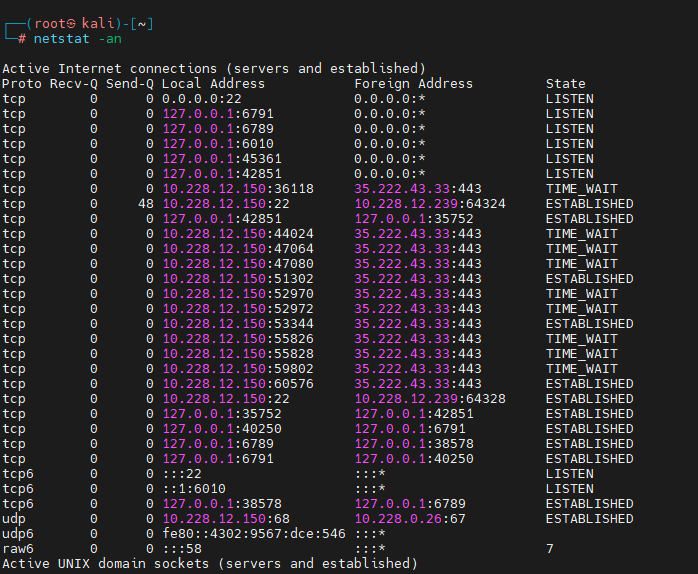
The -a option displays active connections and listening sockets, while -n displays numerical IP addresses and port numbers instead of resolving names. This provides a quick overview of network activity.
List listening services
netstat -tuln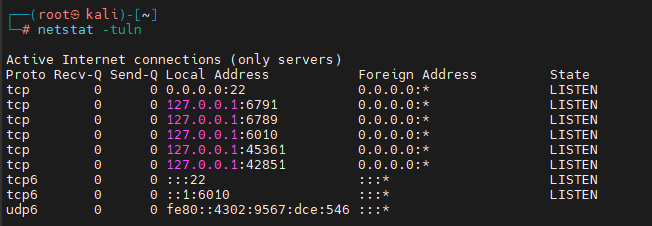
The -t option shows TCP connections, -u shows UDP connections, -l displays listening sockets, and -n keeps addresses in numerical form. Together, these options help identify services waiting for network connections.
Example:
Proto    Local Address    Foreign Address     State
tcp      0.0.0.0:22       0.0.0.0:*           LISTEN
This indicates that a TCP service is listening on port 22 on all available IPv4 interfaces. Port 22 is commonly associated with SSH.
18. nmap
Nmap is a widely used network discovery and security auditing tool that can identify hosts, open ports, and services.
Verify installation
nmap --version
The –version option displays the installed Nmap version and confirms that the tool is available on the system.
Scan localhost
nmap localhost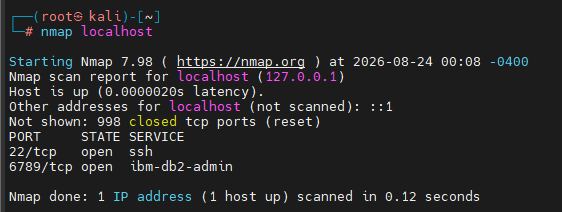
This scans the local Kali system for commonly scanned TCP ports. It is a safe way to practice basic Nmap functionality on your own machine.
Scan an authorized host
nmap 10.228.12.150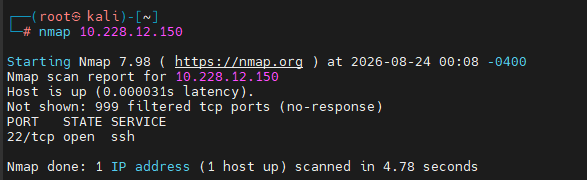
This performs a basic scan against the specified IP address. Only scan systems that you own or have explicit authorization to assess.
Service detection
nmap -sV localhost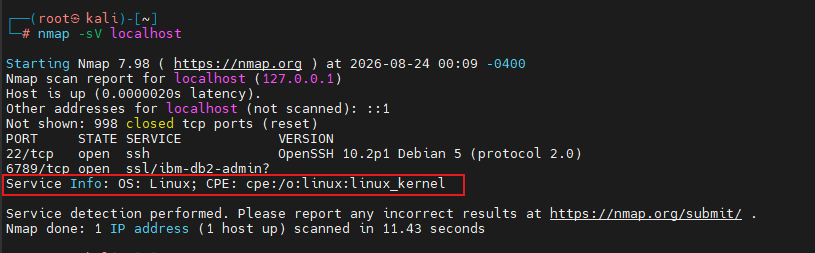
The -sV option enables service and version detection. Nmap attempts to determine which services are running on discovered ports and identify their versions.
Scan specific ports
nmap -p 22,80,443 localhost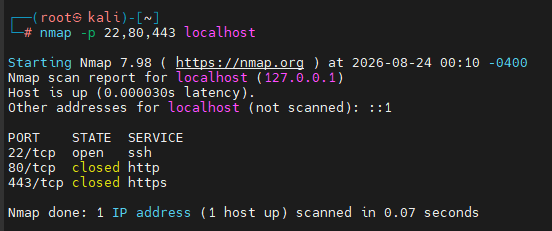
The -p option specifies which ports should be scanned instead of scanning the default port set. This example checks ports 22, 80, and 443.
19. ifconfig
The ifconfig command displays information about configured network interfaces.
ifconfig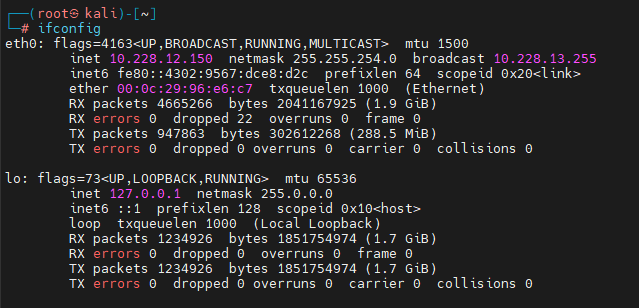
The command can display interface names, IP addresses, MAC addresses, network masks, and packet statistics. It is useful for quickly checking network configuration.
eth0 may represent a wired or virtual Ethernet interface, and lo represents the local loopback interface. Actual interface names can vary depending on the system.
20. tcpdump
tcpdump is a command-line packet capture tool used to inspect network traffic.
List interfaces
sudo tcpdump -D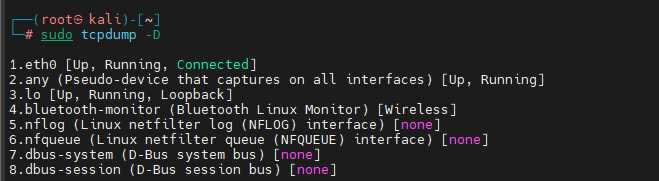
The -D option lists the network interfaces available for packet capture. This helps you identify the correct interface before starting a capture.
Capture packets
sudo tcpdump -i eth0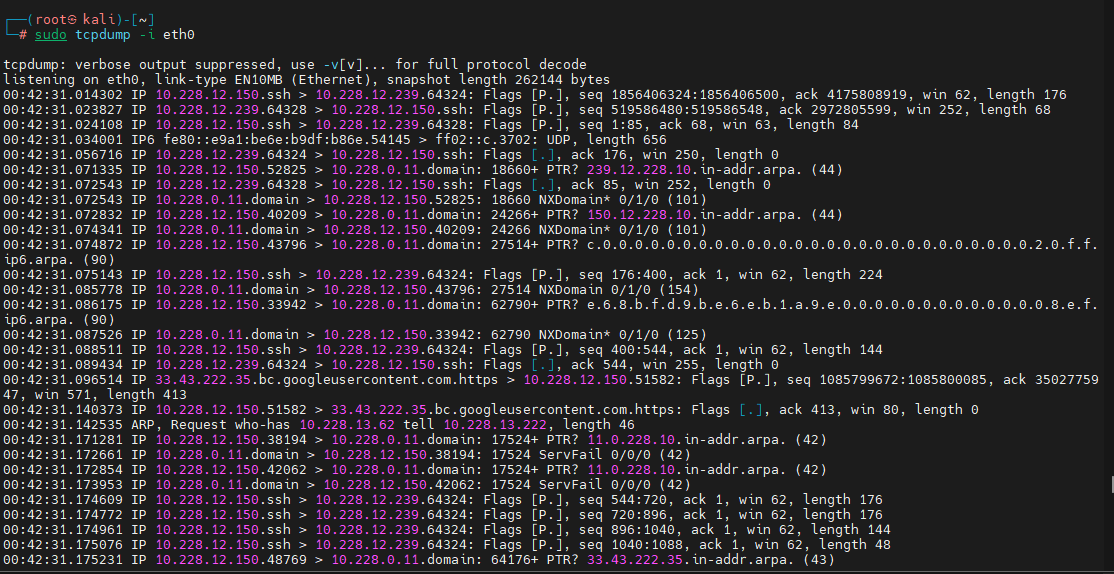
The -i option specifies the interface on which packets should be captured. Here, eth0 is selected as the capture interface.
Generate traffic in another terminal
ping -c 4 google.com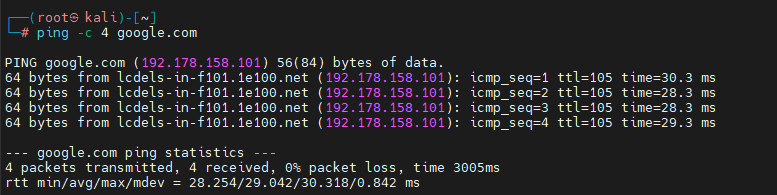
This generates a small amount of ICMP traffic that can be observed in the tcpdump capture. It is useful for demonstrating packet capture in a controlled lab.
Stop the capture
Ctrl + CPressing Ctrl + C stops the running tcpdump process and returns control to the terminal.
21. Wireshark
Wireshark is a graphical network protocol analyzer used to capture and inspect network traffic.
Verify installation
wireshark --versionThe –version option displays the installed Wireshark version. It can be used to verify that Wireshark is installed and available from the terminal.
Launch Wireshark
wireshark
This starts the Wireshark graphical interface, where you can select a network interface and capture packets. It provides detailed information about network protocols and individual packets.
Display filter
icmp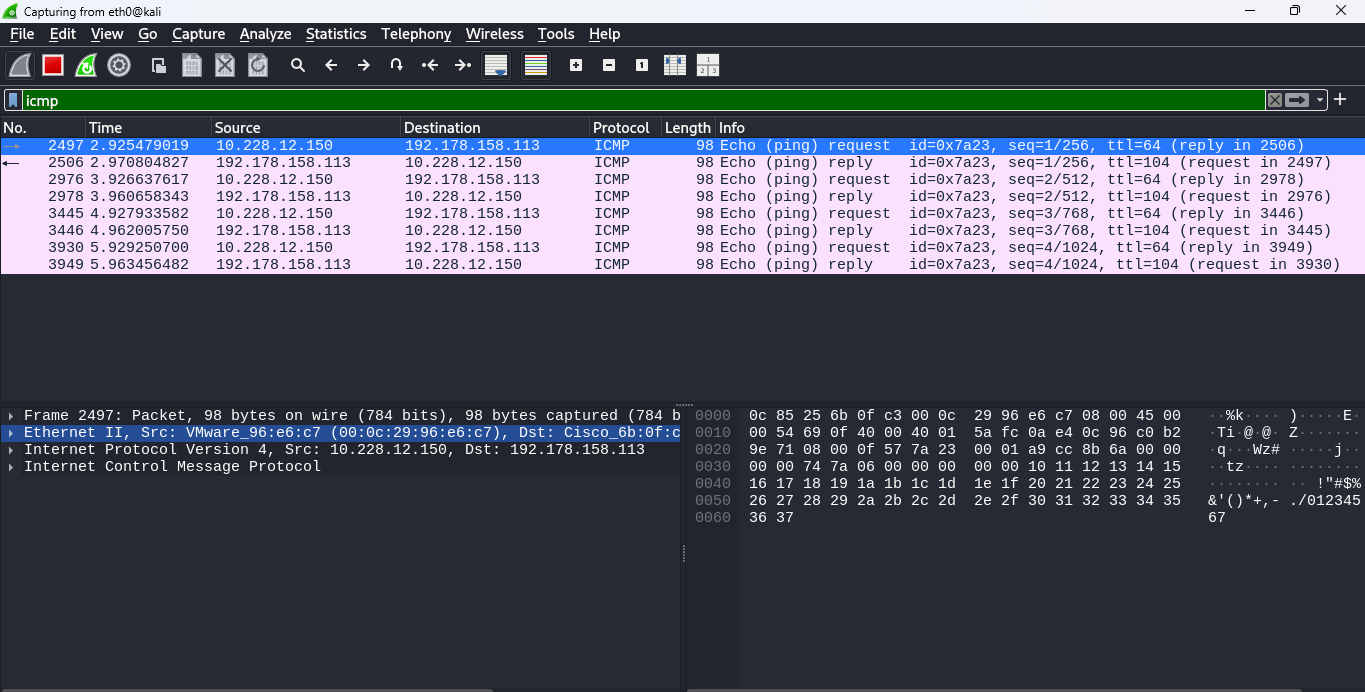
The icmp display filter limits the packets shown in Wireshark to ICMP traffic. This is useful when analyzing traffic generated by tools such as ping.
22. arp
ARP, or Address Resolution Protocol, is used to map IPv4 addresses to MAC addresses on a local network.
Display the ARP table
arp -a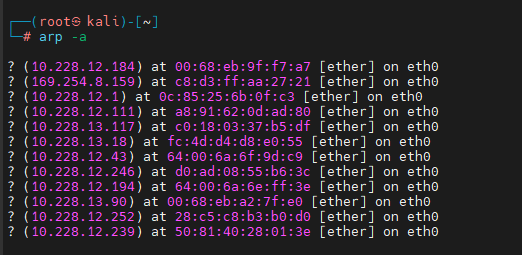
The -a option displays the ARP cache entries known to the system. These entries can show local IP addresses and their associated hardware addresses.
Modern alternative
ip neigh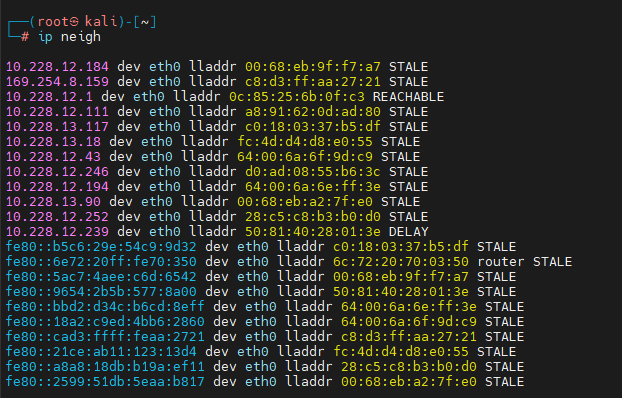
The ip neigh command provides modern Linux functionality for viewing neighbor information, including IP-to-MAC mappings. It is generally preferred over the older arp utility on modern systems.
23. SSH – Secure Remote Access
SSH, or Secure Shell, provides encrypted remote access to another computer.
Connect to another Linux system
ssh kali@10.228.12.150
This command attempts to establish an SSH session with the specified user and IP address. Authentication is normally required before access is granted.
Exit the session
exitThe exit command closes the current SSH session and returns you to your local terminal.
Check SSH service status
sudo systemctl status ssh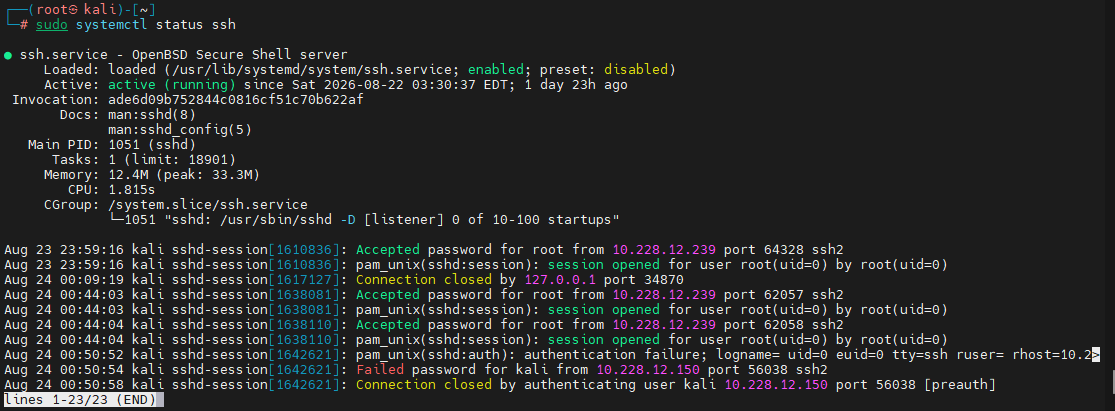
This command checks whether the SSH service is running on the local system. The status output also provides information about the service state and recent activity.
24. Wireless Security Basics
WEP and WPA are wireless security protocols rather than executable Linux commands.
View wireless information
iwconfig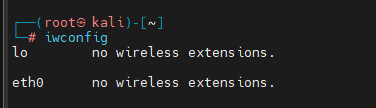
The iwconfig command displays information about wireless interfaces and their current configuration. It is commonly encountered in older Linux wireless networking documentation.
View network interfaces
ip link
The ip link command displays network interfaces and their current link state. It is a modern Linux command that can be used to inspect both wired and wireless interfaces.
25. iptables
iptables is a traditional Linux firewall management utility used to view and manage packet-filtering rules.
View firewall rules
sudo iptables -L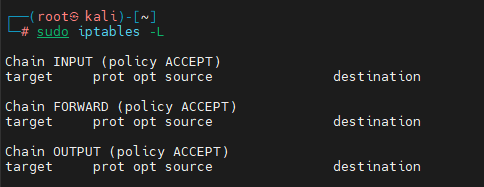
The -L option lists the firewall rules currently configured in the iptables chains. This provides a basic overview of how traffic is being filtered.
Detailed output
sudo iptables -L -n -v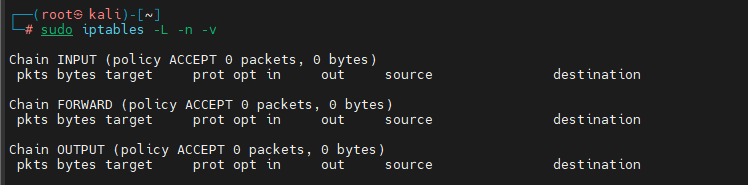
The -n option prevents DNS and service-name resolution, while -v provides more detailed information such as packet and byte counters. This makes the output useful for troubleshooting firewall activity.
View rule numbers
sudo iptables -L --line-numbers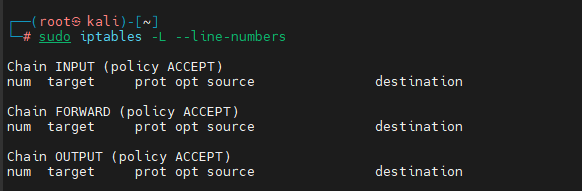
The –line-numbers option adds a number to each firewall rule. Rule numbers are useful when identifying or managing a particular rule.
Inspect only the INPUT chain
sudo iptables -L INPUT -n -v
This command displays only the rules in the INPUT chain, which handles traffic destined for the local system. The -n and -v options provide numerical and detailed output.
26. Nessus
Nessus is a vulnerability assessment platform used to identify security weaknesses in authorized systems.
Check the Nessus service
sudo systemctl status nessusd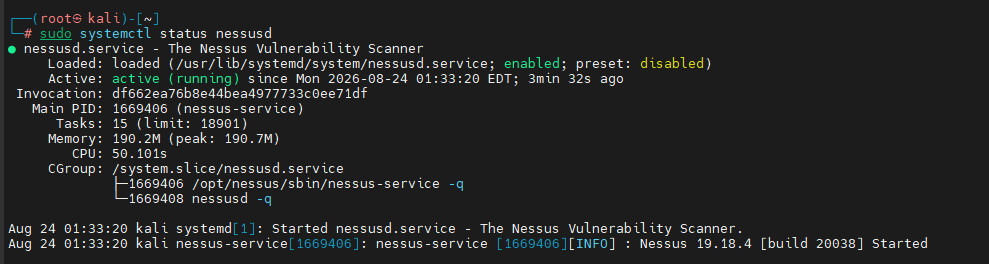
This command checks whether the Nessus service is running on the local system. The output can also provide information about the service state and recent startup activity.
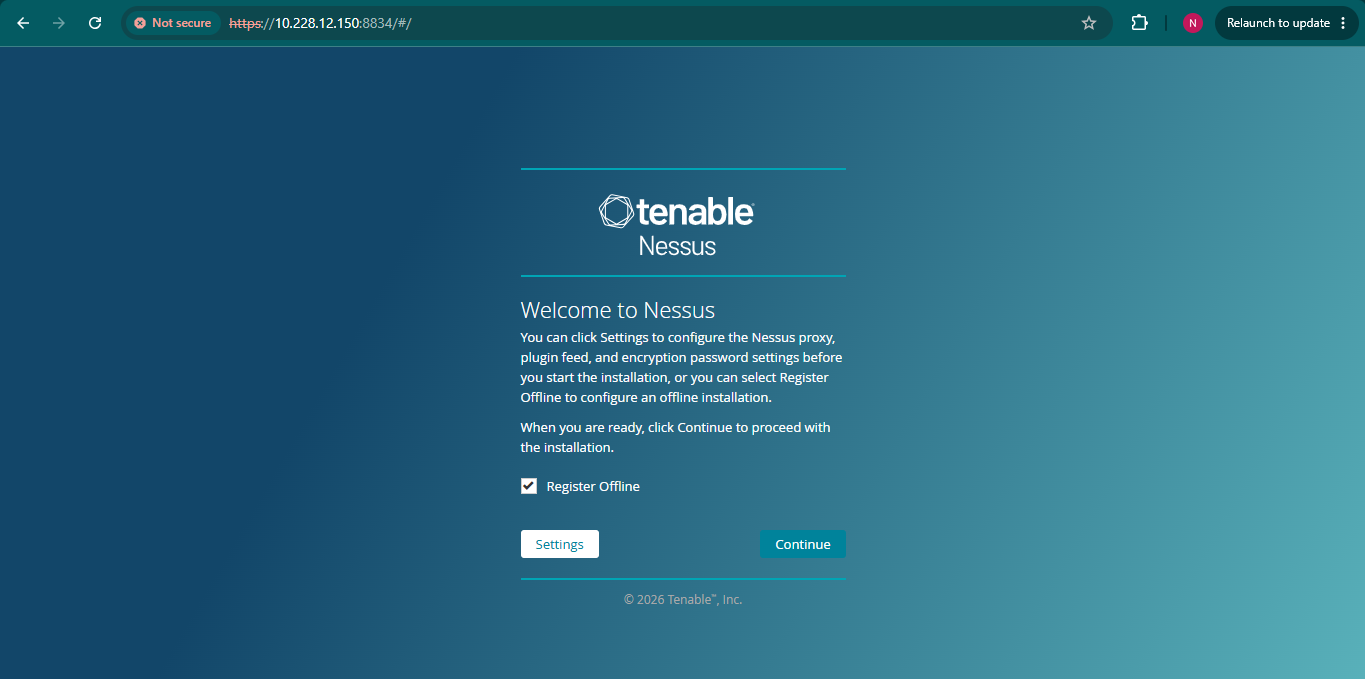
After installation and configuration, Nessus can be accessed through its web interface to create vulnerability scans.
27. df
The df command displays information about available and used disk space.
Display storage information
df -h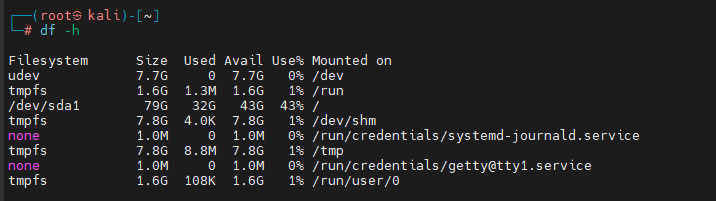
The -h option displays disk sizes in a human-readable format such as GB, MB, or KB. This provides a quick overview of filesystem capacity and available space.
View only the root filesystem
df -h /
Adding / limits the output to the filesystem containing the root directory. This is useful when checking whether the main filesystem is running low on storage.
28. free
The free command displays information about system memory and swap usage.
free -h
The -h option presents memory values in an easy-to-read format. The output includes total, used, available, and swap memory information. It can be useful when troubleshooting performance problems or checking whether applications are consuming excessive memory.
29. top
The top command provides a real-time view of running processes and system resource usage.
top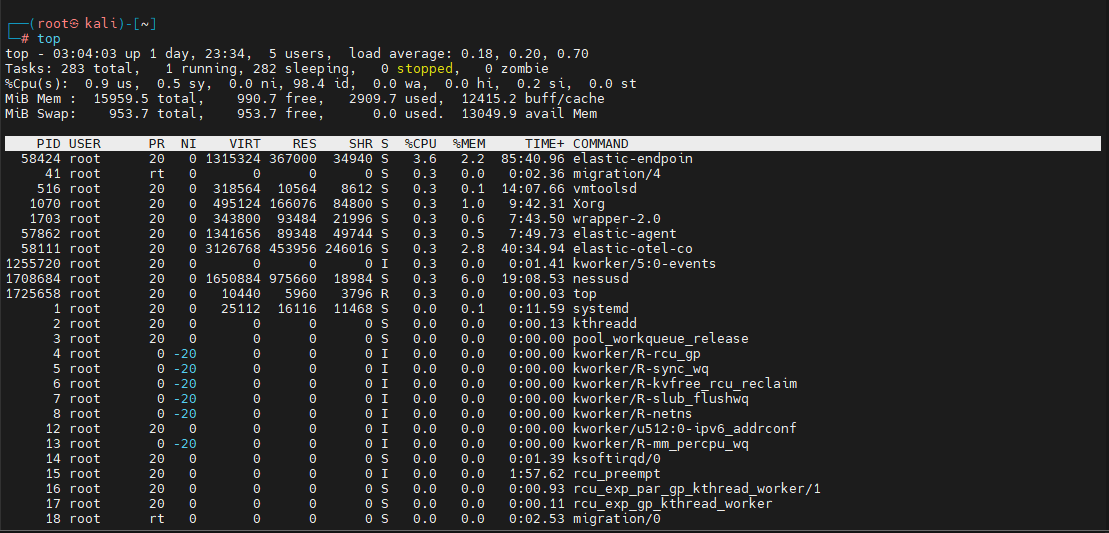
The command displays CPU utilization, memory consumption, running processes, process IDs, and system load. It is useful for identifying processes that are consuming significant system resources.
30. ps
The ps command displays information about processes currently running on the system.
Show active processes
ps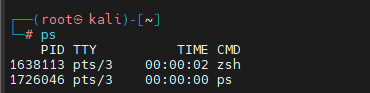
The basic ps command displays processes associated with the current terminal session. It provides a quick view of the processes running under the current session.
Detailed process listing
ps aux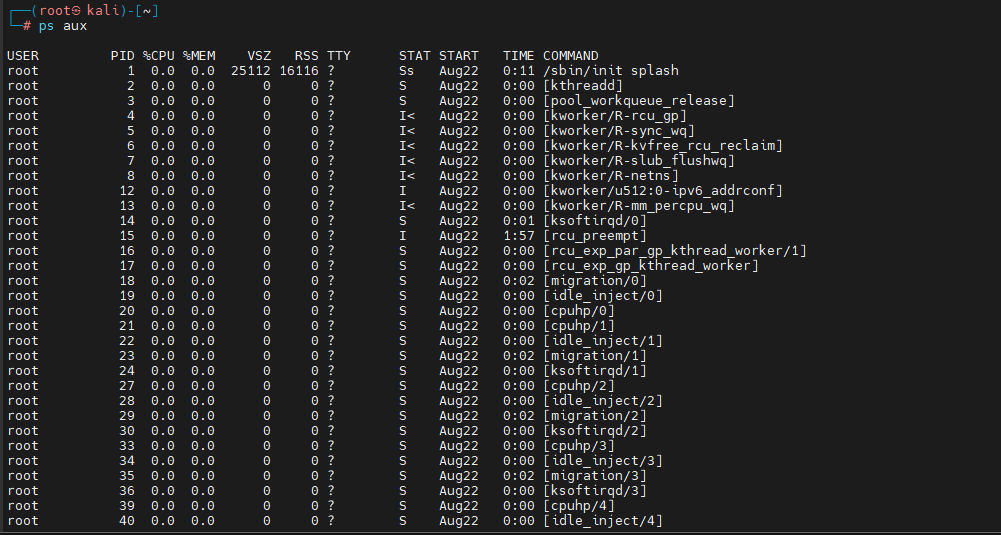
The a, u, and x options provide a broader process listing, including processes from other users and processes without an associated terminal. This is useful for getting a more complete view of running processes.
Search for SSH-related processes
ps aux | grep ssh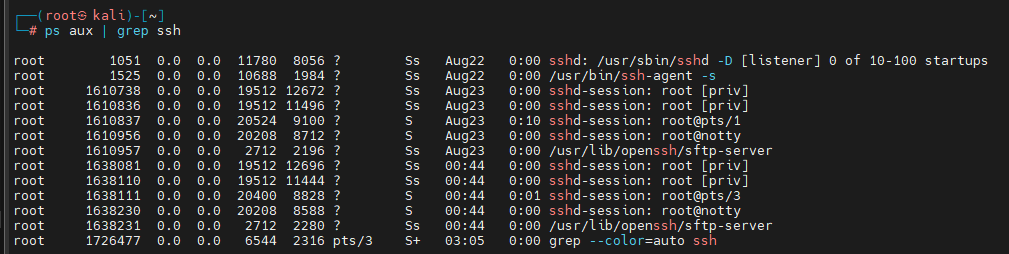
The pipe (|) sends the output of ps aux to grep, which searches it for entries containing ssh. This is a convenient way to filter a large process list.
Alternative format
ps -ef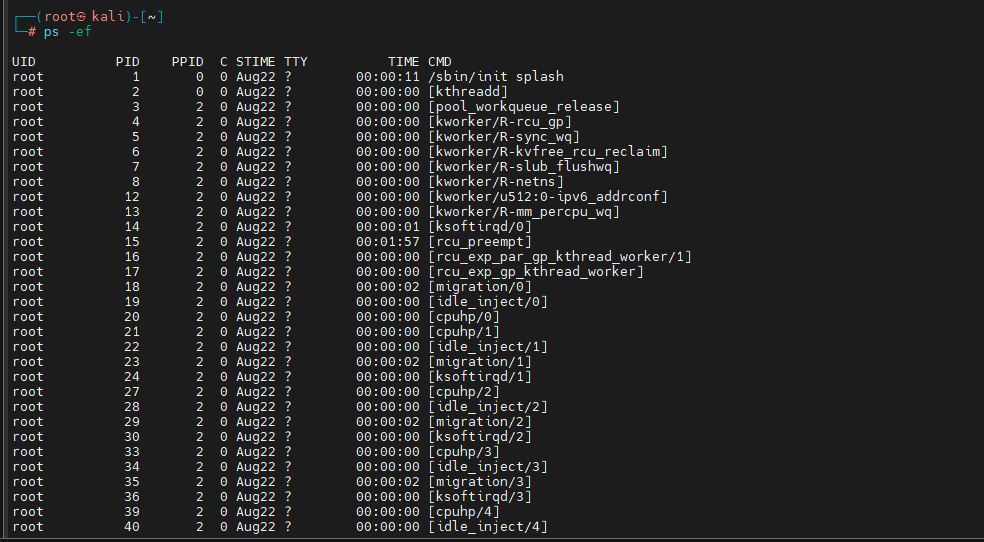
The -e option selects all processes, while -f displays them in a full-format listing. It provides another commonly used way to inspect running processes.
31. uname
The uname command displays information about the Linux system and kernel.
Show complete system information
uname -a
The -a option displays all available system information, including the kernel name, hostname, kernel release, version, machine architecture, and other details.
Show kernel version
uname -r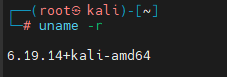
The -r option displays the kernel release currently running on the system. This information can be useful when troubleshooting compatibility and kernel-related issues.
Show architecture
uname -m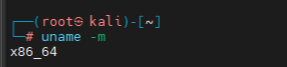
The -m option displays the machine hardware architecture. For example, x86_64 indicates a 64-bit x86 architecture.
32. uptime
The uptime command displays how long the system has been running.
uptime
The command displays the current time, system uptime, number of logged-in users, and system load averages. This provides a quick overview of the system’s runtime and workload.
The information can also be useful during troubleshooting and system investigations.
33. systemctl
The systemctl command is used to interact with services and other systemd components on modern Kali Linux systems.
View the default system target
systemctl get-default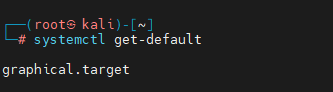
This command displays the default systemd target that the system enters during startup. It helps identify the default operating mode configured for the system.
List services
systemctl list-units --type=service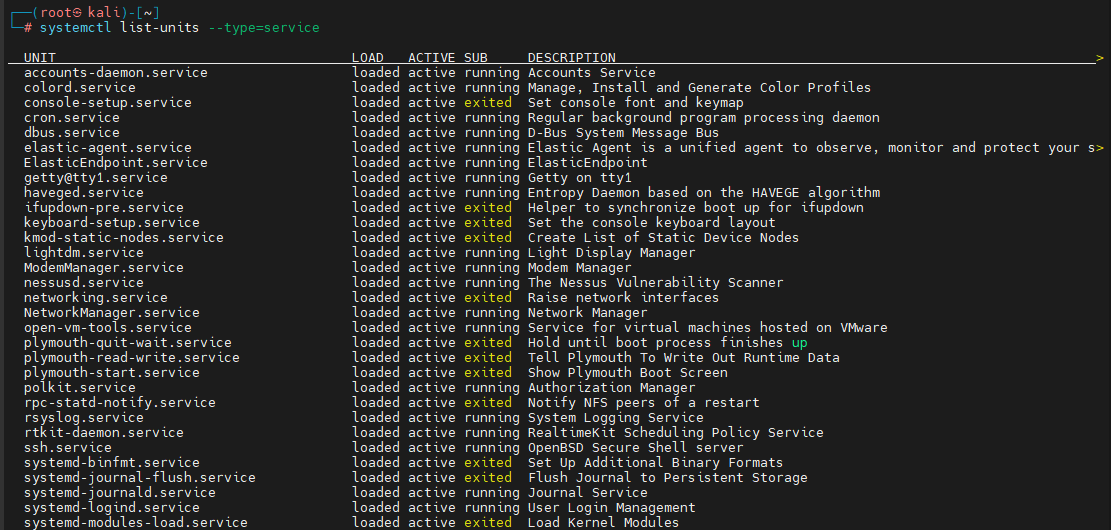
The –type=service option limits the displayed units to services. This provides an overview of services currently loaded and their states.
Check SSH status
sudo systemctl status ssh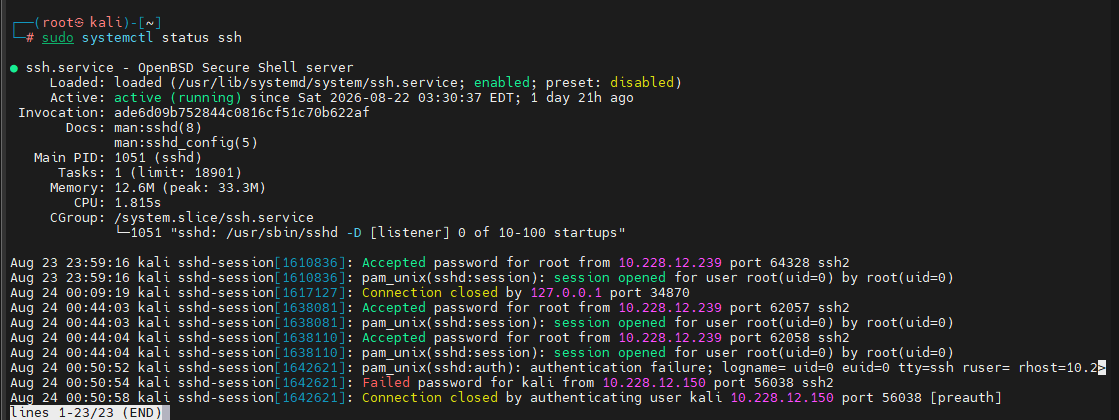
This command displays the current status of the SSH service, including whether it is running and recent service messages. It is useful when troubleshooting remote access.
Modern Kali Linux relies on systemd, making systemctl an important command for service management.
34. chown
The chown command changes the owner and group associated with a file or directory.
Create a file
touch howsnip.txt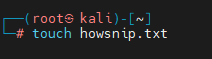
The touch command creates an empty howsnip.txt file if it does not already exist. It can also update the modification time of an existing file.
Change ownership
sudo chown root howsnip.txt
This changes the owner of howsnip.txt to the root user. Administrative privileges may be required when changing ownership of files.
Change owner and group
sudo chown root:root howsnip.txt
This changes both the owner and group of the file to root. The format is owner:group, allowing both ownership values to be specified together.
Verify changes
ls -l howsnip.txt
The long-format ls output displays the file owner and group, allowing you to verify that the ownership change was successful.
35. crontab
The crontab command is used to manage scheduled tasks on Linux systems.
View existing jobs
crontab -l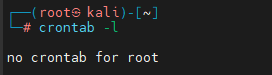
The -l option lists the cron jobs configured for the current user. It is useful for reviewing tasks that are scheduled to run automatically.
Edit cron jobs
crontab -eThe -e option opens the current user’s crontab for editing. It can be used to add, modify, or remove scheduled tasks.
Example scheduled task
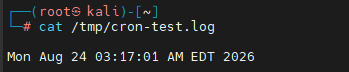
* * * * * date >> /tmp/cron-test.log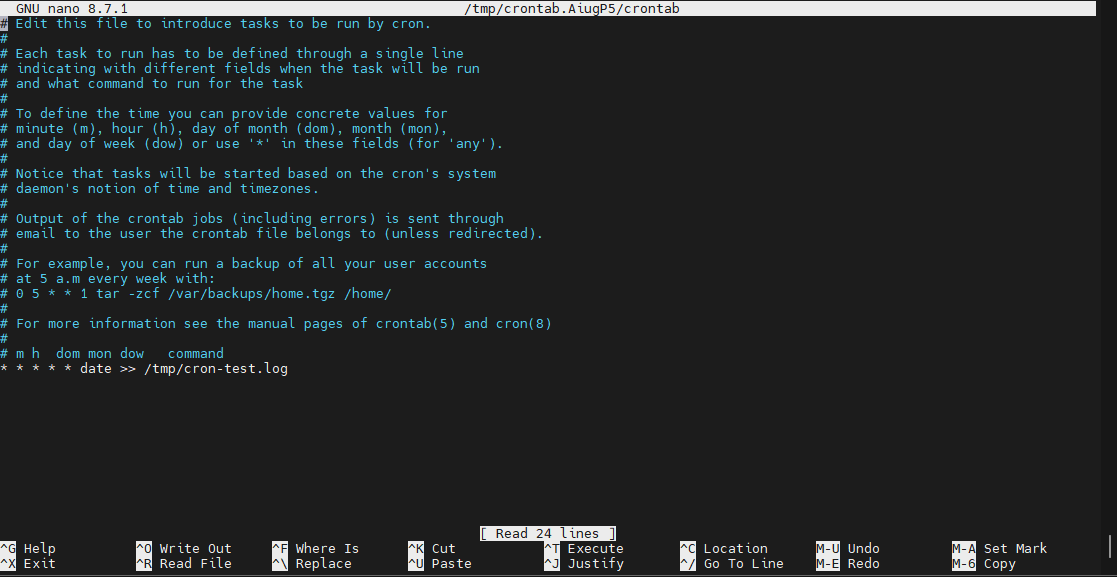
This cron expression runs the date command every minute and appends the output to /tmp/cron-test.log. The five asterisks represent minute, hour, day of month, month, and day of week.
36. useradd
The useradd command creates a new user account on a Linux system.
Create a new user
sudo useradd -m howsnip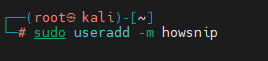
The -m option creates a home directory for the new user. In this example, a user named howsnip is created along with the associated home directory.
Verify the user
id howsnip
The id command displays the user’s UID, primary group, and supplementary group information. It provides a quick way to verify that the account was created successfully.
Set a password
sudo passwd howsnip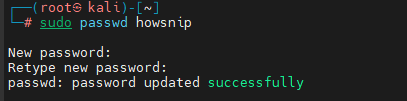
The passwd command is used to set or change the password for the specified user. The system will prompt you to enter and confirm the new password.
Check the account
grep "^howsnip:" /etc/passwd
This command searches /etc/passwd for the account beginning with howsnip:. It can be used to verify that the user account has an entry in the local user database.
37. userdel
The userdel command removes an existing Linux user account.
Remove a test account
sudo userdel howsnip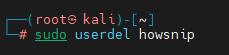
This removes the specified user account from the system. The user’s home directory may remain unless the appropriate removal option is used.
Verify removal
id howsnip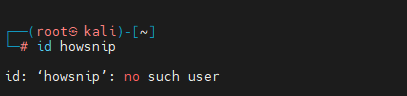
Running id after deleting the account checks whether the user still exists. If the account has been removed, the command will report that the user cannot be found.
38. groupadd
The groupadd command creates a new Linux group.
Create a group
sudo groupadd howsniplab
This creates a new group named howsniplab. Groups are useful for managing permissions and providing multiple users with controlled access to files and resources.
Verify the group
getent group howsniplab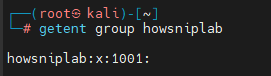
The getent group command searches the system’s group database for the specified group. If the group exists, its name, group ID, and associated members are displayed.
39. groupdel
The groupdel command removes an existing Linux group.
Remove the group
sudo groupdel howsniplab
This removes the howsniplab group from the system. Before deleting a group, verify that it is no longer required by users or applications.
Verify
getent group howsniplab
Running getent group again checks whether the group still exists in the system’s group database. If there is no matching output, the group has been removed.