
Memory forensics is one of the most valuable techniques in digital investigations because it allows analysts to capture and examine the contents of a system’s RAM while the operating system is running. Unlike disk-based evidence, memory often contains active processes, network connections, encryption keys, user sessions, and other volatile artifacts that may disappear when a system is shut down.
This article walks through the complete process of acquiring a memory dump in Kali Linux using AVML, securing the dump through encryption, and analyzing it with Volatility 3.
Capturing Memory Dumps in Kali Linux with AVML
AVML (Azure VM Memory Dumper) is a lightweight and efficient tool developed by Microsoft for acquiring memory dumps from Linux systems. It is widely used in forensic investigations because it creates memory captures in formats that can be analyzed using modern forensic tools.
Download AVML
Open a terminal in Kali Linux and download the latest AVML binary:
wget https://github.com/microsoft/avml/releases/latest/download/avml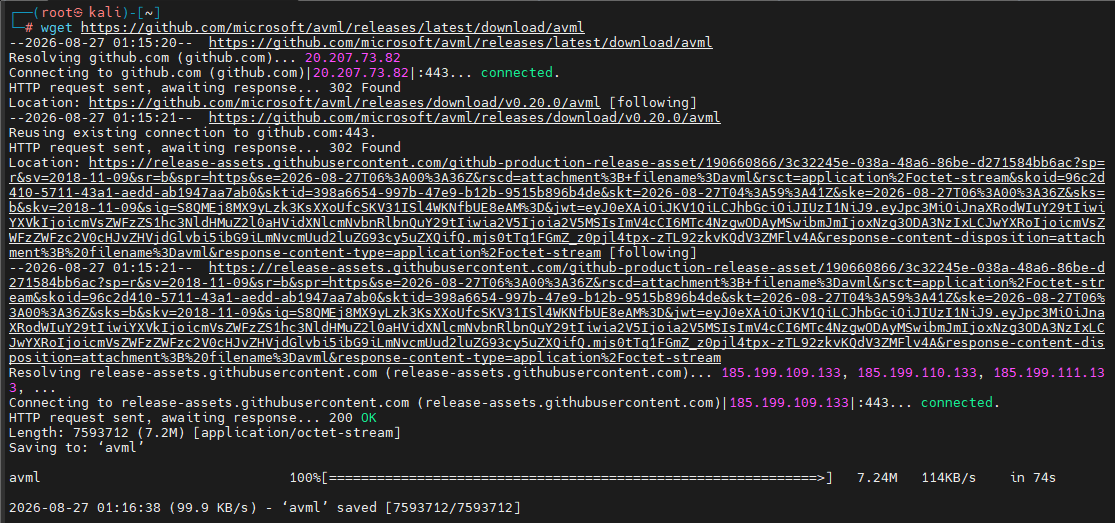
Make the Binary Executable
After downloading the file, grant executable permissions:
chmod +x avml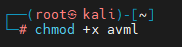
Verify the Download
Confirm that the binary exists and has the correct permissions:
ls -lh avml
A successful output should show permissions similar to:
-rwxr-xr-xAcquire a Memory Dump
To capture system memory, run:
sudo ./avml acquire /home/kali/memory_dump.raw
Replace the output path with the location where you want to store the memory dump.
Verify the Memory Dump
Once acquisition is complete, verify that the file was successfully created:
ls -lh /home/kali/memory_dump.raw
Important Considerations Before Taking a Memory Dump
- Root Privileges Required – Memory acquisition requires administrative access. Always run AVML with sudo or as the root user.
- Storage Requirements – A memory dump is typically close in size to the amount of installed RAM.
- For example:
- 4 GB RAM → approximately 4 GB dump file
- 8 GB RAM → approximately 8 GB dump file
- 16 GB RAM → approximately 16 GB dump file
- Ensure sufficient storage space is available before starting the acquisition.
- For example:
- Safe Analysis Practices – To prevent contamination of evidence:
- Analyze memory dumps on a separate forensic workstation whenever possible.
- Use sandboxed or isolated environments for analysis.
- Encrypt memory dumps during storage and transfer.
- Preserve the original dump as evidence and analyze a copy.
- Know Your Operating System – Familiarity with normal processes and services for the target operating system helps distinguish legitimate activity from malicious or suspicious behavior.
Encrypting a Memory Dump Using GPG
Memory dumps can contain highly sensitive information, including credentials, tokens, browser sessions, and encryption keys. For that reason, memory dumps should always be protected during storage and transport.
Step 1: Generate a GPG Key
If you do not already have a GPG key pair, create one with:
gpg --full-generate-key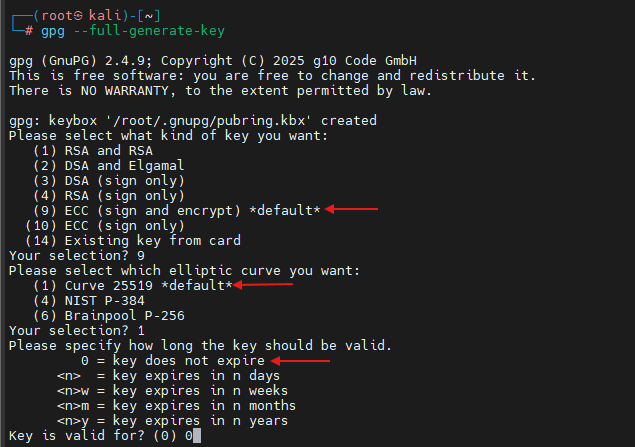
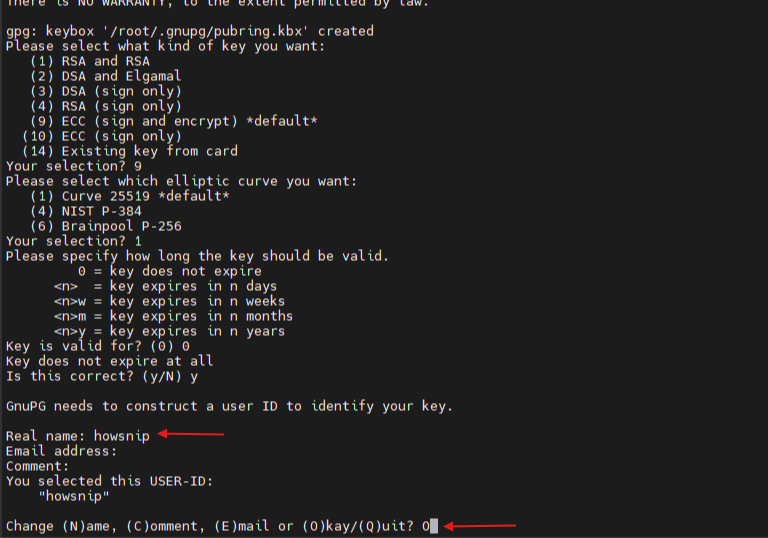
Follow the prompts and choose a strong passphrase. Example:
KaliMemoryForensics2026!Secure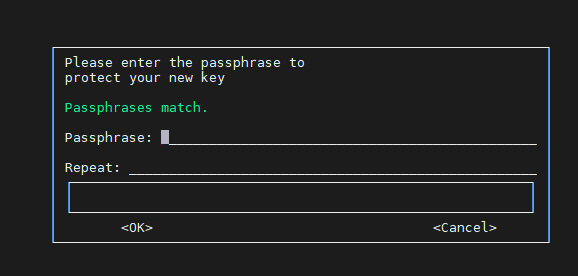
Use a passphrase that is both strong and memorable. This passphrase protects your private key.
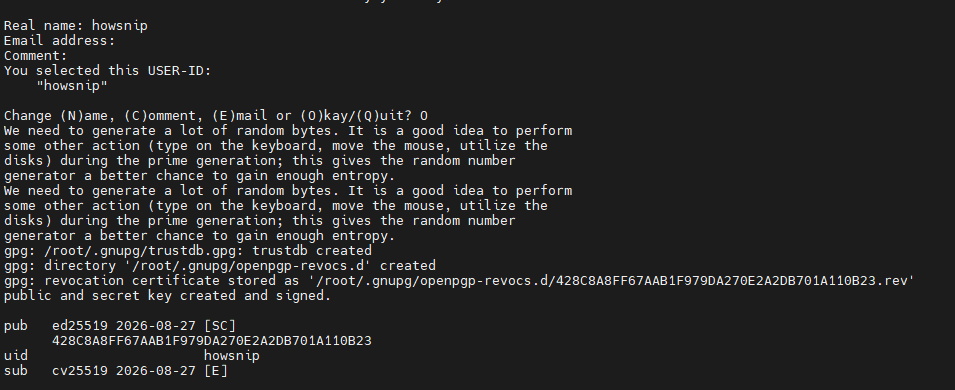
Step 2: Encrypt the Memory Dump
To encrypt the memory dump:
gpg --encrypt --recipient "howsnip" /root/memory_dump.raw
Replace:
- “howsnip” with your GPG User ID.
- /root/memory_dump.raw with the location of your memory dump.
After encryption, a file similar to the following will be created: memory_dump.raw.gpg
Once you verify the encrypted file, you may choose to securely remove the original dump if your workflow permits.
Step 3: Decrypt the Memory Dump
When analysis is required, decrypt the file:
gpg --output /home/howsnip/decrypted_memory_dump.raw --decrypt /home/kali/memory_dump.raw.gpg
Replace the paths to match your environment. You will be prompted to enter the required passphrase or provide access to the corresponding private key.
Analyzing Memory Dumps with Volatility 3
Volatility is the most widely used open-source memory forensics framework. It allows investigators to extract forensic artifacts from memory images collected from Windows, Linux, and macOS systems.
Although a graphical interface called Volatility Workbench exists, the command-line version provides significantly greater functionality and flexibility. This guide uses Volatility 3.
Installing Volatility 3
Update the System
sudo apt update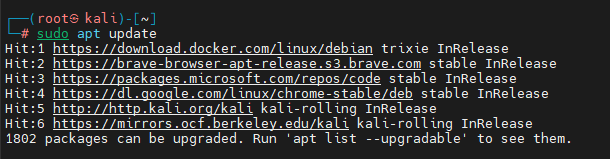
Install Required Packages
sudo apt install python3 python3-pip git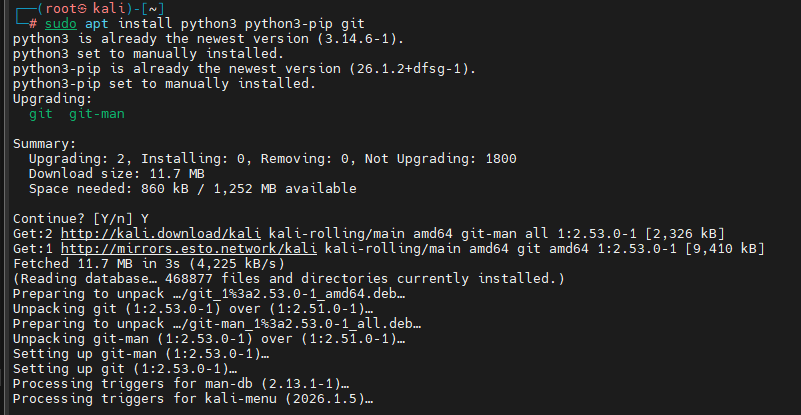
Clone the Repository
git clone https://github.com/volatilityfoundation/volatility3.git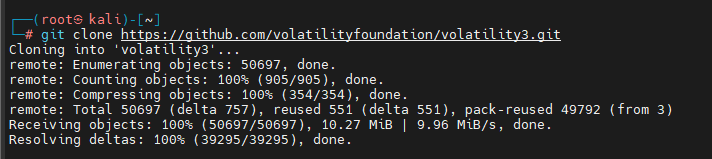
Navigate into the Directory
cd volatility3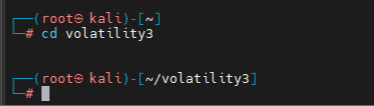
Install Dependencies
pip3 install .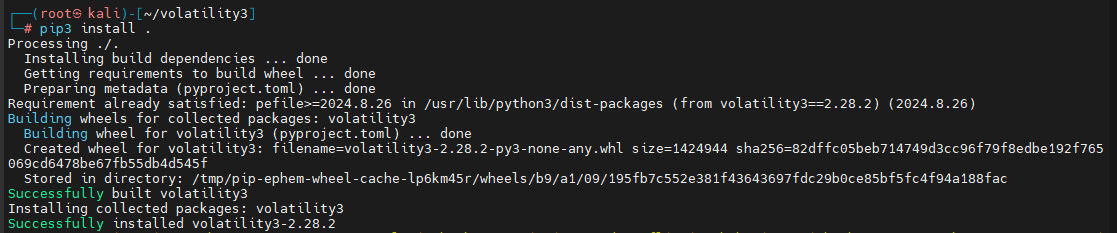
Verify Installation
python3 vol.py -h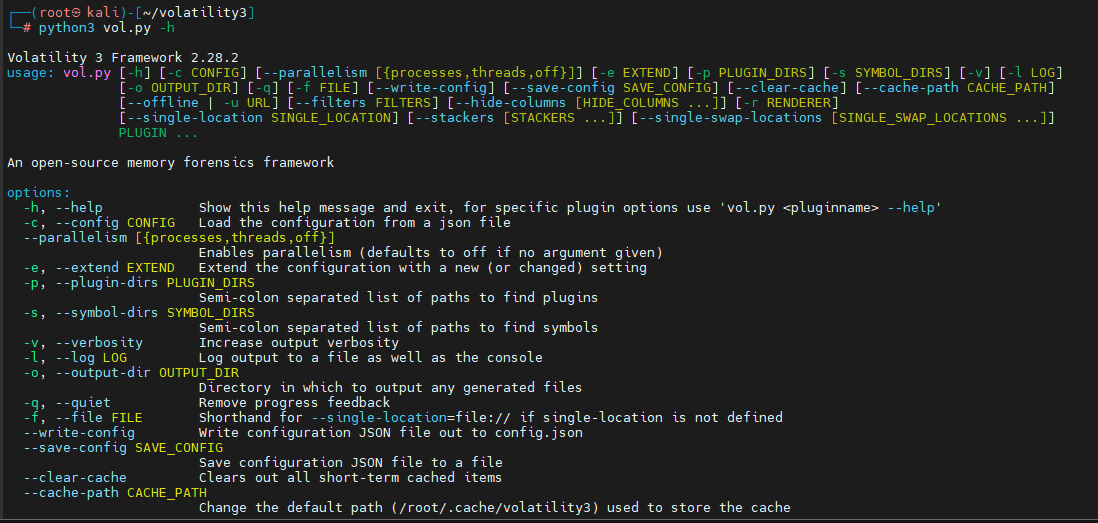
If installation was successful, Volatility will display a list of available plugins.
Understanding Volatility Syntax
The basic syntax for running Volatility is:
python3 vol.py -f <memory_dump_file> <plugin_name>Example:
python3 vol.py -f memory_dump.raw linux.pslistHere:
- -f specifies the memory dump file.
- linux.pslist is the plugin being executed.
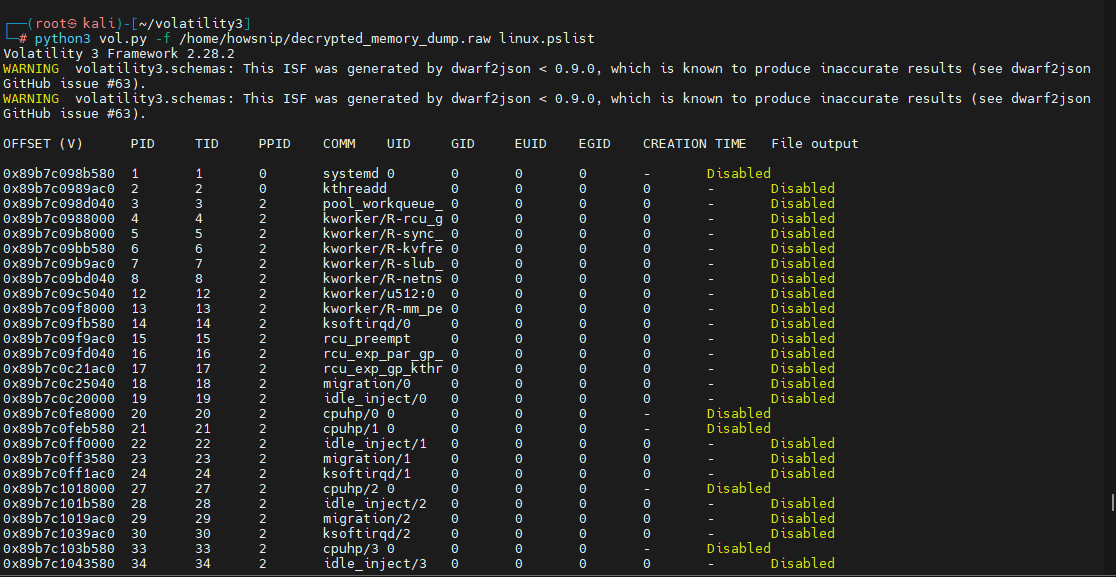
Process Enumeration in Linux Memory Dumps
Process listing is one of the first steps in memory analysis. Volatility provides two useful plugins:
- linux.pslist.PsList
- linux.pslist
For thorough investigations, analysts often compare the output from both plugins.
Example:
cd ~/volatility3
python3 vol.py -f /home/kali/memory_dump.raw linux.pslist
python3 vol.py -f /home/kali/memory_dump.raw linux.psscan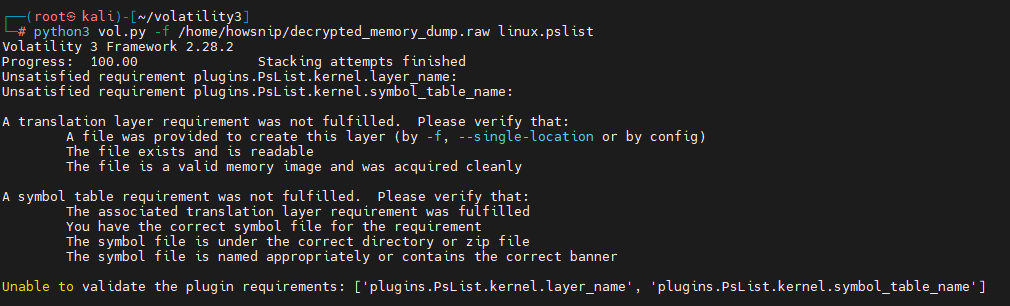
Understanding Linux Symbol Files
A common issue during Linux memory analysis is Volatility’s inability to identify the correct kernel symbols.
A symbol file acts as a map that describes the operating system’s internal memory structures. It helps Volatility correctly interpret kernel objects, processes, network connections, and other artifacts.
Without the correct symbol file:
- Analysis may fail completely.
- Plugins may return errors.
- Results may be inaccurate.
Creating a Linux Symbol File for Volatility
If Volatility reports missing symbols, follow these steps.
1. Check Available Disk Space
df -h /
Ensure you have adequate free space before downloading debug packages.
2. Download the Matching Kernel Debug Package
Navigate to your Volatility directory:
cd ~/volatility3Download the debug package that exactly matches your kernel version.
Example:
wget https://http.kali.org/kali/pool/main/l/linux/linux-image-6.19.14+kali-amd64-dbg_6.19.14-1+kali1_amd64.deb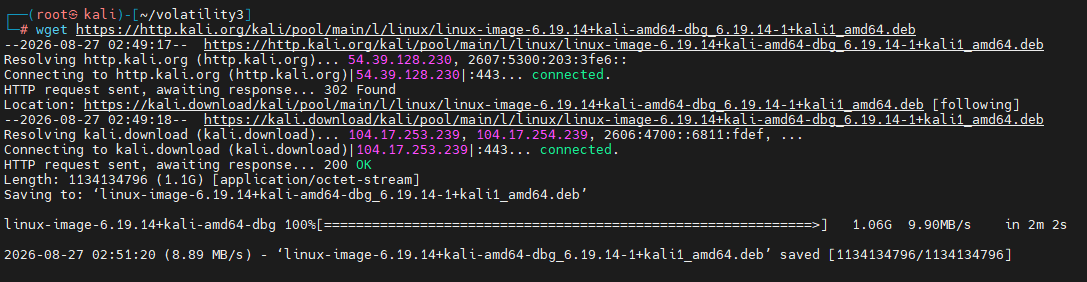
These packages are often very large. If you have less than approximately 2 GB of free space available, consider freeing space before proceeding.
3. Extract the Package Without Installing It
Create a temporary extraction directory:
mkdir -p /tmp/kali-debug
Extract the package:
dpkg-deb -x linux-image-6.19.14+kali-amd64-dbg_6.19.14-1+kali1_amd64.deb /tmp/kali-debug
Locate the vmlinux file:
find /tmp/kali-debug -type f -name 'vmlinux*'
Expected output:
/tmp/kali-debug/usr/lib/debug/boot/vmlinux-6.19.14+kali-amd644. Generate the Volatility Symbol File
Create the Linux symbols directory:
mkdir -p ~/volatility3/symbols/linux
Generate the JSON symbol file:
dwarf2json linux \
--elf /tmp/kali-debug/usr/lib/debug/boot/vmlinux-6.19.14+kali-amd64 \
> ~/volatility3/symbols/linux/kali-6.19.14.json
5. Verify Symbol Generation
Check that the symbol file was created:
ls -lh ~/volatility3/symbols/linux/
Check its size:
du -h ~/volatility3/symbols/linux/kali-6.19.14.json
A successfully generated file is typically hundreds of megabytes in size.
6. Test Memory Analysis
Run Volatility against your memory dump:
cd ~/volatility3
python3 vol.py -f /home/howsnip/decrypted_memory_dump.raw linux.pslist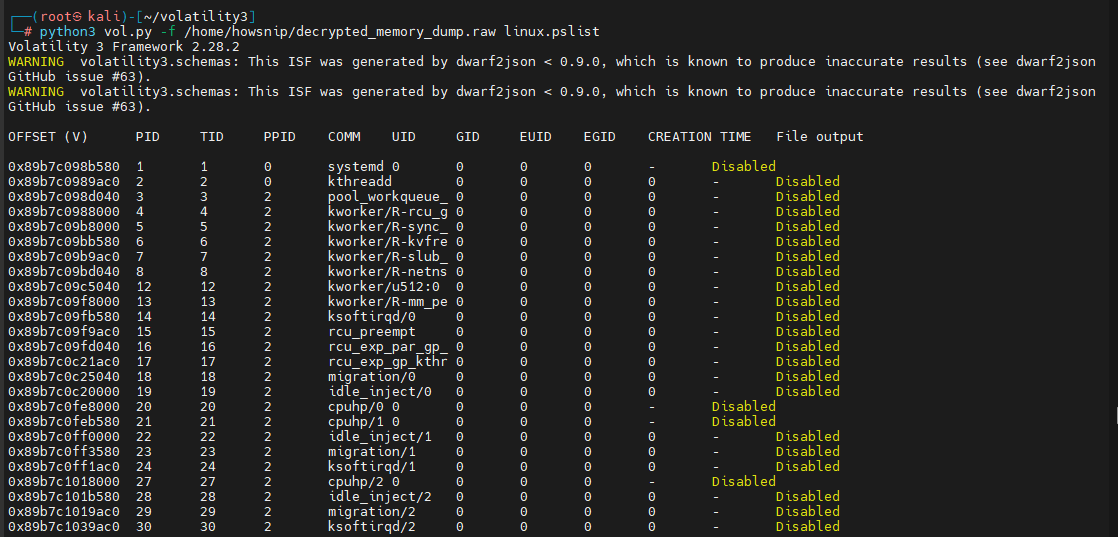
If the symbol file matches the kernel banner contained within the memory image, Volatility should successfully construct the kernel translation layer and display the process list.
Conclusion
Memory forensics is a critical component of modern incident response and digital investigations. Using AVML, investigators can quickly acquire memory dumps from Linux systems. Encrypting those dumps with GPG helps protect sensitive evidence during storage and transfer, while Volatility 3 provides powerful capabilities for extracting valuable forensic artifacts.
A successful investigation depends not only on collecting memory correctly but also on using matching symbol files, maintaining evidence integrity, and performing analysis in a secure environment.
By following the workflow outlined above, analysts can confidently acquire, protect, and examine memory evidence from Kali Linux systems.