

Importing a large MySQL database through phpMyAdmin can sometimes become frustrating, especially when migrating a WordPress website from one hosting server to another or moving a website to a local development environment.
One common problem users encounter is the following error:
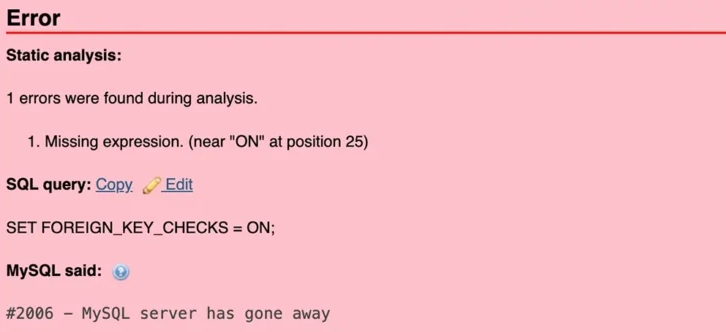
Error

Static analysis:
1 errors were found during analysis.
Unrecognized keyword. (near "ON" at position 25)

SQL query:
SET FOREIGN_KEY_CHECKS = ON;

MySQL said:
#2006 - MySQL server has gone away
This error can occur when importing large .sql database backup files through phpMyAdmin. It is particularly common when working with large WordPress databases containing thousands of posts, comments, metadata records, plugin data, and other database tables.
Fortunately, there are several ways to resolve this issue. In this guide, we will explore different solutions, including increasing PHP and MySQL configuration limits, adjusting phpMyAdmin settings, and importing databases directly through the MySQL command line.
The MySQL error `MySQL server has gone away` generally indicates that the connection between the MySQL client and the database server was interrupted or closed unexpectedly.
When importing a large SQL file, this can happen for several reasons:
- Maximum packet size exceeded: The SQL file contains large queries or individual records that exceed MySQL’s max_allowed_packet limit.
- PHP execution timeout: The import process takes longer than the PHP execution time allowed.
- File upload restrictions: PHP or phpMyAdmin does not allow uploading a file of the required size.
- Insufficient memory: PHP or MySQL runs out of available memory while processing the import.
- Connection timeout: The MySQL server closes an inactive or stalled connection.
- Large SQL queries: A database dump contains large INSERT statements that take considerable time to execute.
It is important to understand that these are different limitations. Increasing one configuration value may not resolve every type of import failure.
Solution 1: Increase PHP Configuration Limits
One of the first things you should try is increasing the PHP configuration limits.
PHP controls several settings related to file uploads, memory usage, and script execution time. If these limits are too low, phpMyAdmin may fail while processing a large SQL file.
Step 1: Locate php.ini
If you are using XAMPP on Windows, open:
C:\xampp\php\php.iniIf you are using WAMP, locate the active PHP version’s php.ini file through the WAMP configuration menu.
Step 2: Update PHP Settings
Find the following configuration directives and update their values:
max_execution_time = 600
max_input_time = 600
memory_limit = 1024M
post_max_size = 1024M
upload_max_filesize = 1024M
upload_max_filesize is also required when you are uploading a large SQL file through phpMyAdmin. The post_max_size value should be larger than upload_max_filesize.
These values are examples, not mandatory settings. Adjust them according to your database size and available server resources.
Solution 2: Increase MySQL max_allowed_packet
Another common reason for this error is the MySQL packet size limitation.
The max_allowed_packet variable controls the maximum size of a communication packet that MySQL can send or receive. A packet can contain an SQL statement or a large data row.
For example, a WordPress database backup may contain large INSERT statements, serialized plugin data, or other large records. If an individual packet exceeds the configured limit, MySQL may close the connection.
Step 1: Locate my.ini
For XAMPP on Windows, open:
C:\xampp\mysql\bin\my.iniFor WAMP, the file is generally located in a version-specific directory, such as:
C:\wamp64\bin\mysql\mysql5.7.26\my.iniThe exact path depends on your installed MySQL or MariaDB version.
Step 2: Update max_allowed_packet
Find the [mysqld] section and add or update:
[mysqld]
max_allowed_packet = 512M
You can also use:
max_allowed_packet = 1024MHowever, do not increase this value unnecessarily. Choose a suitable limit based on the size of the largest SQL statement or data row you need to import. If you use the MySQL command-line client, remember that the client can have its own packet-size setting.
Step 3: Restart MySQL
After saving the configuration file:
- Open the XAMPP or WAMP control panel.
- Stop the MySQL service.
- Start the MySQL service again.
- Open phpMyAdmin.
- Try importing your database again.
Note: Changing my.ini without restarting the MySQL service will not apply the new server configuration.
Solution 3: Import a Large Database Using the MySQL Command Line
If you have already increased the PHP and MySQL configuration limits but phpMyAdmin still fails, importing the database directly through the MySQL command-line client is often a better solution.
This approach avoids phpMyAdmin’s browser-based upload and PHP request processing limitations. It is particularly useful when migrating large WordPress databases or importing database backups containing hundreds of megabytes or several gigabytes of SQL data.
Step 1: Open the XAMPP Shell
Open the XAMPP Control Panel and click the Shell button. Alternatively, open Windows Command Prompt.
Step 2: Execute the Import Command
Use the following command:
mysql -u root -p database_name < "C:\xampp\DBfolder\db.sql"Press Enter. MySQL will prompt you for the database password. If your root account does not have a password, simply press Enter when prompted.
If the `mysql` command is not recognized, use its full executable path:
"C:\xampp\mysql\bin\mysql.exe" -u root -p wordpress_db < "C:\xampp\backup\wordpress.sql"Wait for the command to finish. A successful import normally returns to the command prompt without displaying an error.
Alternative: Import Using the MySQL Source Command
You can also import a database using the MySQL interactive shell.
First, connect to MySQL:
mysql -u root -pSelect your destination database:
USE wordpress_db;Execute the SQL backup:
SOURCE C:/xampp/backup/wordpress.sql;Notice that forward slashes are used in the file path. This method is particularly helpful when you want to execute SQL files from within an existing MySQL session.
Solution 4: Increase phpMyAdmin’s Execution Time Limit
phpMyAdmin has its own execution time configuration that can affect large database imports.
If you are using XAMPP, open:
C:\xampp\phpMyAdmin\config.inc.phpAdd the following configuration:
$cfg['ExecTimeLimit'] = 0;Setting this value to 0 removes phpMyAdmin’s execution time limit.
For WAMP, you can also check the phpMyAdmin Apache alias configuration:
C:\wamp64\alias\phpmyadmin.confDepending on your PHP and Apache configuration, you may find directives such as:
php_admin_value max_execution_time 360
php_admin_value max_input_time 360
Increase these values if required.
Important: Removing phpMyAdmin’s execution time limit does not remove every possible timeout. PHP, Apache, MySQL, the operating system, or a proxy may still impose their own limits.
Solution 5: Configure the MySQL Packet Size According to Database Size
Sometimes, increasing max_allowed_packet to a very large value is unnecessary.
Instead, configure an appropriate packet size based on the SQL backup file and its individual statements.
For example:
[mysqld]
max_allowed_packet = 50M
Or:
[mysqld]
max_allowed_packet = 256M
After updating the configuration, restart MySQL.
You can verify the active setting by executing:
SHOW VARIABLES LIKE 'max_allowed_packet';This displays the packet-size limit currently being used by the MySQL server.
Remember that the overall SQL backup file size and the maximum size of an individual SQL statement are two different things. A 2 GB database backup does not necessarily require a 2 GB packet limit.
Solution 6: Change SQL Compatibility Mode in phpMyAdmin
Another workaround reported by some users is changing the SQL compatibility mode during database import.
When importing an SQL file through phpMyAdmin, you may find an option named SQL compatibility mode. Some users have reported success after selecting:
ANSISQL compatibility mode influences how SQL statements are interpreted. It does not increase MySQL packet size, PHP memory, upload limits, or connection timeouts. For WordPress database migrations, the safest approach is to use a compatible MySQL or MariaDB environment and the appropriate SQL dialect for the database backup.
Use ANSI mode only when you have a specific SQL compatibility issue.
Solution 7: Correct the FOREIGN_KEY_CHECKS Statement
During a database import, you may also encounter a phpMyAdmin static analysis warning similar to:
SET FOREIGN_KEY_CHECKS = ON;The warning may look like:
Unrecognized keyword. (near “ON” at position 25)
This message relates to the SQL statement parser, not necessarily to the underlying MySQL connection failure. MySQL supports enabling and disabling foreign key checks through the FOREIGN_KEY_CHECKS system variable.
You can use numeric values to avoid parser compatibility problems:
SET FOREIGN_KEY_CHECKS = 0;To enable foreign key checks again:
SET FOREIGN_KEY_CHECKS = 1;Important: Disabling foreign key checks can affect data integrity. It should only be done when necessary, and you should verify the relationships between imported tables afterward. Re-enabling checks does not automatically validate rows inserted while checks were disabled.
Also, changing FOREIGN_KEY_CHECKS will not fix an interrupted MySQL connection.
Solution 8: Export and Import Using mysqldump
If phpMyAdmin repeatedly fails to import your database, consider exporting the original database using mysqldump and importing it through the MySQL command-line client.
This is generally more reliable for large database migrations because it avoids browser-based upload limitations.
Export the Database
Execute:
mysqldump -u db_user -p db_name > dump_file.sqlFor example:
mysqldump -u root -p wordpress_db > wordpress_backup.sqlImport the Database
Create the destination database first, if it does not already exist.
Then execute:
mysql -u db_user -p db_name < dump_file.sqlFor example:
mysql -u root -p wordpress_db < wordpress_backup.sqlEnter your password when prompted.
If you are using XAMPP and the commands are not recognized, use the full executable paths:
"C:\xampp\mysql\bin\mysqldump.exe" -u root -p wordpress_db > "C:\xampp\backup\wordpress_backup.sql"And:
"C:\xampp\mysql\bin\mysql.exe" -u root -p wordpress_db < "C:\xampp\backup\wordpress_backup.sql"For compatibility, use an appropriate `mysqldump` version and options for your source and destination database engines.
Conclusion
The `MySQL server has gone away` error is a common problem when importing large WordPress databases through phpMyAdmin. It can be caused by PHP restrictions, MySQL packet-size limitations, connection timeouts, insufficient resources, or server-side failures.
If you are using XAMPP or WAMP, start by increasing the PHP configuration limits and MySQL’s max_allowed_packet value. If phpMyAdmin continues to fail, use the MySQL command-line client to import your SQL backup directly.
For very large WordPress database migrations, prefer the MySQL command-line import method over phpMyAdmin. It avoids browser-based upload limitations and is generally a more dependable approach for handling large SQL backup files.