Managing Docker containers entirely from the command line can become challenging as your environment grows. Portainer simplifies container administration by providing a lightweight, web-based management interface for Docker environments.
In this tutorial, you’ll learn how to install Portainer Community Edition (CE) on Ubuntu 26.04, connect it to Docker, and access the Portainer dashboard to manage containers, images, networks, and volumes through an easy-to-use graphical interface.
Note: Portainer requires Docker Engine to be installed and running before deployment.
Prerequisites
Before you begin, make sure you have:
- A server running Ubuntu 26.04
- Root access, or a non-root user with sudo privileges
- Internet connectivity to download packages and Docker images
Step 1: Update Your Ubuntu System
Before installing any software, it is recommended to update your system packages to the latest available versions.
Run the following command:
apt update -y && apt upgrade -y
This command:
- Updates the package repository information.
- Installs available package upgrades.
- Helps avoid compatibility issues during installation.
Step 2: Install Docker
Portainer runs as a Docker container, so Docker Engine must be installed first.
Install Required Dependencies
Install the packages needed to add external repositories and securely download software:
apt install software-properties-common apt-transport-https ca-certificates -y
These packages enable HTTPS repository support and certificate validation.
Add the Docker GPG Key
Docker signs its packages with a GPG key to ensure package authenticity.
Run:
curl -fsSL https://download.docker.com/linux/ubuntu/gpg | gpg --dearmor -o /usr/share/keyrings/docker-archive-keyring.gpgThis downloads Docker’s official signing key and stores it on your system.
Add the Docker Repository
Next, add Docker’s official repository to Ubuntu:
echo "deb [arch=amd64 signed-by=/usr/share/keyrings/docker-archive-keyring.gpg] https://download.docker.com/linux/ubuntu $(lsb_release -cs) stable" | sudo tee /etc/apt/sources.list.d/docker.list > /dev/nullThis allows Ubuntu to download Docker packages directly from Docker’s repository.
Install Docker Engine
Update the package list again so Ubuntu can recognize the newly added repository:
apt update -y
Install Docker and its related components:
apt install docker-ce docker-ce-cli containerd.io docker-buildx-plugin docker-compose-plugin -y
The installation includes:
- docker-ce – Docker Engine
- docker-ce-cli – Docker command-line tools
- containerd.io – Container runtime
- docker-buildx-plugin – Advanced image-building support
- docker-compose-plugin – Docker Compose functionality
Start and Enable Docker
Start the Docker service and configure it to launch automatically on system boot:
systemctl start docker && systemctl enable docker
Verify Docker Status
Check whether Docker is running correctly:
systemctl status docker
You should see output indicating that the Docker service is active and running.
Step 3: Install Portainer
Portainer runs as its own Docker container and communicates with the local Docker daemon through a mounted socket.
Create a Persistent Data Volume
First, create a Docker volume to store Portainer data and configuration files:
docker volume create portainer_data
Using a persistent volume ensures your Portainer settings remain intact if the container is restarted or recreated.
Deploy the Portainer CE Container
Run the following command to download and start Portainer Community Edition:
docker run -d \
-p 8000:8000 \
-p 9443:9443 \
--name portainer \
--restart=always \
-v /var/run/docker.sock:/var/run/docker.sock \
-v portainer_data:/data \
portainer/portainer-ce:latest
Allow Access Through the Firewall (Optional)
If UFW is enabled on your server, allow incoming traffic on port 9443:
ufw allow 9443/tcp
Then reload the firewall rules:
ufw reloadNote: If UFW is not installed or active, you can safely skip these commands.
Step 4: Access and Configure the Portainer Web Interface
After deploying the container, you must retrieve the Portainer setup token and complete the initial configuration.
Find the Portainer Container ID
Display the running Docker containers:
docker ps --format "{{.ID}}\t{{.Names}}"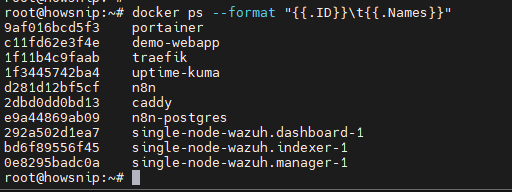
Example output:
9af016bcd5f3 portainer
The first column shows the container ID, while the second column displays the container name.
Retrieve the Setup Token
Use the Portainer container ID from the previous step to obtain the setup token:
docker logs 9af016bcd5f3 2>&1 | grep "setup_token"
Replace 9af016bcd5f3 with your actual container ID.
The command returns a setup token similar to:
setup_token=xxxxxxxxxxxxxxxxxxxxxxxxxxxxxxxx
Copy this token for the next step.
Important: The setup token must be used within 5 minutes of starting the Portainer container.
Reset the Setup Window if Necessary
If the setup token expires, restart the Portainer container:
docker restart portainerThis resets the initial setup timer and allows you to generate a new token.
Open the Portainer Dashboard
Open your web browser and visit:
https://YourServerIPAddress:9443Replace YourServerIPAddress with your server’s actual IP address.
Handle the SSL Warning
Because Portainer uses a self-signed certificate by default, your browser will display a security warning.
For a local or lab environment:
- Click Advanced.
- Continue to the Portainer website.
Note: Self-signed certificate warnings are expected during the initial setup unless you have configured a trusted SSL certificate.
Create the Administrator Account
On the setup page:
- Enter an administrator password.
- Ensure the password is at least 12 characters long.
- Paste the setup token obtained earlier.
- Click Create User.

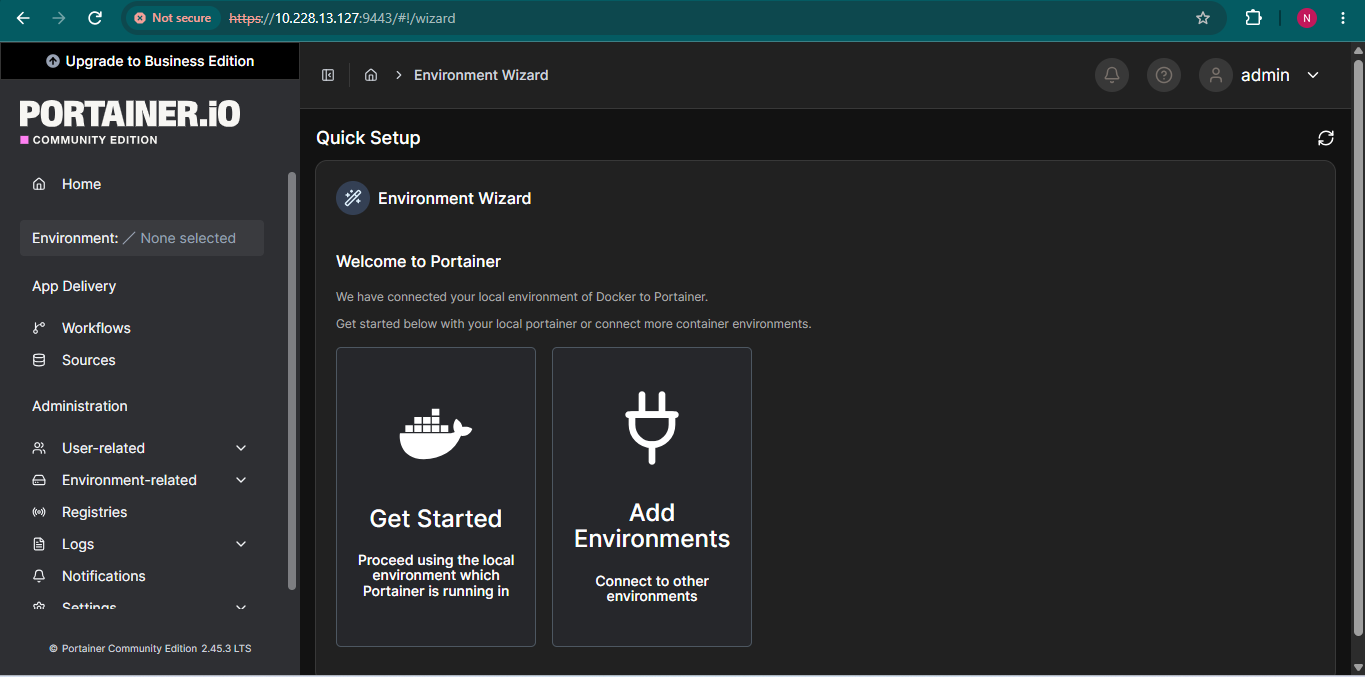
After authentication, you will be redirected to the Portainer administration dashboard.
Connect to the Local Docker Environment
When prompted to select an environment:
- Choose Get Started.
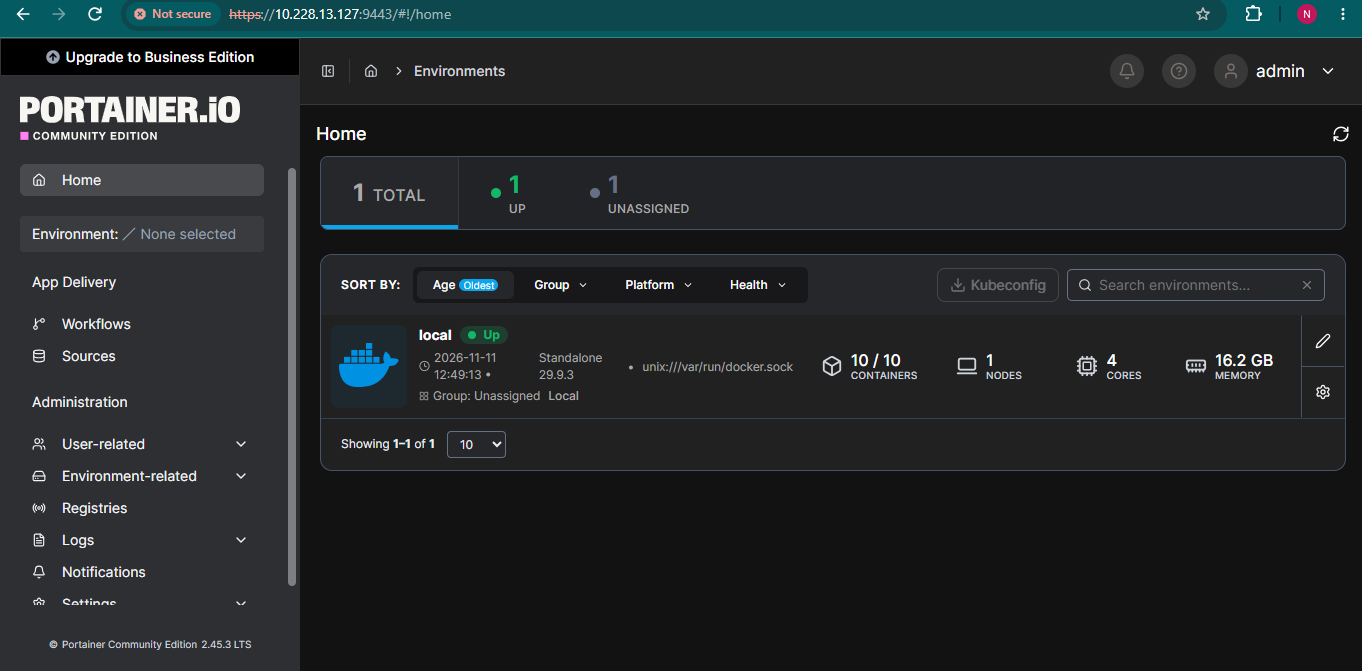
- Select the local Docker environment managed by Portainer.
Portainer will connect to the Docker Engine and display your Docker resources through the web interface.
Conclusion
You have successfully installed Portainer Community Edition on Ubuntu 26.04 and connected it to your Docker environment. With Portainer’s web-based dashboard, you can manage containers, images, networks, volumes, and other Docker resources without relying entirely on terminal commands.
This makes Docker administration more accessible for beginners while still providing powerful management capabilities for experienced users.