

Linux commands are essential for managing files, configuring servers, troubleshooting network problems, monitoring system performance, and maintaining applications. Whether you are new to Linux or an experienced system administrator, understanding commonly used terminal commands can make everyday tasks faster and more efficient.
This Linux commands cheat sheet covers essential commands with practical examples, explanations, and step-by-step instructions. It includes file management, text editing, permissions, user administration, system monitoring, networking, package management, service management, log analysis, disk management, compression, and command-line automation.
The examples use common Linux utilities and familiar paths. Some commands may differ depending on your Linux distribution, installed packages, permissions, and system configuration.
Prerequisites
- Access to a Linux terminal or command-line interface.
- A user account with appropriate permissions for the tasks you want to perform.
- `sudo` access for administrative operations where required.
- A test environment for practicing commands that modify files, permissions, users, services, or storage.
Important: Review every command before running it on a production server. Commands involving rm, chmod, chown, userdel, disk partitions, and service management can cause data loss or service interruptions if used incorrectly.
1. How to Use This Linux Commands Cheat Sheet
The commands are organized by task so you can find the right instruction without reading the entire guide from beginning to end. Beginners should start with navigation and file management before progressing to administration and troubleshooting.
a) Check command help
Most command-line utilities provide a help option that lists supported arguments and options.
grep --help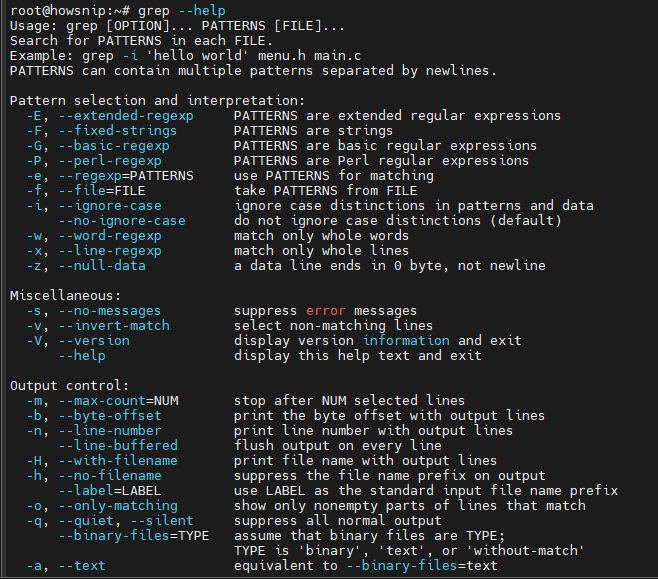
Use this command to review the available options for `grep` before performing more advanced searches.
b) Read the manual pages
The `man` command opens the manual for a utility and provides detailed information about its syntax, options, and behavior.
man tar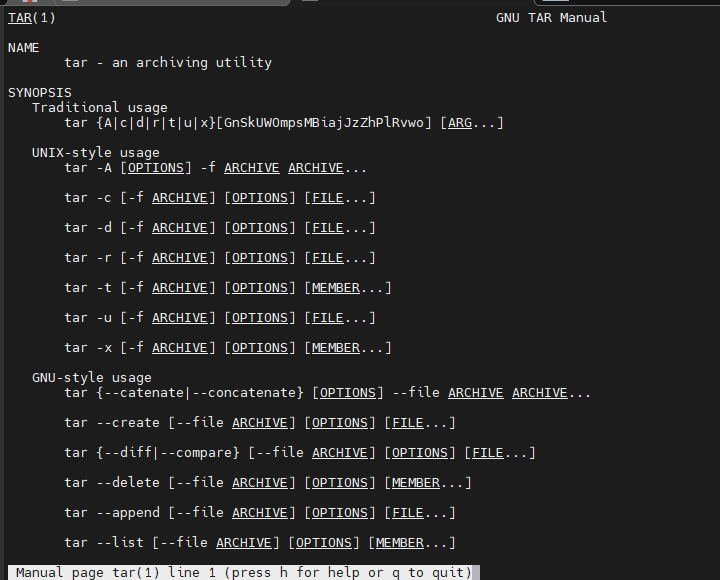
Press `q` to exit the manual viewer.
c) Connect to a remote Linux server
If you administer a remote server, establish an SSH connection before executing commands on that machine.
ssh user@server-ip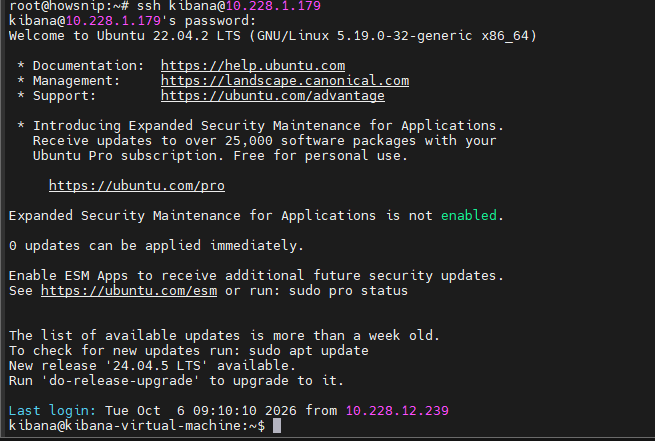
Replace `user` and `server-ip` with the appropriate username and server address. Confirm that you are connected to the intended system before making changes.
2. Linux Navigation and File Management Commands
Navigation commands help you move through the filesystem, while file management commands let you create, copy, rename, and delete files and directories.
a) Display the current directory with `pwd`
The `pwd` command prints the full path of your current working directory.
pwd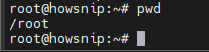
Use it to confirm your location before creating files or performing administrative operations.
b) List files and directories with `ls`
The `ls` command lists files and directories in a specified location or the current directory.
ls -lah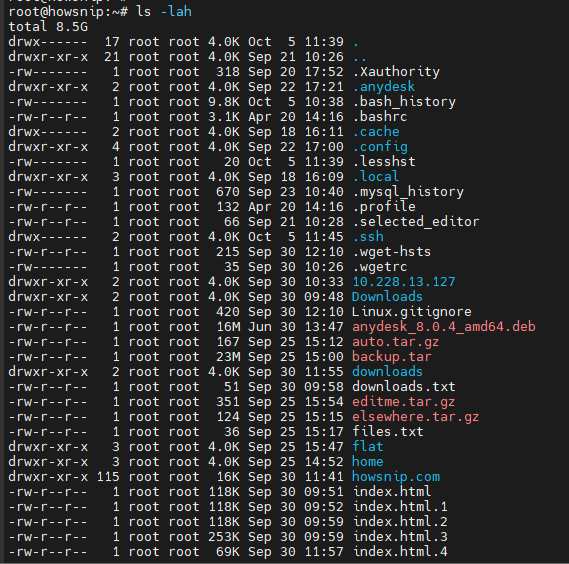
This command is particularly useful when checking file permissions, ownership, and directory contents.
c) Navigate directories with `cd`
The `cd` command changes the current working directory.
cd /path/to/directory
To navigate to your home directory:
cd ~
To return to the previous working directory:
cd -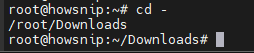
Always verify the current path with `pwd` if you are unsure where a subsequent command will operate.
d) Display a directory tree with `tree`
The `tree` command displays files and directories in a hierarchical format.
tree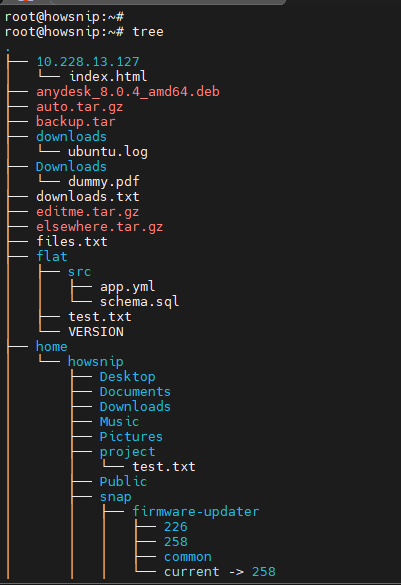
This is useful for reviewing project structures and locating nested folders. If the command is unavailable, install the `tree` package using your distribution’s package manager.
e) Create files with `touch`
The `touch` command creates an empty file if it does not exist. If the file already exists, it updates its timestamps rather than clearing its contents.
touch file.txt
Use it to create placeholder files, log files, or files that you intend to edit later.
f) Create directories with `mkdir`
The `mkdir` command creates a directory.
mkdir new_folder
Use the `-p` option to create a nested directory structure, including missing parent directories.
mkdir -p parent/child/grandchild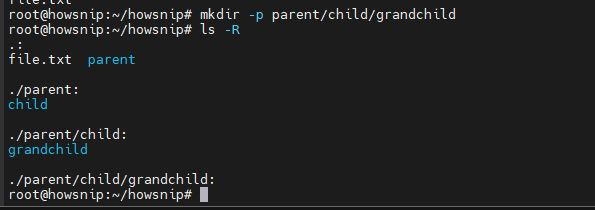
This is useful when preparing application folders or organizing project files.
g) Copy files and directories with `cp`
The `cp` command copies files from one location to another.
cp source.txt destination.txt
To copy a directory and its contents recursively:
cp -r project project_backup
Check the destination before copying so that you do not unintentionally overwrite important files.
h) Move or rename files with `mv`
The `mv` command moves files between directories or renames them.
Rename a file:
mv oldname.txt newname.txt
Move a file to another directory:
mv file.txt /path/to/destination/
Unlike copying, moving normally removes the original directory entry after the operation succeeds.
i) Remove files and directories with `rm`
The `rm` command deletes files. Use it carefully because recovery may be difficult or impossible.
Delete a file:
rm file.txt
Request confirmation before deleting a file:
rm -i file.txt
Remove a directory and its contents recursively:
rm -r folder
Force removal without interactive confirmation:
rm -rf folder
Warning: Never run `rm -rf` on a path you have not verified. Recursive deletion can remove large amounts of data, and the command does not provide a normal recycle-bin recovery mechanism.
3. Linux File Viewing and Search Commands
File viewing and search utilities are especially useful when inspecting configuration files, analyzing application errors, and investigating server logs.
a) Display file contents with `cat`
The `cat` command prints a file’s contents to the terminal.
cat file.txt
It is suitable for small files. For large files, use `less` or another paginated viewer to avoid flooding the terminal.
b) Read files page by page with `less`
The `less` command lets you navigate through a file without displaying everything at once.
less file.txt
Use the arrow keys or other navigation keys to move through the content, and press `q` to exit.
c) Display the first lines with `head`
The `head` command displays the first ten lines of a file by default.
head file.txt
To display the first 20 lines:
head -n 20 file.txt
This is useful when checking the beginning of configuration files or reviewing the format of a log.
d) Display the last lines with `tail`
The `tail` command displays the last ten lines of a file by default.
tail file.txt
To display the last 50 lines:
tail -n 50 file.txt
To follow new entries as they are written to an Nginx error log:
tail -f /var/log/nginx/error.log
Press `Ctrl + C` to stop following the file. The example assumes that the specified log exists and is accessible.
e) Search file contents with `grep`
The `grep` command searches for lines matching a specified text pattern.
grep "error" logfile.txt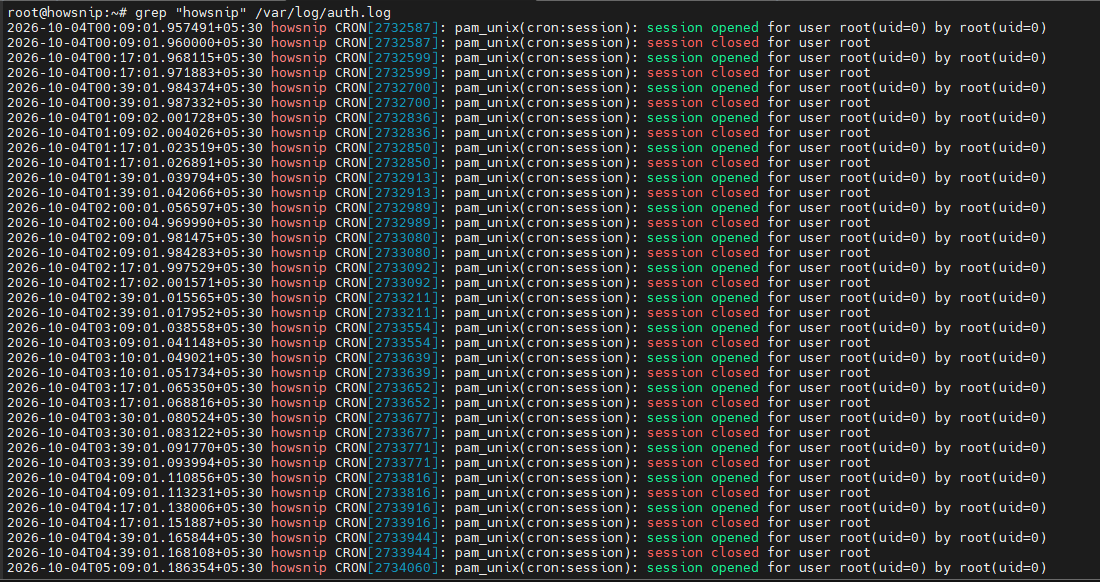
Perform a case-insensitive search:
grep -i "error" logfile.txt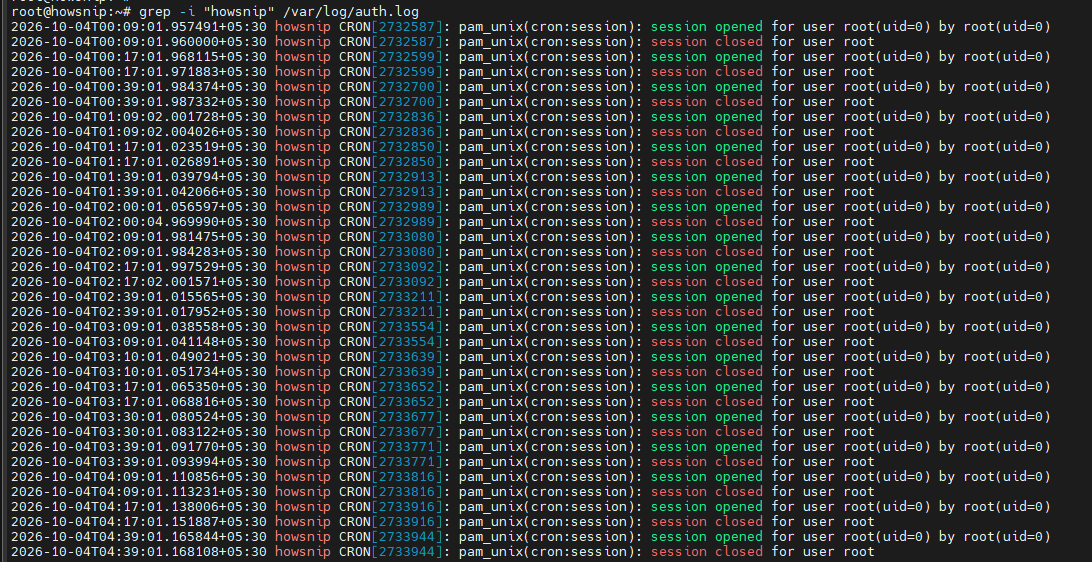
Search recursively through a project directory:
grep -R "howsnip" /var/log/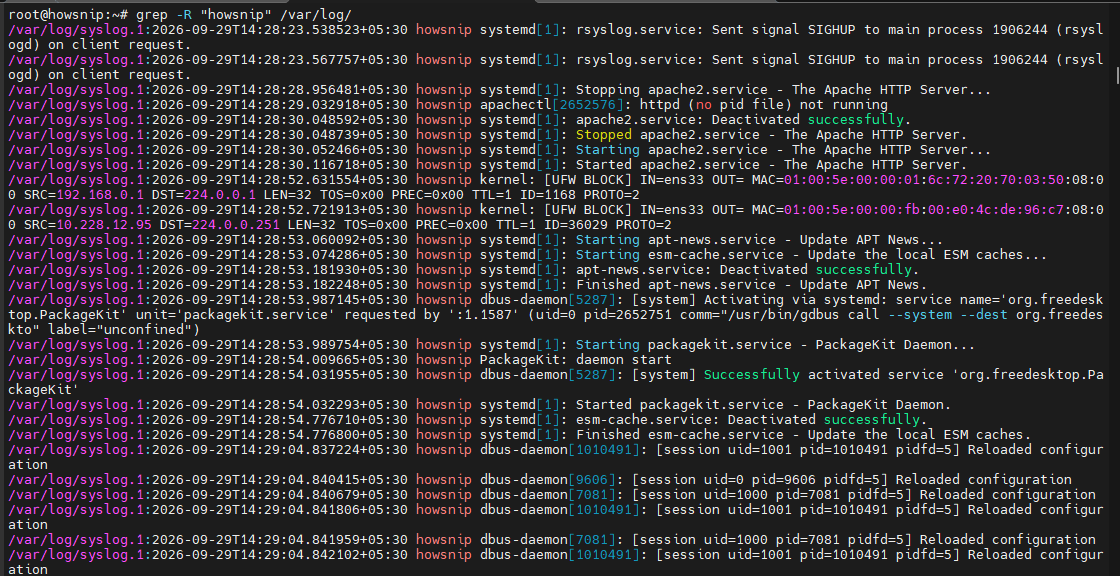
These commands are useful for locating error messages, configuration values, and unfinished tasks.
f) Find files with `find`
The `find` command searches for files and directories based on conditions such as name and type.
Find PHP files under `/var/www`:
find /var/www -name "*.php"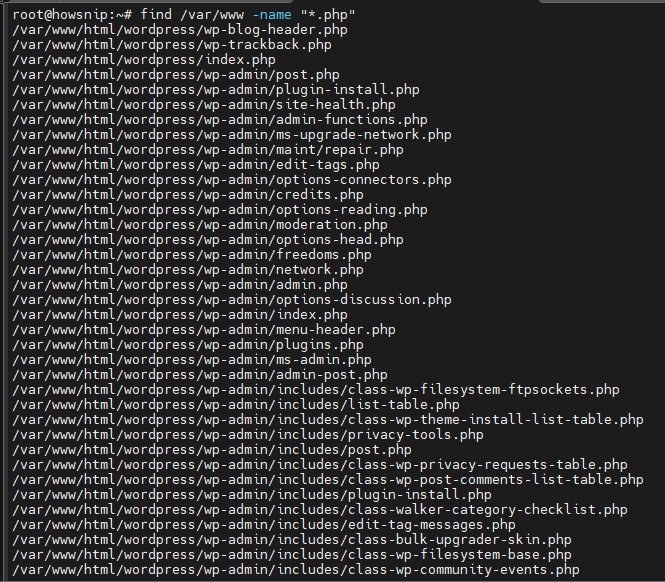
Find regular files larger than 100 MB under the current directory:
find . -type f -size +100M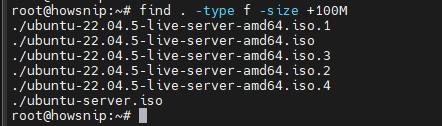
Find directories named `cache`:
find . -type d -name "cache"
The search begins at the path you specify and examines matching entries below that location.
g) Search using `plocate`
The `plocate` command searches an indexed database of file paths, which can make it faster than scanning a directory tree with `find`.
plocate elasticsearch.conf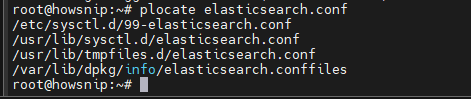
Results depend on the index and the permissions and paths represented in it. If the index is outdated, refresh it where supported:
sudo updatedb
The `updatedb` command and its availability depend on the installed locate implementation and system configuration.
Practical file-search examples
Find log files in the current directory and its subdirectories:
find . -name "*.log"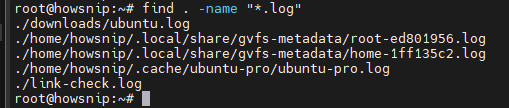
Search an Ubuntu authentication log for failed login messages:
grep -i "failed" /var/log/auth.log
Follow a specified application log in real time:
tail -f /var/log/application.logThe paths and message formats vary by application and Linux distribution. Use the actual log location for your system.
4. Linux Text Editors: Nano and Vim
Terminal-based text editors allow you to modify configuration files and scripts directly on a Linux system. Nano is generally easier for beginners, while Vim offers a more extensive keyboard-driven editing workflow.
a) Edit files with Nano
Open or create a text file:
nano filename.txt
Open an Nginx configuration file for editing:
nano /etc/nginx/nginx.confYou need appropriate permissions to edit protected system files. If required, use `sudo` and ensure that the file path is correct. Nano displays many of its shortcuts at the bottom of the screen. When a shortcut is shown using `^`, it represents the Ctrl key.
b) Edit files with Vim
Open a file in Vim:
vim filename.txt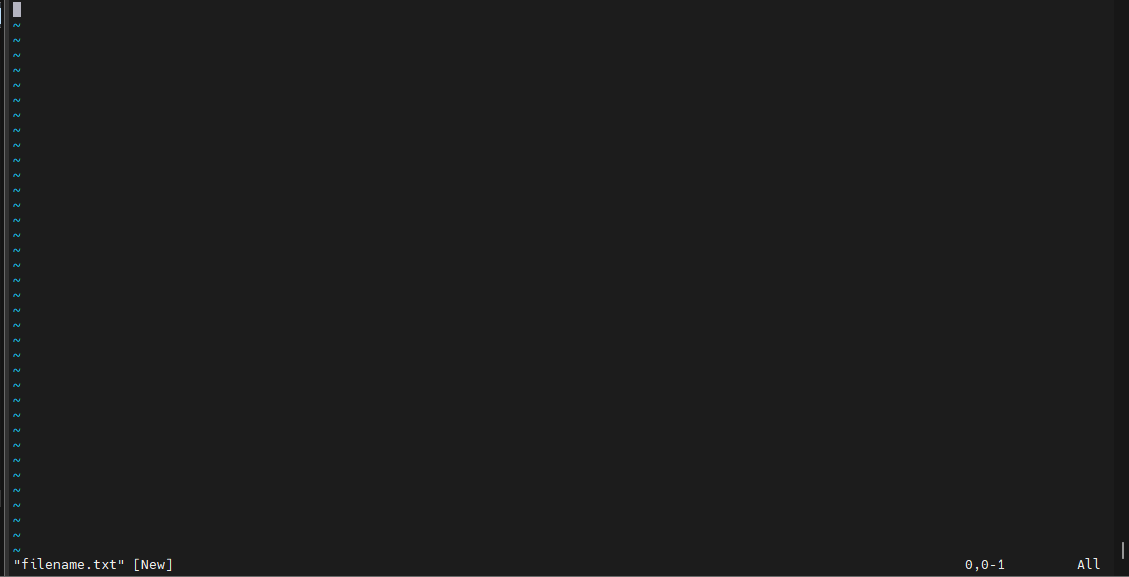
For example, open an SSH server configuration file:
sudo vim /etc/ssh/sshd_config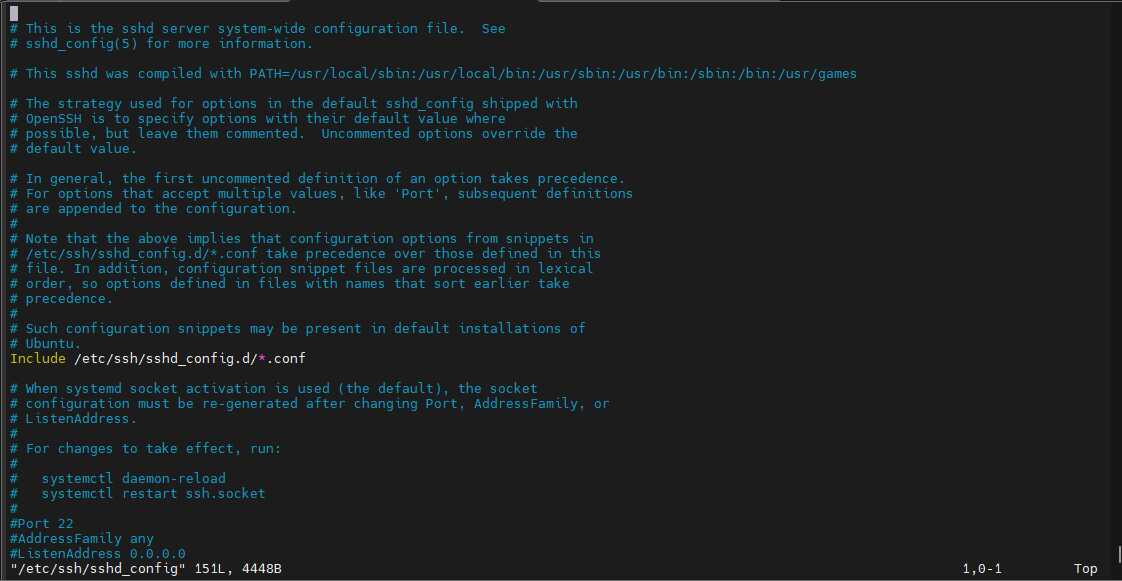
Vim has different modes, so beginners should understand the basic editing workflow.
- Press `i` to enter Insert Mode.
- Edit the text.
- Press `Esc` to return to Normal Mode.
- Enter one of the following commands to save or exit.
- :w – Save changes.
- :q – Quit if there are no unsaved changes.
- :wq – Save changes and quit.
- :q! – Quit without saving changes.
For example, type `:wq` and press Enter to save and exit.
Nano or Vim: Which should you choose?
Choose Nano if you want a straightforward editor with visible shortcuts. Choose Vim if you want to develop a keyboard-driven workflow for frequent terminal editing.
5. Linux Permissions and Ownership Commands
Linux permissions control who can read, write, or execute files and directories. Correct ownership and permissions are important for application functionality and server security.
a) Understand file permissions
Linux permissions are assigned to three categories:
- Owner: The user who owns the file.
- Group: Users associated with the file’s group.
- Others: All other users.
The permission symbols are:
- r – Read
- w – Write
- x – Execute or, for directories, access and traverse
For example:
-rwxr-xr--For a regular file, this represents read, write, and execute permissions for the owner; read and execute for the group; and read-only access for others.
b) Understand numeric permissions
The numeric representation uses the values 4 for read, 2 for write, and 1 for execute. Add the applicable values for each permission category.
- 7 `rwx` — read, write, execute
- 6 `rw-` — read and write
- 5 `r-x` — read and execute
- 4 `r–` — read only
- 3 `-wx` — write and execute
- 2 `-w-` — write only
- 1 `–x` — execute only
- 0 `—` — no permissions
For example, `755` means the owner has permissions `7`, while the group and others each have permissions `5`. The `644` setting gives the owner read and write access and gives the group and others read access.
c) Change permissions with `chmod`
Assign read and write permissions to the owner and read-only access to the group and others:
chmod 644 file.txt
Set typical executable-script permissions:
chmod 755 script.sh
These are common examples, not universal requirements. The correct permissions depend on the file’s purpose and security requirements.
d) Use symbolic permissions
Symbolic mode allows you to add or remove particular permissions.
Add execute permission for the owner:
chmod u+x script.sh
Remove write permission for others:
chmod o-w file.txt
Add group write permission recursively:
chmod -R g+w storage/
Use recursive permission changes carefully because they affect files and directories throughout the specified tree.
e) Change ownership with `chown`
The `chown` command changes the owner of a file or directory.
sudo chown username file.txt
Change ownership recursively:
sudo chown -R username directory/
Change both owner and group for a website directory:
sudo chown -R www-data:www-data /var/www/html
The `www-data` account is commonly used by web services on Debian-based systems. Confirm the actual service account before applying this example to your server.
f) Change group ownership with `chgrp`
The `chgrp` command changes the group associated with a file or directory.
sudo chgrp developers project.txt
Change group ownership recursively:
sudo chgrp -R developers project/
The target group must exist, and the command must be run with sufficient privileges.
g) Apply permissions to website files and directories
The following commands apply `644` to regular files and `755` to directories under `/var/www/html`:
find /var/www/html -type f -exec chmod 644 {} \;
find /var/www/html -type d -exec chmod 755 {} \;
These settings are common for ordinary website content, but they may not suit executable scripts, private files, upload directories, or applications that require more restrictive permissions.
Permission best practices
Avoid using `chmod 777` as a routine troubleshooting shortcut. It grants read, write, and execute permissions to everyone, potentially exposing files to unauthorized modification.
Before changing permissions recursively on a production server, verify the target directory, identify the required application permissions, and document the existing configuration.
6. Linux User Management Commands
User management commands allow administrators to create accounts, change passwords, manage group memberships, and remove accounts when access is no longer required.
a) Identify the current user with `whoami`
whoami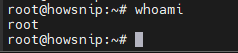
This prints the username associated with the current shell session.
b) Display user and group information with `id`
id
To inspect a specific account:
id username
The output includes the user ID, primary group, and supplementary group memberships.
Step 3: Change passwords with `passwd`
Change your own password:
passwd
Reset another user’s password when authorized:
sudo passwd username
Use a strong, unique password and follow your organization’s authentication policies.
d) Create a user account
Create a basic account:
sudo useradd username
Create an account with a home directory:
sudo useradd -m username
On Ubuntu and other systems that provide it, `adduser` offers an interactive alternative:
sudo adduser username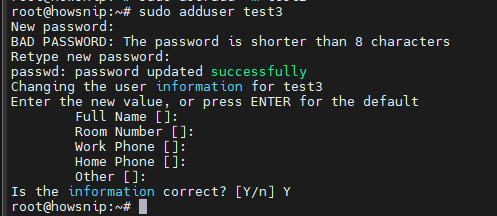
The exact account defaults and interactive prompts vary by distribution.
e) Add a user to a group
Use `usermod` to add an existing user to an additional group:
sudo usermod -aG groupname username
For example, to add a user to the `docker` group:
sudo usermod -aG docker usernameThe `-aG` combination appends the supplementary group instead of replacing the user’s existing supplementary group memberships.
Security note: Membership in the Docker group can provide root-equivalent control over many Docker hosts. Grant it only to trusted users.
f) Grant administrative privileges
On Ubuntu and Debian systems, add an authorized user to the `sudo` group:
sudo usermod -aG sudo usernameOn CentOS, Rocky Linux, and AlmaLinux systems, the administrative group is commonly `wheel`:
sudo usermod -aG wheel usernameAdministrative access should be granted only when required. The system’s sudo configuration must also permit the relevant group to use `sudo`.
g) Remove a user account
Delete the account while retaining its home directory and files:
sudo userdel username
Delete the account and its home directory:
sudo userdel -r usernameBefore removing an account, check for files, scheduled jobs, running processes, and services that may depend on it.
h) Switch users and review active sessions
Switch to another user:
su username
Start a root login shell, if permitted:
su -
Display logged-in users:
who
Display logged-in users and additional activity information:
w
Administrators often prefer `sudo` for individual privileged commands because it can provide better accountability than working in a root shell.
Common user administration workflow
Create a developer account on a system where `adduser` is available:
sudo adduser developer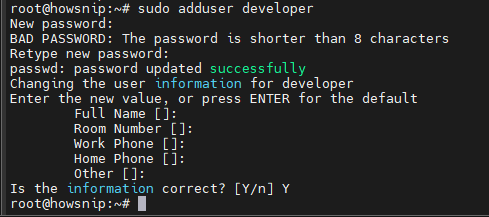
Grant administrative privileges if required:
sudo usermod -aG sudo developer
Verify the user’s groups:
id developerUse the appropriate administrative group and account-creation method for your distribution.
7. Linux System Information and Monitoring Commands
System monitoring commands help administrators review hardware details, memory usage, disk capacity, running processes, and system load. They are useful for diagnosing slow applications and identifying resource bottlenecks.
a) Display kernel and system information
Show detailed kernel and architecture information:
uname -a
Display the kernel release:
uname -r
These commands help verify kernel information when troubleshooting compatibility or system-level issues.
b) Review hostname and operating system details
Display hostname and system information on systems using systemd:
hostnamectl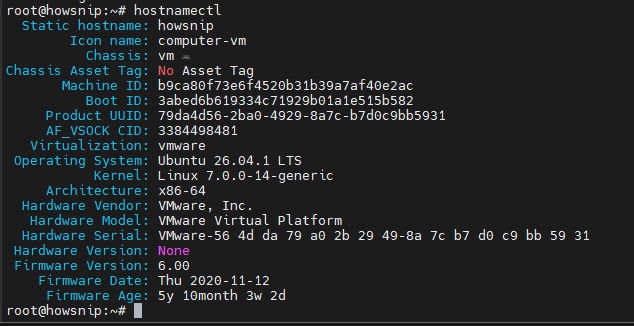
Read the distribution identification file:
cat /etc/os-release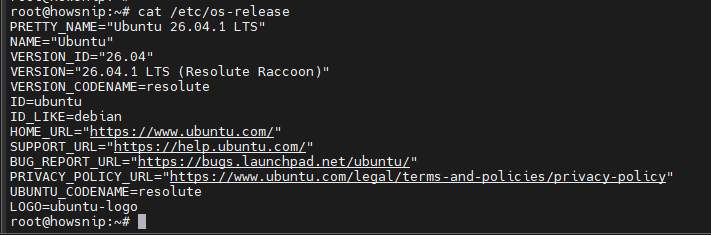
The second command is useful for identifying the Linux distribution and its release information.
c) Check system uptime
uptime
The output includes how long the system has been running, the number of logged-in users, and system load averages. Load averages represent runnable or uninterruptible tasks over time; their interpretation depends on the system’s CPU capacity and workload.
d) Monitor memory usage with `free`
free -h
The command reports memory and swap statistics in human-readable units. Review the available memory and overall usage rather than assuming that all memory shown as used is unavailable to applications, because Linux also uses memory for caching.
e) Check filesystem capacity with `df`
df -h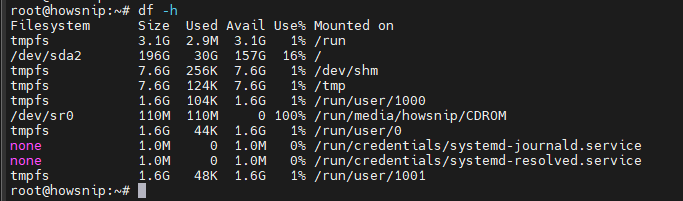
To include filesystem types:
df -ThThese commands help identify filesystems that are running low on available space.
f) Check directory sizes with `du`
Summarize the size of each entry in the current directory:
du -sh *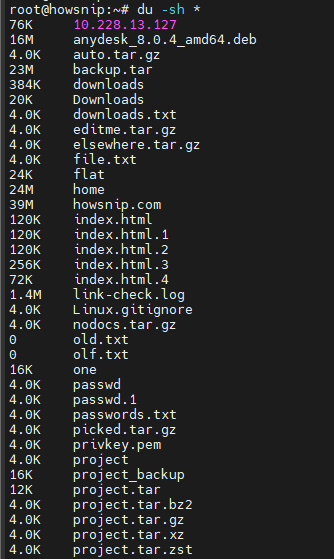
Check the size of a website directory:
du -sh /var/www
Use `du` when investigating which directories contribute most to storage consumption.
g) Review CPU information with `lscpu`
lscpu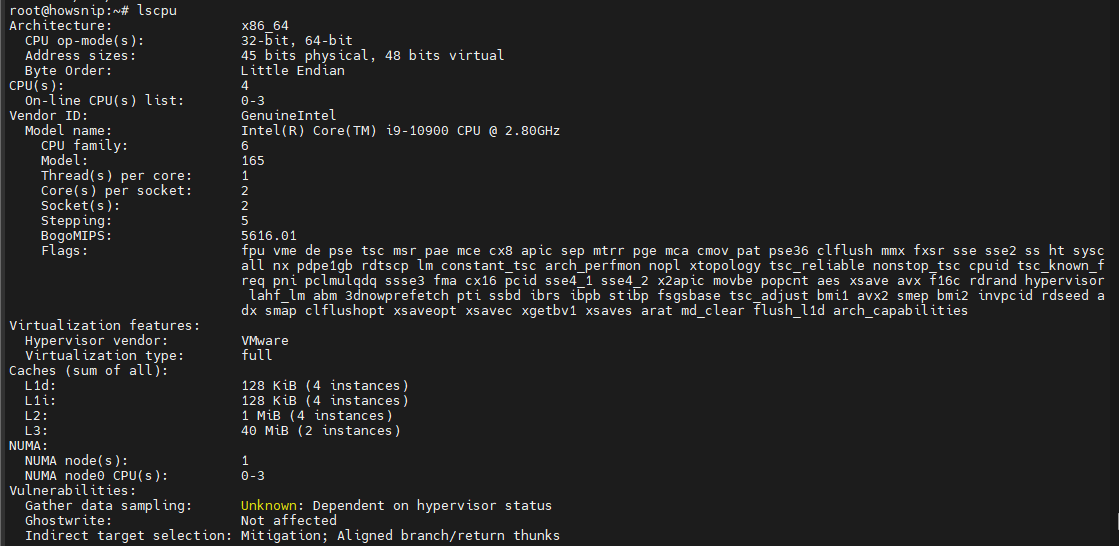
This displays processor architecture, CPU counts, core and thread information, and other details reported by the system.
h) List running processes with `ps`
Display a detailed list of processes:
ps aux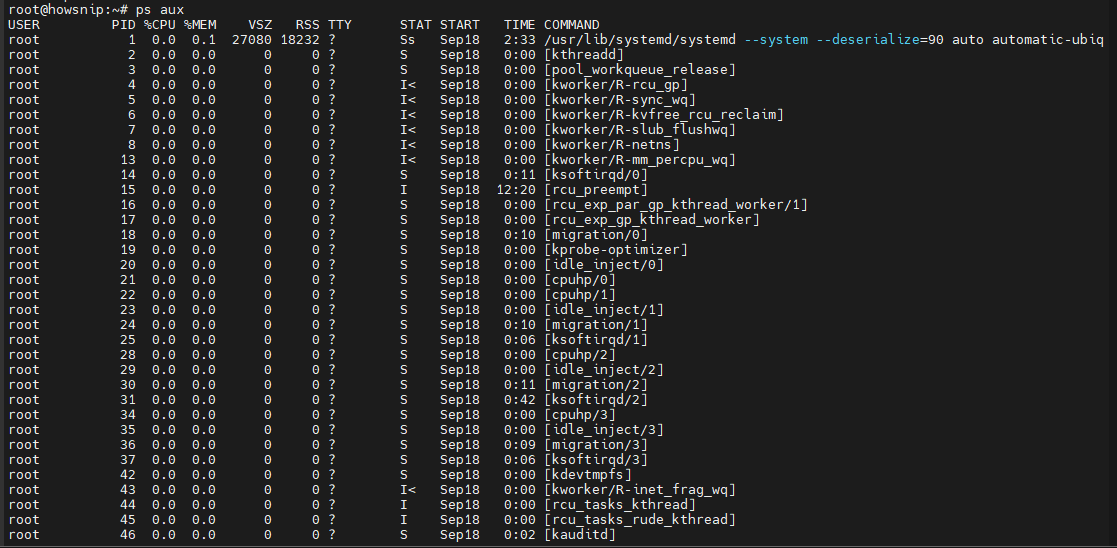
Search for processes matching Nginx:
ps aux | grep nginx
The search can also match the `grep` command itself. For targeted process-name searches, tools such as `pgrep` may be more convenient.
i) Monitor processes interactively
Start the `top` utility:
top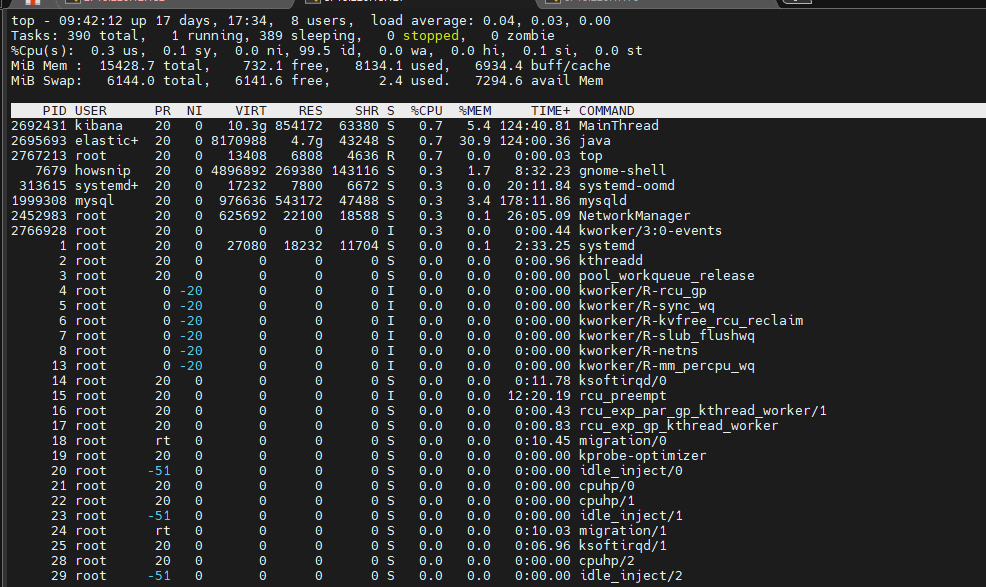
It displays process activity, CPU usage, memory usage, and system load. Press `q` to exit.
An alternative is `htop`:
htop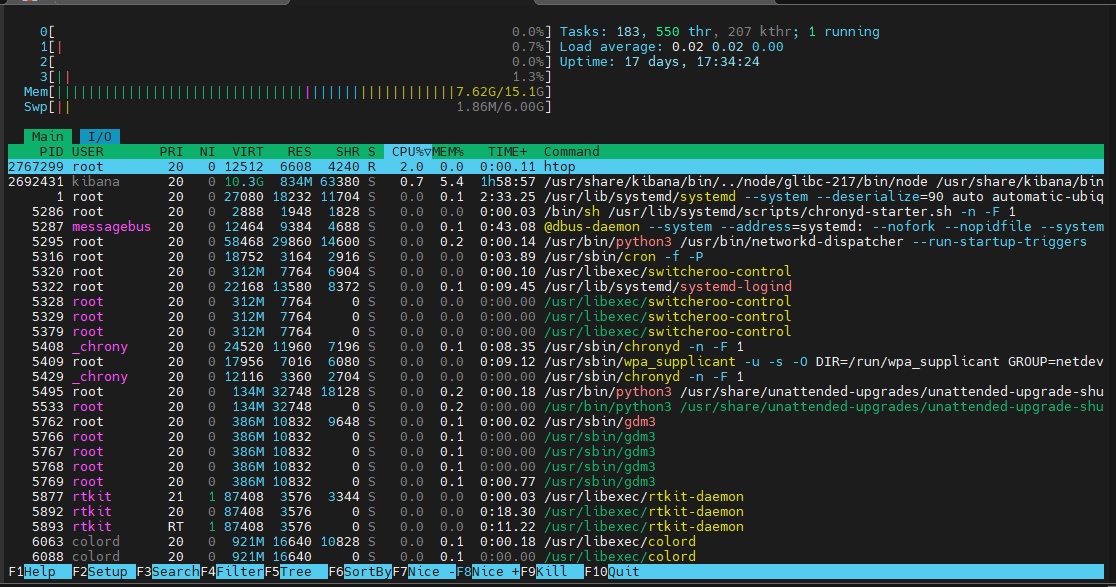
`htop` provides an interactive process view with additional navigation and process-management features. Install it through your package manager if it is not already available.
j) Observe system activity with `vmstat`
vmstat 2
This displays system statistics at two-second intervals, including process, memory, CPU, and input/output information. Review several updates to understand trends rather than relying on a single reading.
Practical monitoring examples
Check mounted filesystem capacity:
df -h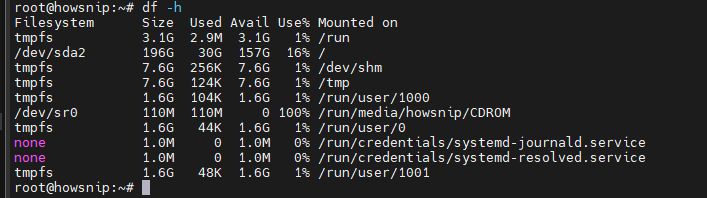
Review the sizes of directories under `/var/www`:
du -sh /var/www/*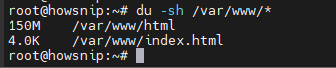
Check memory usage:
free -h
Inspect active processes:
ps auxRegular monitoring helps identify disk exhaustion, memory pressure, excessive CPU consumption, and unexpected processes before they affect services.
8. Linux Process Management Commands
Process management commands allow you to control running applications, manage background tasks, and maintain long-running operations during remote administration.
a) Terminate a process with `kill`
Identify the process ID (PID) using `ps` or `top`, then request termination:
kill PID
Replace `PID` with the actual numeric process ID.
Forcefully terminate a process when necessary:
kill -9 PID
The first command normally sends `SIGTERM`, allowing the process to shut down gracefully. The second sends `SIGKILL`, which cannot be caught or handled by the process.
Use forced termination only when a normal shutdown is insufficient.
b) Stop processes by name
Use `pkill` to send a signal to processes matching a name or pattern:
pkill nginx
Match a command line containing a particular application string:
pkill -f "python app.py"
The matching pattern can affect multiple processes, so verify the target before executing the command.
Another option is `killall`:
killall firefox
This can affect every matching process accessible to the caller. Confirm the process name and scope before use.
c) Run a command in the background
Append `&` to start a command as a background job in the current shell:
python app.py &
This returns control to the shell, but the process may still be associated with the terminal session and is not automatically configured as a persistent service.
d) Manage shell jobs
List background jobs associated with the current shell:
jobs
Bring job number 1 to the foreground:
fg %1
Resume job number 5 in the background:
bg %5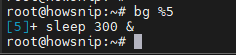
The job number must correspond to a job in the current shell session.
e) Keep a command running after logout with `nohup`
Run a command so it can continue after a terminal hangup:
nohup python app.py &
Output is normally redirected to `nohup.out` when standard output has not already been redirected.
`nohup` does not manage application restarts, dependencies, or service health. For production applications, a properly configured service manager is generally more suitable.
f) Manage persistent sessions with `screen`
Start a new Screen session:
screen
Detach using `Ctrl + A`, followed by `D`.
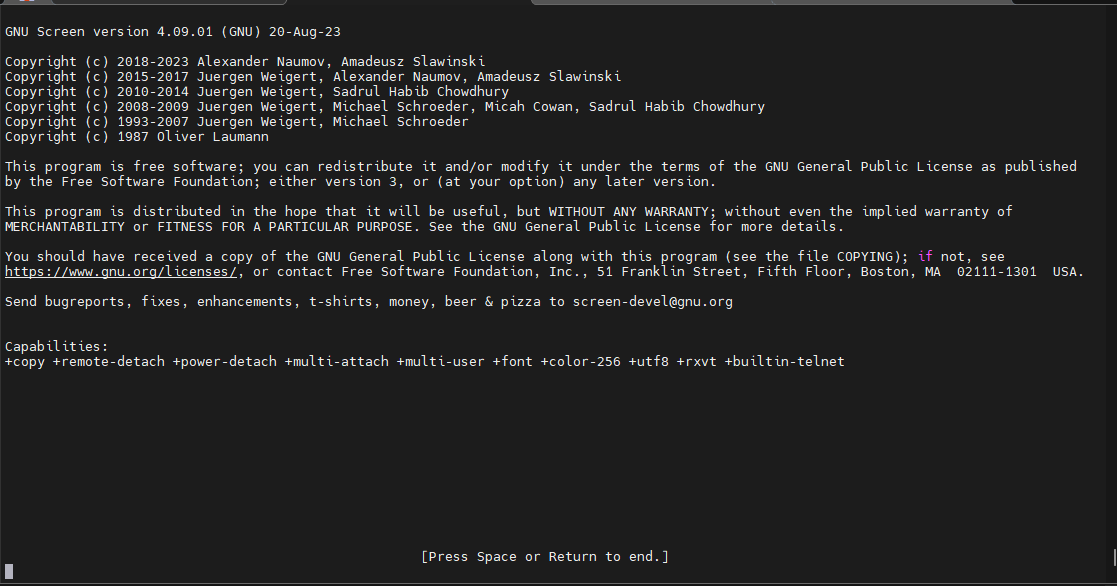
List sessions:
screen -ls
Reconnect to a session:
screen -r session_id
Screen is useful when you want terminal applications to continue running while you disconnect from SSH.
g) Manage terminal sessions with `tmux`
Start a tmux session:
tmux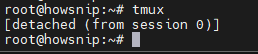
Detach using `Ctrl + B`, followed by `D`.
List sessions:
tmux ls
Reconnect to a named session:
tmux attach -t session_name
Both Screen and tmux help maintain interactive terminal sessions across SSH disconnections. Install the relevant utility if it is not already available.
9. Linux Networking and Remote Access Commands
Networking utilities help verify IP configuration, test connectivity, inspect listening ports, troubleshoot DNS, and transfer files securely between systems.
a) Display IP addresses with `ip`
Show network interfaces and their assigned addresses:
ip a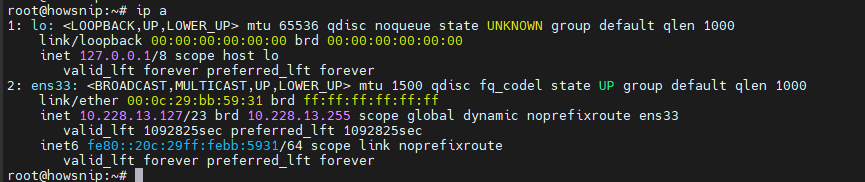
Review the output to confirm interface names, IP addresses, and interface state.
b) View routing information
ip route
This displays the routing table, including routes used to reach other networks and the configured default route when present.
c) Test connectivity with `ping`
Send four ICMP echo requests to an IP address:
ping -c 4 8.8.8.8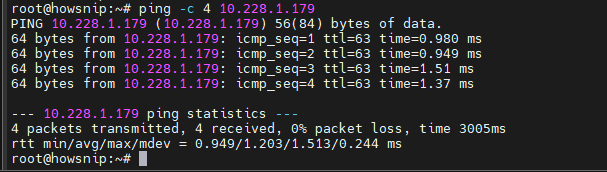
Test a domain name:
ping -c 4 google.com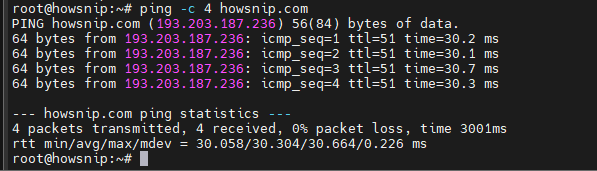
The first example tests IP-level reachability to the specified host. The second also depends on successful name resolution. A failed ping does not necessarily mean that a service is unavailable because ICMP traffic may be filtered.
d) Trace a network path with `traceroute`
traceroute google.com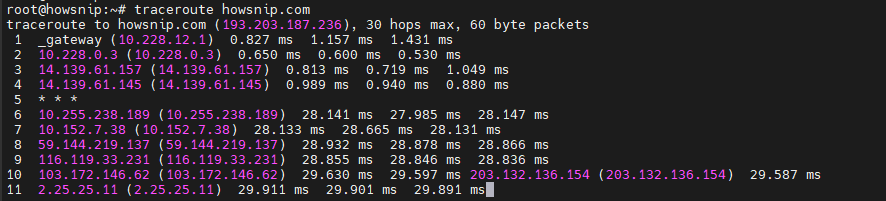
This attempts to display intermediate network hops toward the destination. Some routers may not respond, and the tool may need to be installed separately.
e) Inspect listening ports with `ss`
Display listening TCP and UDP sockets:
ss -tuln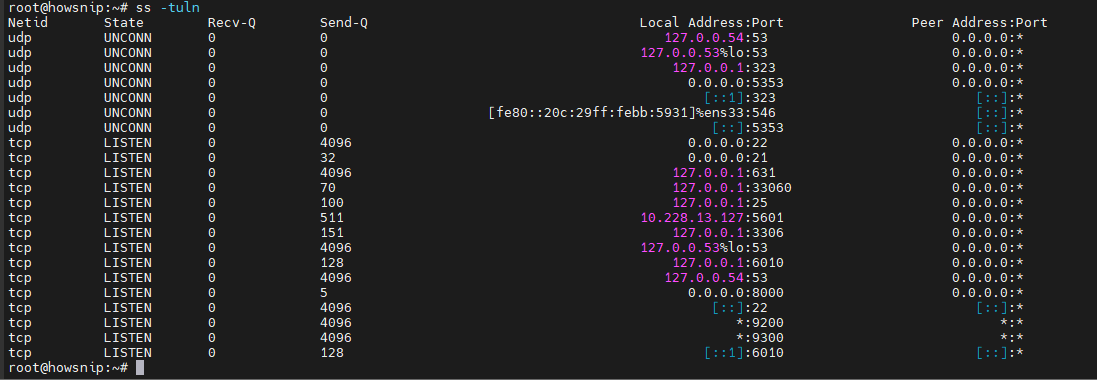
Display additional socket details, including process information where permissions permit:
sudo ss -tulpen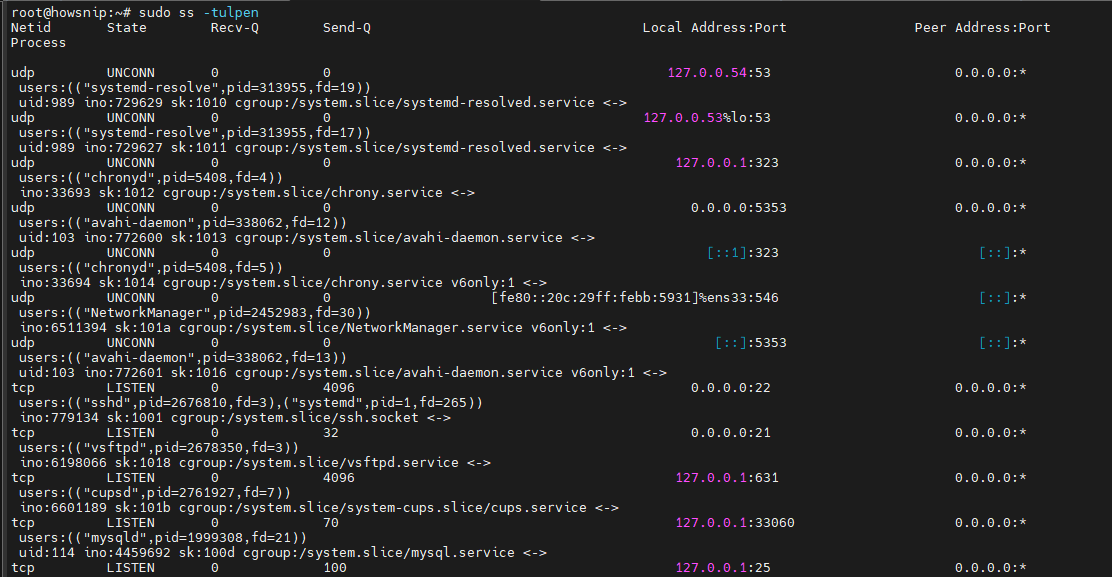
This is useful for identifying services listening on local interfaces and investigating unexpected open ports.
On systems where it is installed, `netstat` provides similar functionality:
netstat -tulnp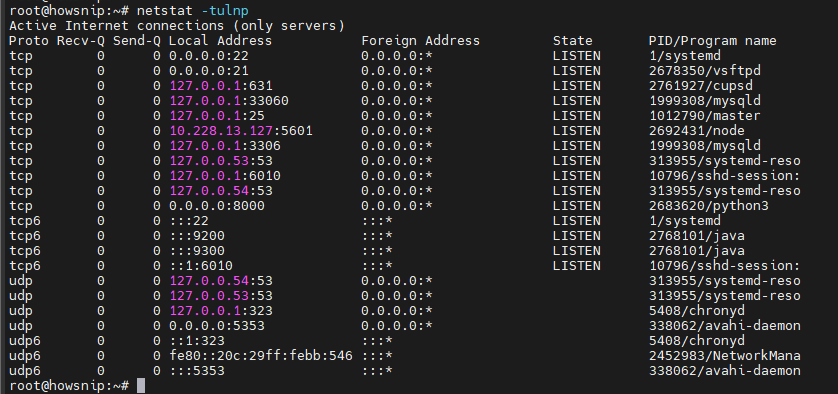
The `ss` utility is generally preferred on modern Linux distributions.
f) Test HTTP and HTTPS endpoints with `curl`
Retrieve response headers:
curl -I https://example.com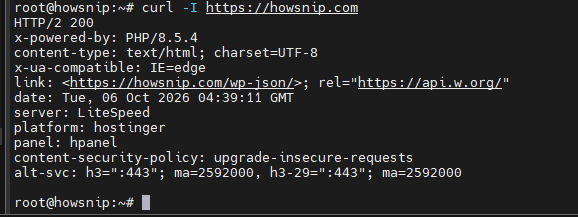
Display the response body:
curl https://howsnip.com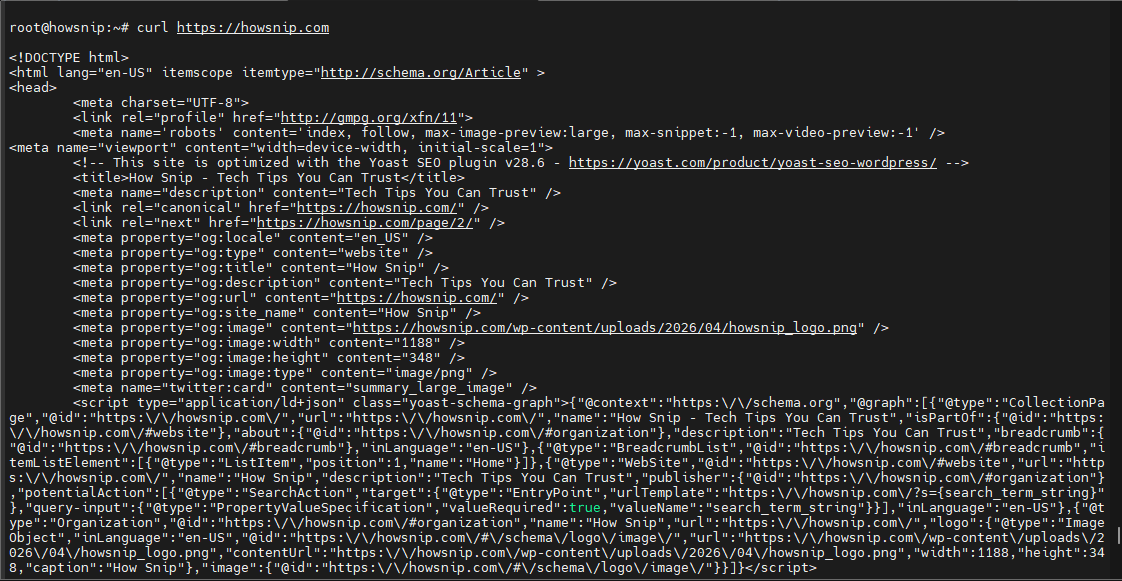
These commands help check web endpoints, inspect HTTP responses, and troubleshoot API connectivity.
g) Download files with `wget`
Download a file:
wget https://example.com/file.zip
Save the download under a specified filename:
wget -O backup.zip https://example.com/file.zip
Use trusted download sources and verify downloaded files before executing or installing them.
h) Query DNS with `dig`
Query DNS records for a domain:
dig example.com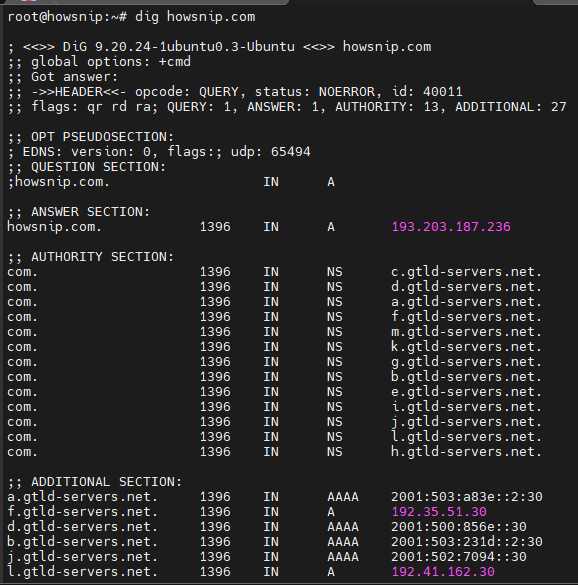
Display a concise answer:
dig example.com +short
`dig` is useful for investigating DNS responses. A successful lookup does not by itself confirm that the destination website or application is operational.
i) Query DNS with `nslookup`
nslookup example.com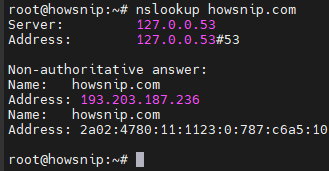
This provides another way to check name resolution and inspect the DNS server’s response.
j) Connect to a server using SSH
ssh username@server-ip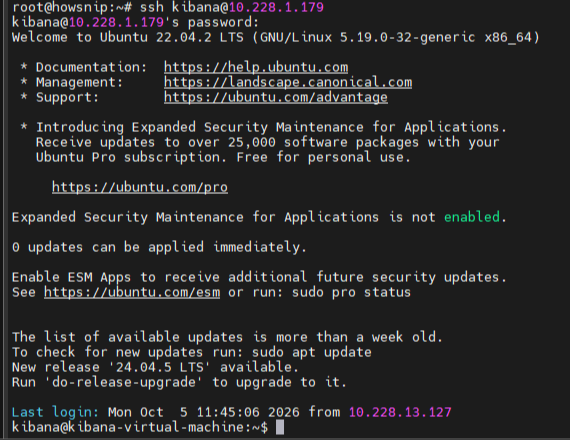
Use an identity file for SSH key authentication:
ssh -i ~/.ssh/id_ed25519 username@server-ip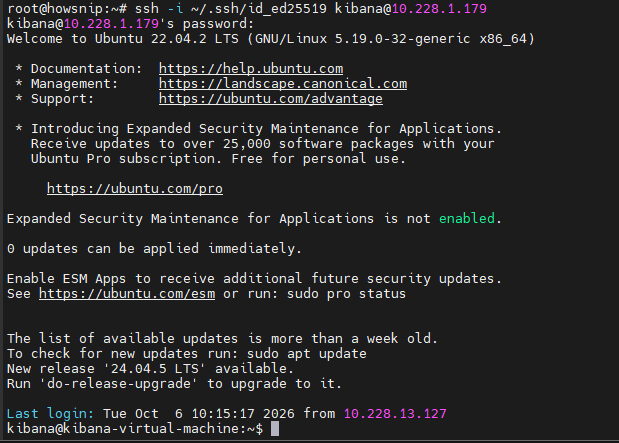
Replace the username and server address with the correct values. Keep private SSH keys protected and never share them with untrusted parties.
k) Generate an SSH key pair
ssh-keygen -t ed25519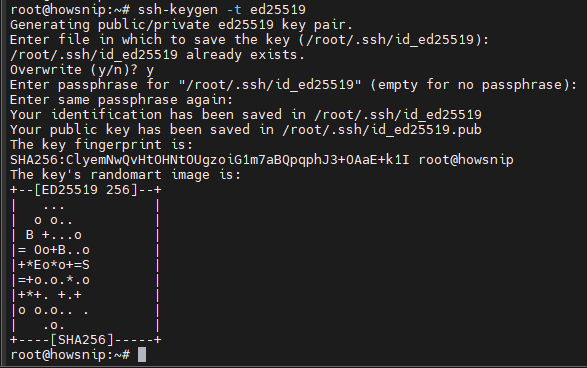
This generates an Ed25519 SSH key pair. Follow the prompts to select the key location and optionally protect the private key with a passphrase. Generating a key does not automatically install the public key on a remote server; the server must be configured to accept it.
l) Transfer files using `scp`
Upload a file:
scp backup.zip username@server-ip:/var/www/
Copy a directory recursively:
scp -r project/ username@server-ip:/var/www/project/
SCP transfers data through SSH. Confirm the destination path and permissions before transferring important files.
m) Transfer files interactively with `sftp`
Connect to the remote server:
sftp username@server-ip
SFTP is useful for interactive file transfers without needing to construct a separate command for every file.
n) Synchronize files with `rsync`
Synchronize local directories:
rsync -av source/ destination/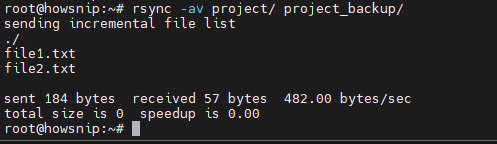
Synchronize a local project directory with a remote server:
rsync -avz project/ username@server-ip:/var/www/project/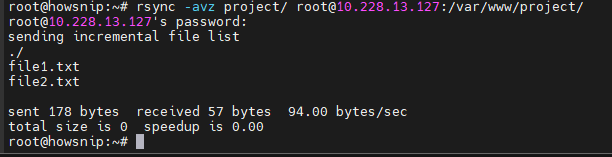
The trailing slash in `source/` means that the contents of the source directory are synchronized into the destination. Without it, the directory itself may be created inside the destination.
Review the destination and synchronization options carefully. For a safer preview of many transfers, use `rsync` with its `–dry-run` option before applying changes.
Practical networking examples
Check connectivity:
ping -c 4 8.8.8.8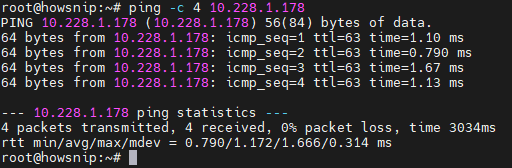
Check listening sockets associated with port 80:
sudo ss -tulpen | grep :80
Upload website files:
scp -r website/ username@server-ip:/var/www/html/
Synchronize project changes:
rsync -avz project/ username@server-ip:/var/www/project/
10. Linux Package Management Commands
Package managers install, update, search, and remove software while handling package dependencies. The commands depend on the Linux distribution.
a) Update package information on Debian and Ubuntu
sudo apt update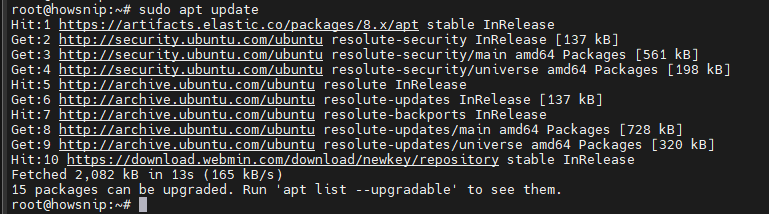
This refreshes package information from configured repositories. It does not itself upgrade all installed software.
Upgrade installed packages:
sudo apt upgrade -y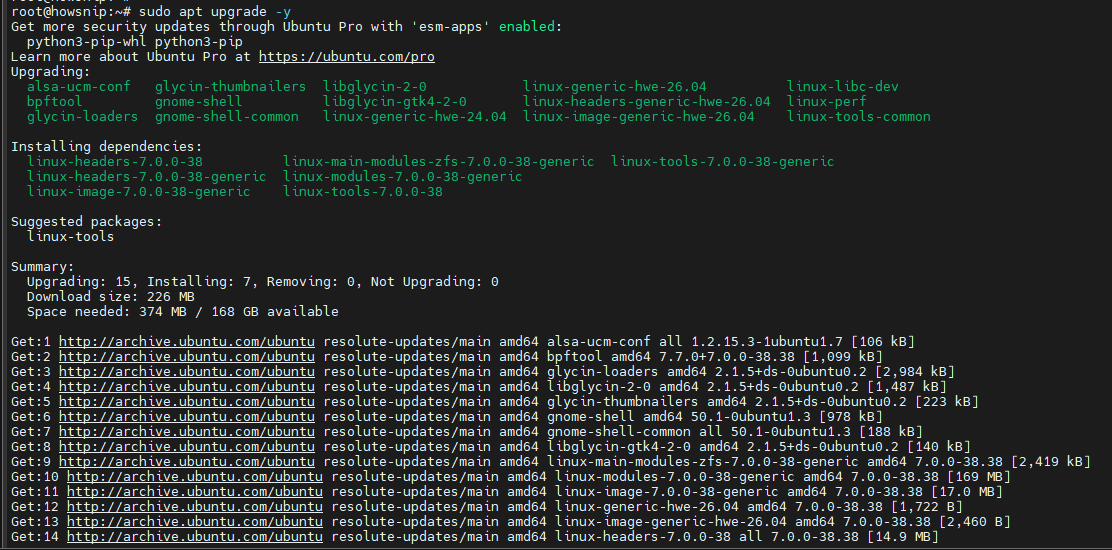
The `-y` option automatically answers yes to confirmation prompts. Review the proposed changes before using it on production systems.
b) Install and remove packages with `apt`
Install Nginx:
sudo apt install nginx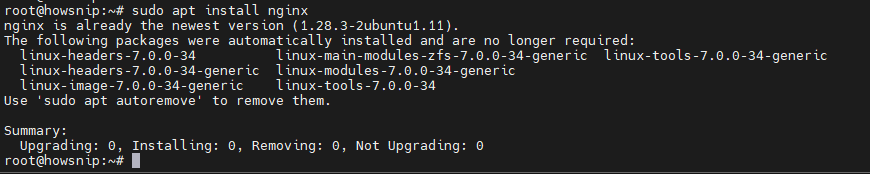
Remove a package while retaining its configuration files where supported:
sudo apt remove package-name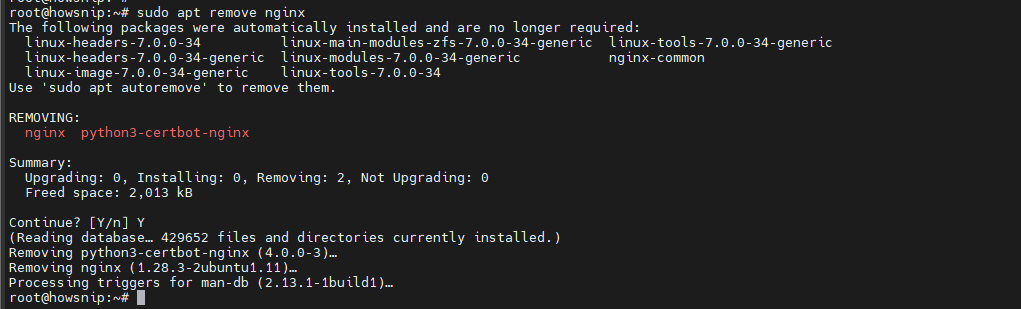
Remove the package and its associated configuration files managed by the package manager:
sudo apt purge package-name
Review package dependencies and application requirements before removing software from a production server.
c) Search and inspect packages
Search for an available package:
apt search nginx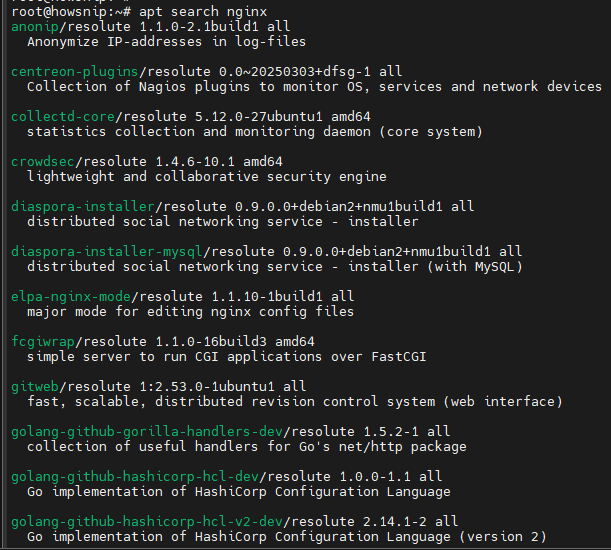
Display package information:
apt show package-name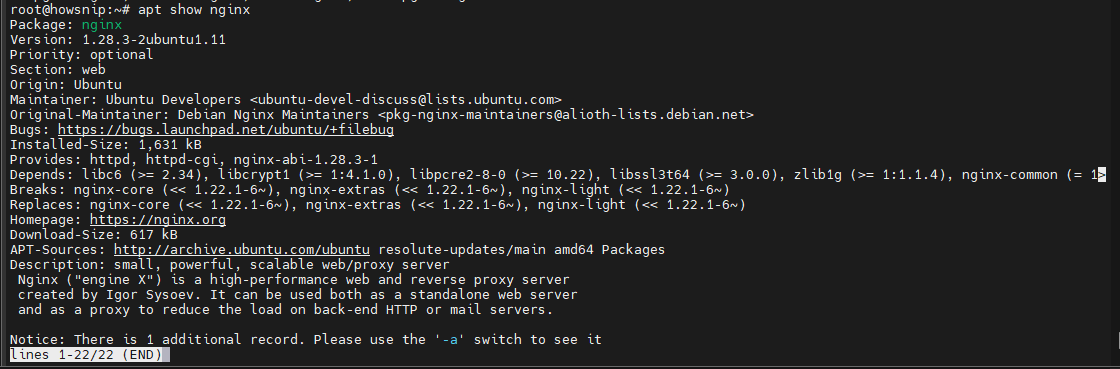
Remove automatically installed packages that are no longer needed:
sudo apt autoremove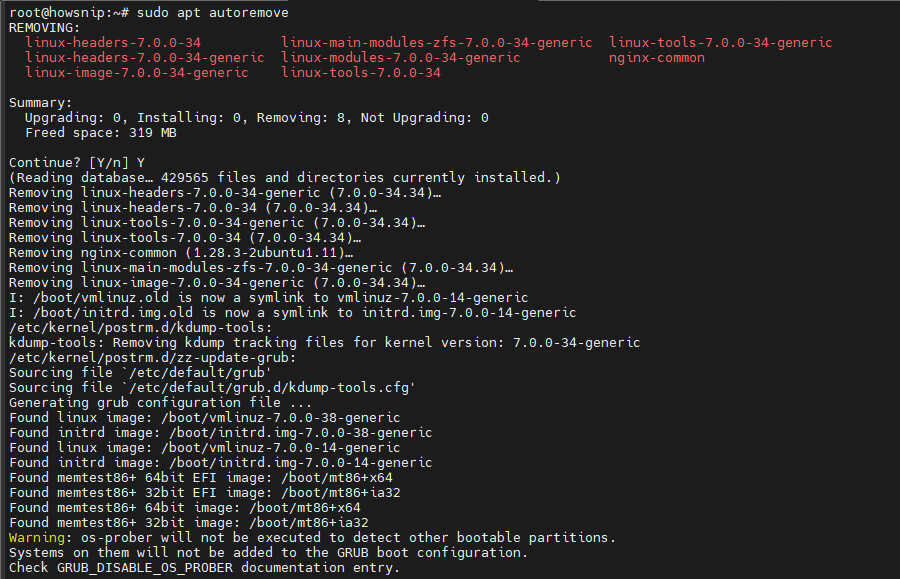
Review the list of packages proposed for removal before confirming the operation.
d) Manage packages with `dnf`
On systems such as Rocky Linux, AlmaLinux, and current Fedora-based distributions, `dnf` is commonly used for package management.
Update installed packages:
sudo dnf update -yInstall Nginx:
sudo dnf install nginxRemove a package:
sudo dnf remove package-nameInspect package details:
dnf info package-nameSearch configured repositories:
dnf search nginxClear cached package data:
sudo dnf clean allThe exact package availability depends on the enabled repositories and distribution.
e) Use `yum` on older systems
Some older CentOS installations use `yum`.
Update installed packages:
sudo yum update -yInstall a package:
sudo yum install nginxThe appropriate package manager depends on the operating system release. Check the system documentation if you are unsure.
f) Verify installed packages
On Debian-based systems:
dpkg -l | grep nginxOn RPM-based systems:
rpm -qa | grep nginxThese commands help verify package installation and maintain a basic software inventory.
Common package management workflows
Update and upgrade packages on Debian or Ubuntu:
sudo apt update && sudo apt upgrade -y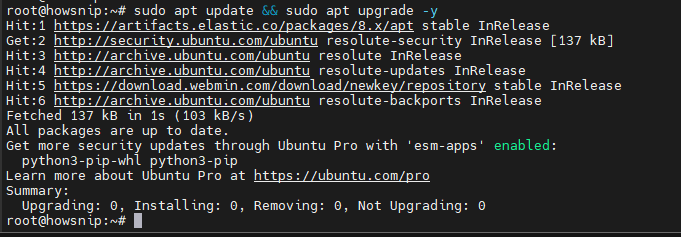
Install Nginx on a Debian-based system:
sudo apt install nginx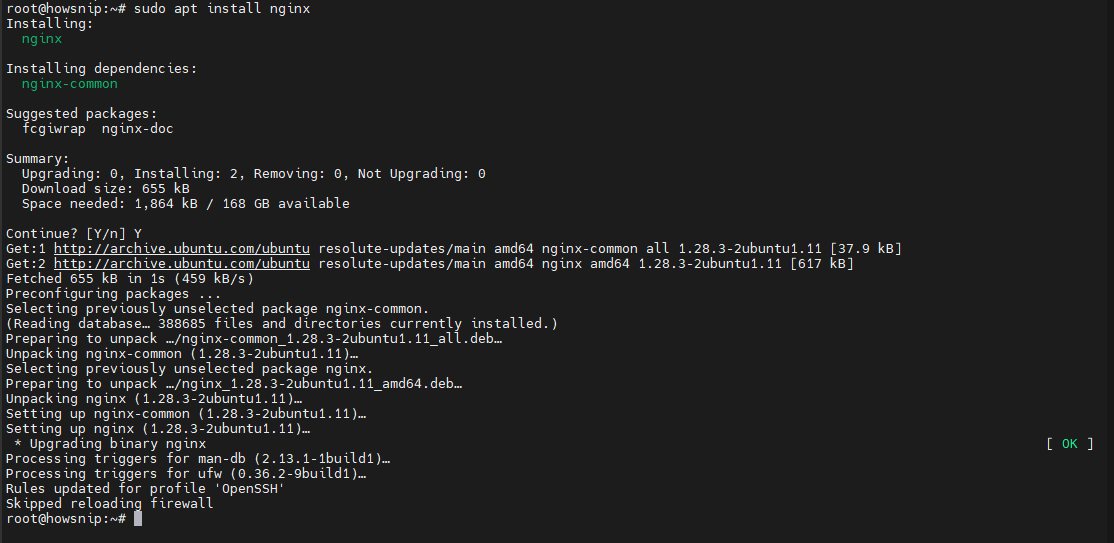
Update packages on a compatible DNF-based system:
sudo dnf update -yRemove unused dependencies on Debian-based systems:
sudo apt autoremoveBest practice: Apply security updates regularly, use trusted repositories, and test significant package upgrades before deploying them to critical production systems.
11. Linux Service Management and Log Commands
Services run background components such as web servers, databases, and system utilities. Logs record events and errors that help administrators determine why a service is failing or behaving unexpectedly.
a) Check service status with `systemctl`
sudo systemctl status nginx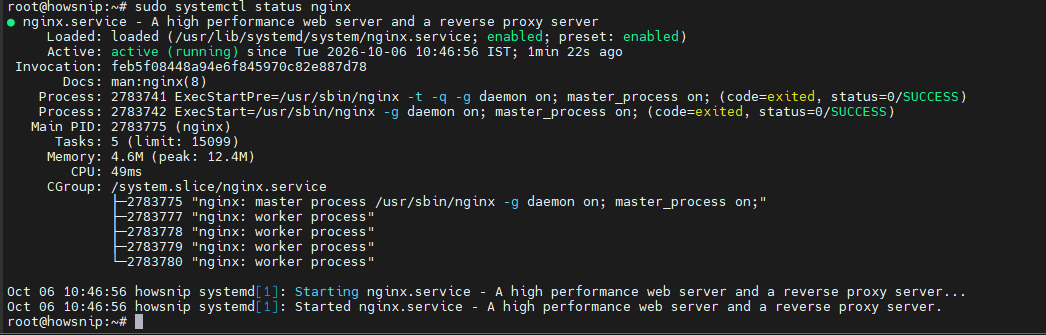
This displays the service’s state and relevant status information. The example assumes Nginx is installed and managed through systemd.
b) Start, stop, and restart services
Start a service:
sudo systemctl start nginxStop a service:
sudo systemctl stop nginxRestart a service:
sudo systemctl restart nginxA restart may interrupt existing connections, so use it with care on production systems.
c) Reload service configuration
sudo systemctl reload nginxReloading asks the service to reload its configuration without a full restart, when supported. Not all services implement reload behavior. Before applying a web server configuration change, validate the configuration using the appropriate application-specific test command.
d) Configure services to start at boot
Enable automatic startup:
sudo systemctl enable nginxDisable automatic startup:
sudo systemctl disable nginxList active service units:
systemctl list-units --type=service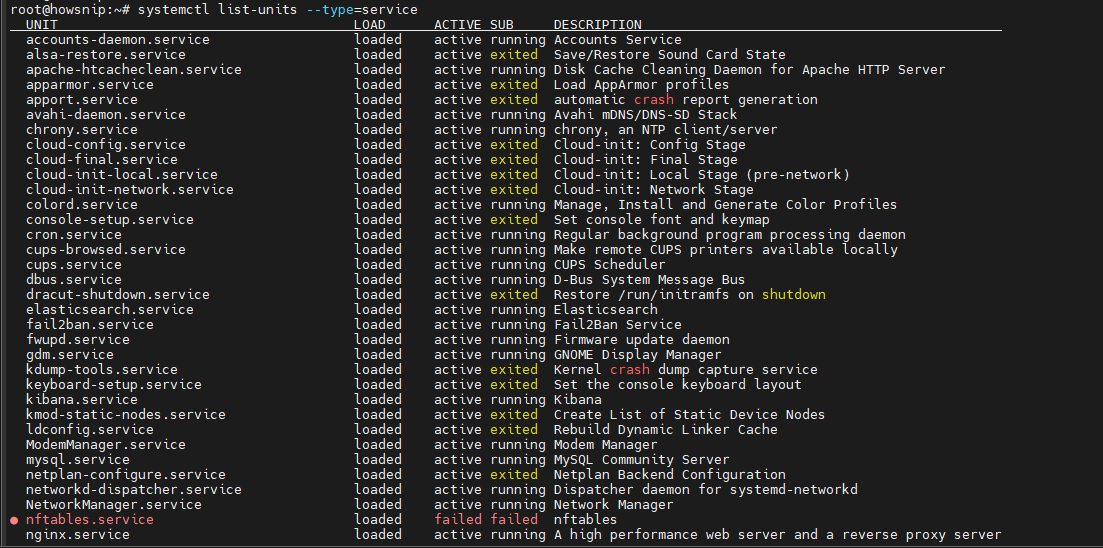
Enabling a service configures its startup behavior; it does not necessarily start it immediately.
e) Manage services on older systems
Some older Linux distributions use the `service` command.
Check a service:
sudo service nginx statusRestart it:
sudo service nginx restartUse the service management method supported by the operating system.
f) View systemd logs with `journalctl`
Display available journal entries:
journalctl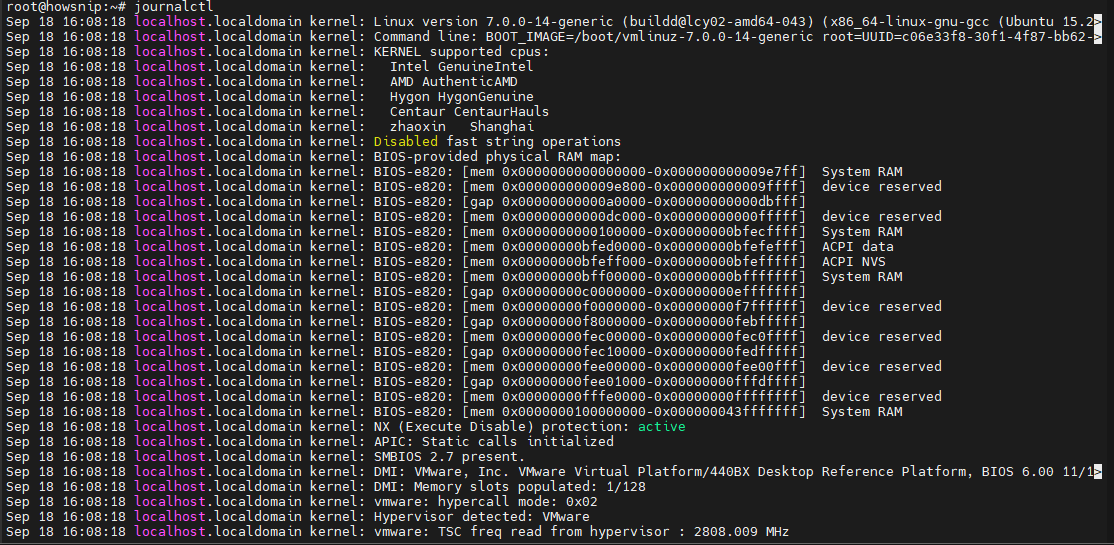
View logs for Nginx:
journalctl -u nginx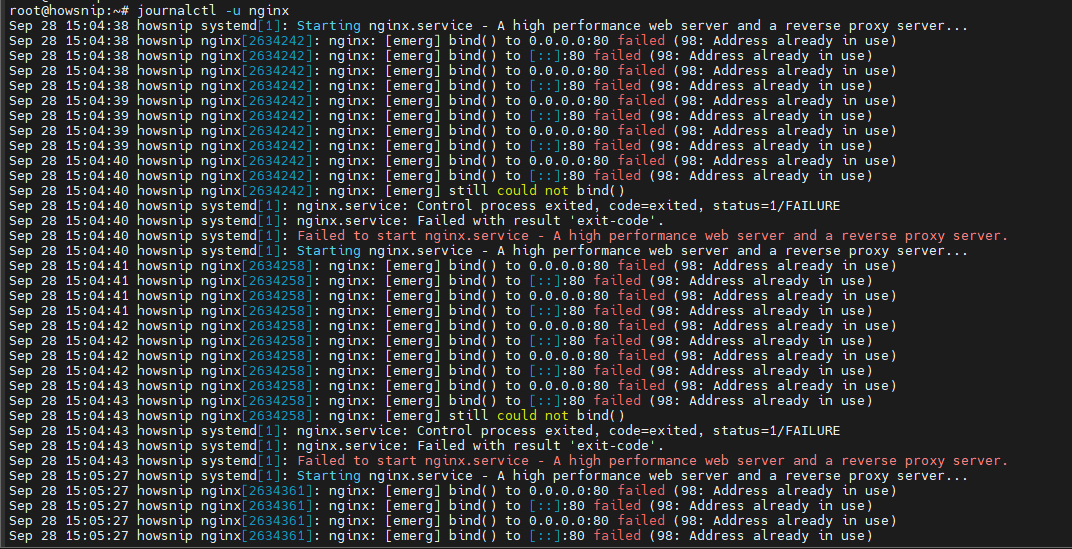
Review the last hour of Nginx logs:
journalctl -u nginx --since "1 hour ago"
Display recent journal messages with additional diagnostic context:
journalctl -xe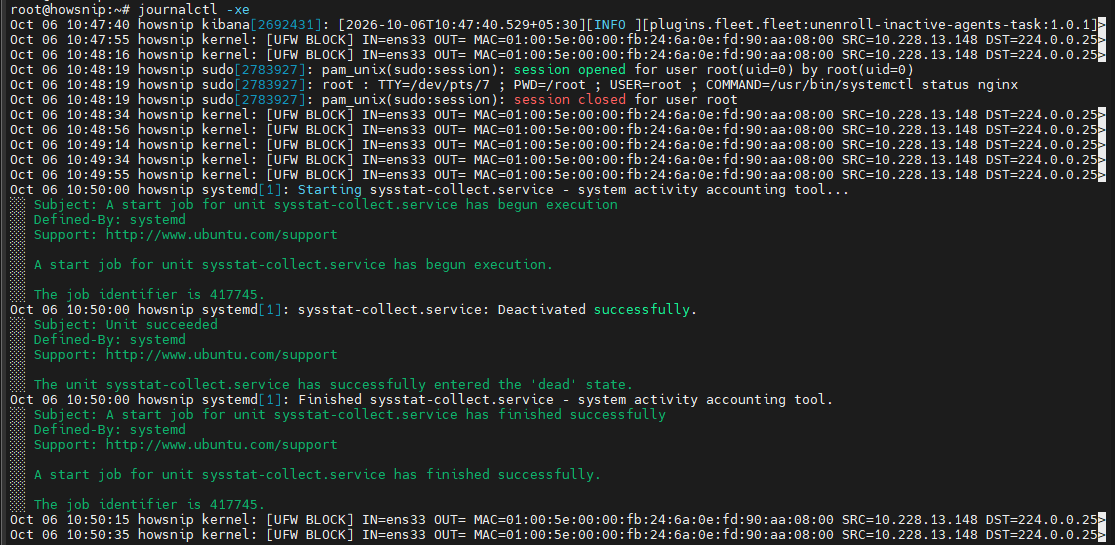
Follow new journal entries in real time:
journalctl -f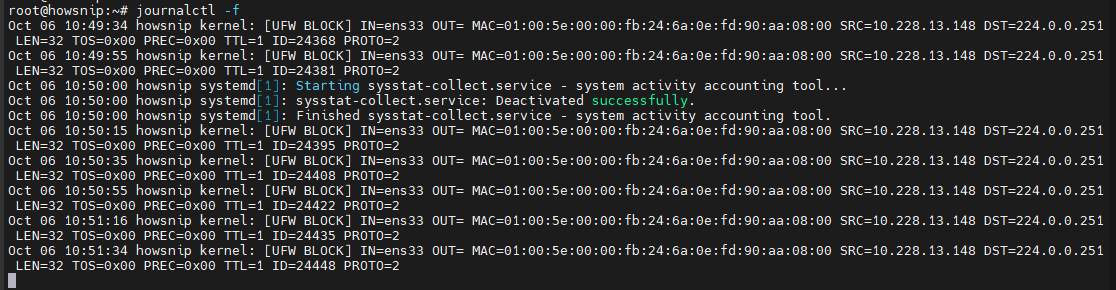
Journal availability and the amount of retained history depend on the system’s logging configuration and permissions.
g) Inspect application log files with `tail`
Review recent Nginx errors:
tail /var/log/nginx/error.log
Display the last 50 lines:
tail -n 50 /var/log/nginx/error.log
Follow new error entries:
tail -f /var/log/nginx/error.log
On many Debian and Ubuntu systems, general system logs may be available at:
tail -f /var/log/syslog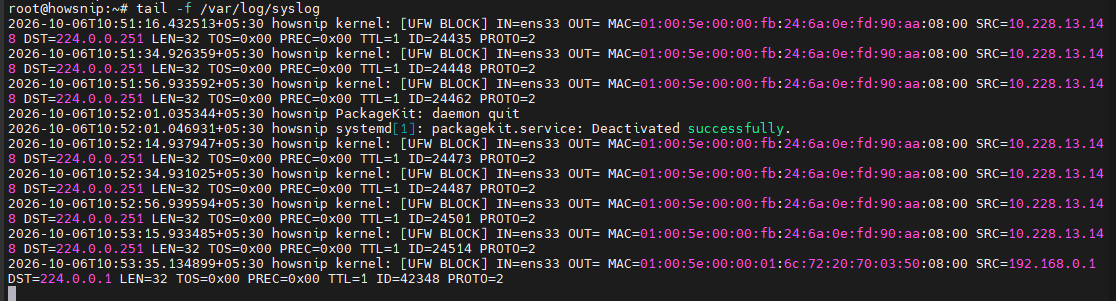
On many RHEL-based systems, general system logs may be available at:
tail -f /var/log/messagesThese files may not exist or may not contain all system events on every installation. Check the logging configuration for your distribution.
Practical service troubleshooting workflow
Check the service status:
sudo systemctl status nginxReview recent logs:
journalctl -u nginx --since "30 minutes ago"
Follow the Nginx error log while testing the website:
tail -f /var/log/nginx/error.logRestart the service only if required and appropriate for the issue:
sudo systemctl restart nginxAlways verify the service status after a restart and investigate any reported errors.
12. Linux Archive and Compression Commands
Archive and compression tools help combine files, reduce storage requirements, and prepare data for backups or transfers. The `tar`, `zip`, `gzip`, and `bzip2` utilities serve different purposes.
a) Create a TAR archive
Create an uncompressed archive:
tar -cf archive.tar /path/to/directory
The command packages the directory contents into an archive without compression.
b) Create compressed TAR archives
Create a Gzip-compressed archive:
tar -czf websiet_backup.tar.gz /var/www/html
Create a Bzip2-compressed archive:
tar -cjf backup.tar.bz2 /var/www/html
Gzip and Bzip2 use different compression algorithms. The resulting size and processing time depend on the data being archived.
c) Extract TAR archives
Extract a standard TAR archive:
tar -xf archive.tar
Extract a Gzip-compressed archive:
tar -xzf backup.tar.gz
Extract a Bzip2-compressed archive:
tar -xjf backup.tar.bz2
Extract a compressed archive into a specified directory:
tar -xzf backup.tar.gz -C /target/directory
Ensure the destination directory exists and is appropriate for the files being restored.
d) List archive contents
List the files in a TAR archive without extracting them:
tar -tf archive.tar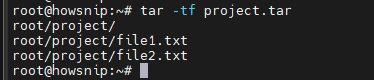
List the contents of a Gzip-compressed TAR archive:
tar -tzf backup.tar.gz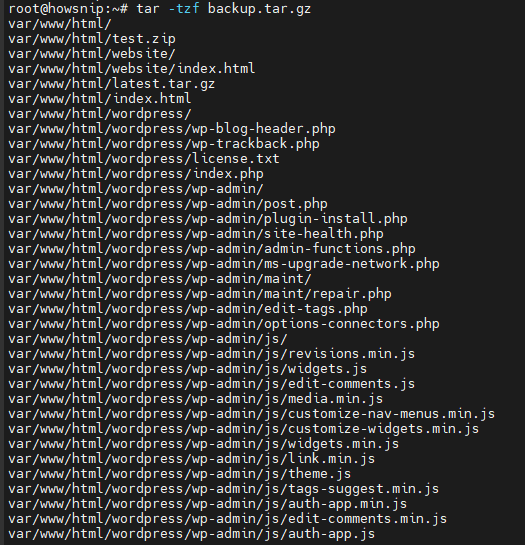
Inspect the contents before extraction, particularly when working with archives from untrusted sources.
e) Create and extract ZIP archives
Create a ZIP archive containing a directory and its contents:
zip -r file.zip /path/to/directory
Create an archive containing individual files:
zip documents.zip file1.txt file2.txt
Extract a ZIP archive:
unzip backup.zip
Extract into a particular directory:
unzip backup.zip -d /restore/location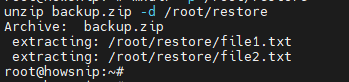
The `zip` and `unzip` utilities may need to be installed separately.
f) Compress individual files with Gzip
Compress a file:
gzip logfile.log
By default, Gzip replaces the input file with a compressed `.gz` file.
Decompress it:
gunzip logfile.log.gz
g) Compress individual files with Bzip2
Compress a file:
bzip2 report.txt
Decompress it:
bunzip2 report.txt.bz2
Bzip2 may achieve different compression ratios and speeds than Gzip, depending on the input data.
Common backup operations
Create a compressed website archive:
tar -czf backup.tar.gz /var/www/html
Extract the archive under `/var/www`:
tar -xzf website_backup.tar.gz -C /var/www/
Create a ZIP archive of a project:
zip -r project_backup.zip project/
Extract a downloaded ZIP package:
unzip software_package.zip
These commands help prepare backups and distribute files, but creating an archive alone does not guarantee that the backup is complete or restorable.
Backup best practice: Keep copies in separate storage locations and periodically test restoration. Verify the archive and its contents before deleting any original data.
13. Linux Disk and Storage Management Commands
Storage utilities help administrators check disk usage, identify partitions, inspect filesystem information, and investigate performance bottlenecks.
a) Check filesystem capacity with `df`
Display used and available space:
df -h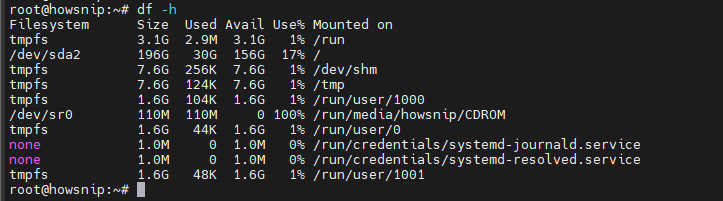
Include filesystem types:
df -Th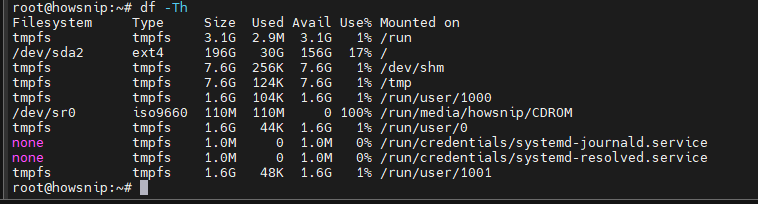
These commands help identify filesystems approaching capacity.
b) Analyze directory sizes with `du`
Summarize entries in the current directory:
du -sh *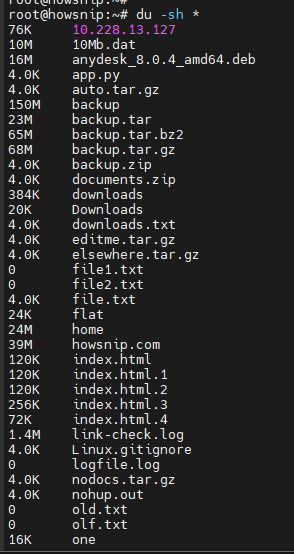
Check a particular directory:
du -sh /var/www/html
Find the ten largest directory or file entries reported under `/var`:
du -h /var | sort -hr | head -10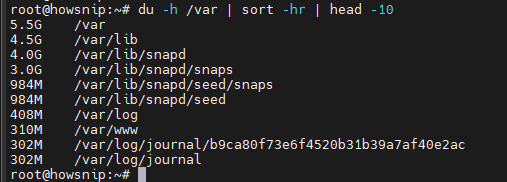
This last command sorts the individual `du` output entries by reported size. Parent directory totals can overlap with their children, so it is not a unique-file storage accounting report.
c) List disks and partitions with `lsblk`
lsblk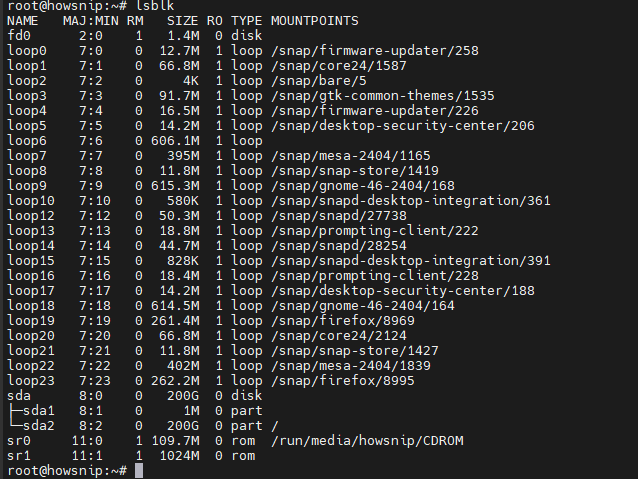
Display filesystem information:
lsblk -f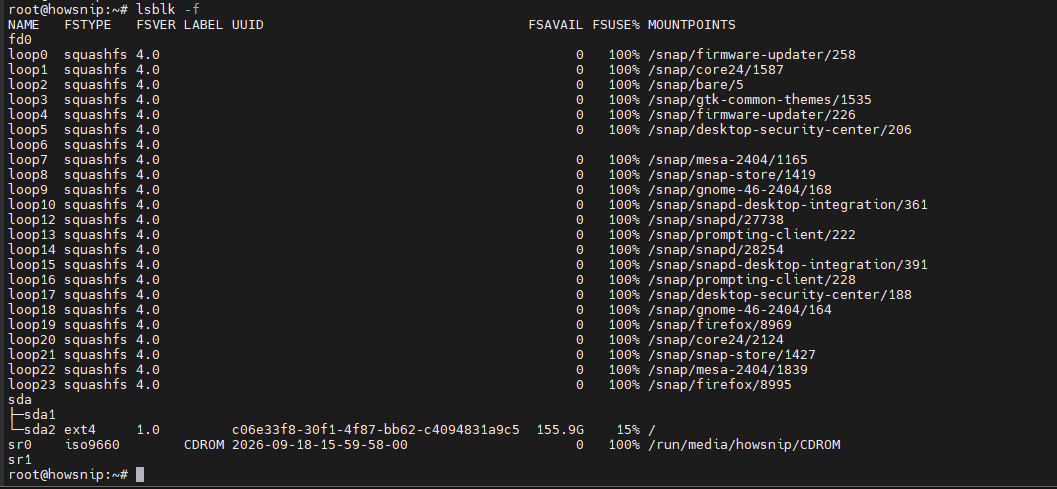
The output helps identify block devices, partitions, filesystem types, UUIDs, and mount points.
d) Inspect partition tables with `fdisk`
sudo fdisk -l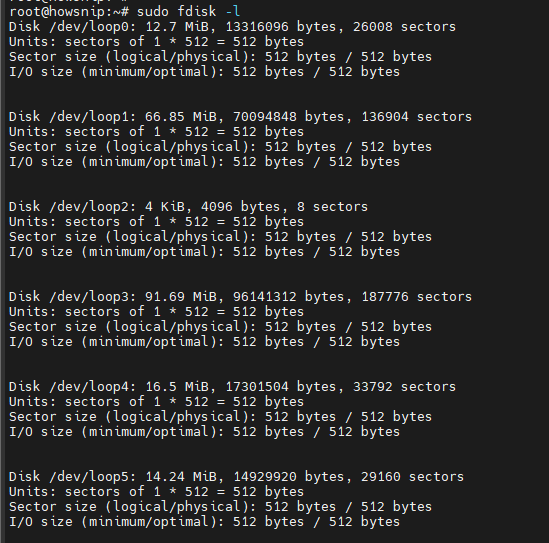
This lists partition information for detected disks.
Warning: Inspecting partitions is different from modifying them. Partition changes can destroy data or make a system unbootable if performed incorrectly. Confirm the target device and maintain backups before making changes.
e) Display filesystem UUIDs with `blkid`
sudo blkid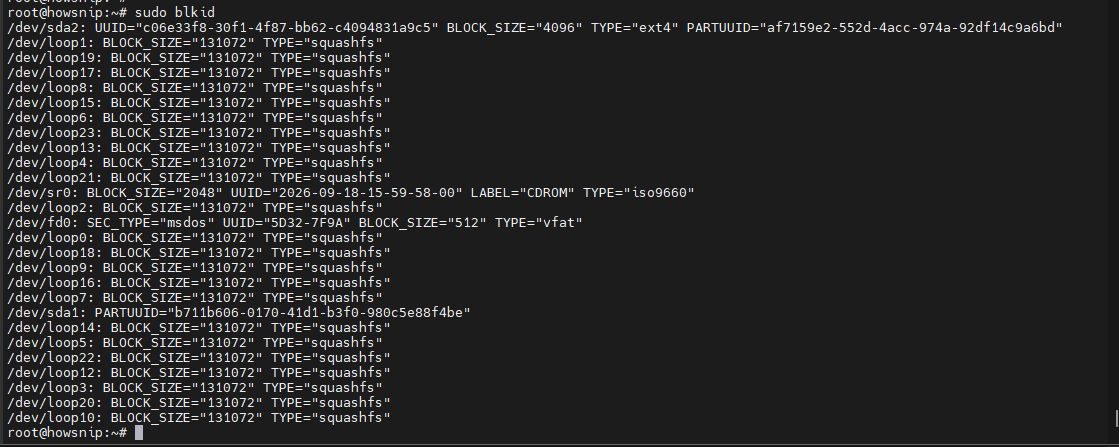
The output includes filesystem identifiers and other metadata. UUIDs can be used in `/etc/fstab` to help configure persistent mounts.
f) Mount a filesystem with `mount`
Mount a partition at `/mnt`:
sudo mount /dev/sdb1 /mntThis example assumes that `/dev/sdb1` exists, contains a supported filesystem, and is the intended device. The mount point must exist.
Display currently mounted filesystems:
mount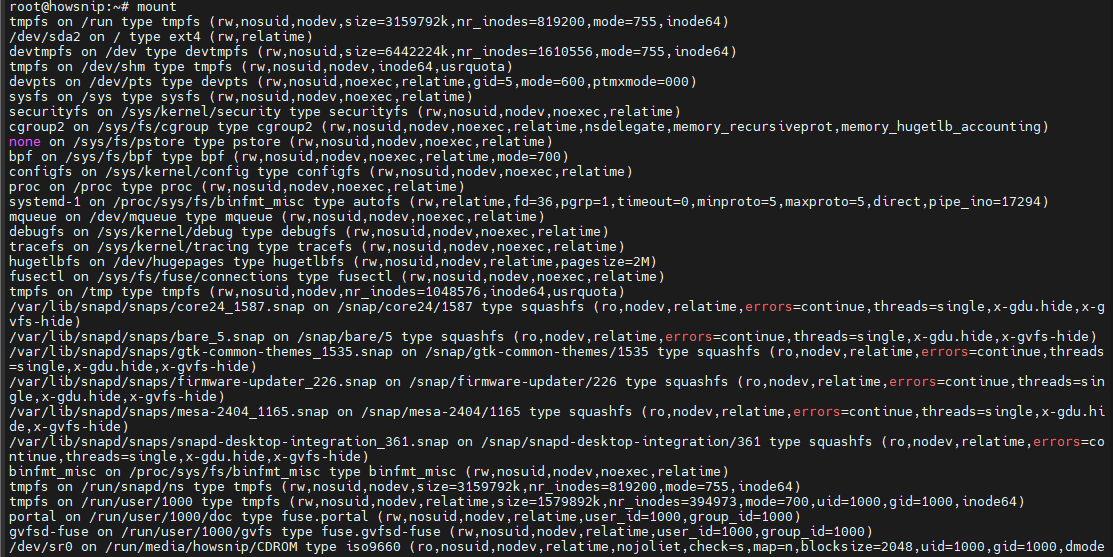
Do not assume a device name such as `/dev/sdb1` will always refer to the same disk. Verify the device before mounting or formatting anything.
g) Monitor disk input/output with `iostat`
iostat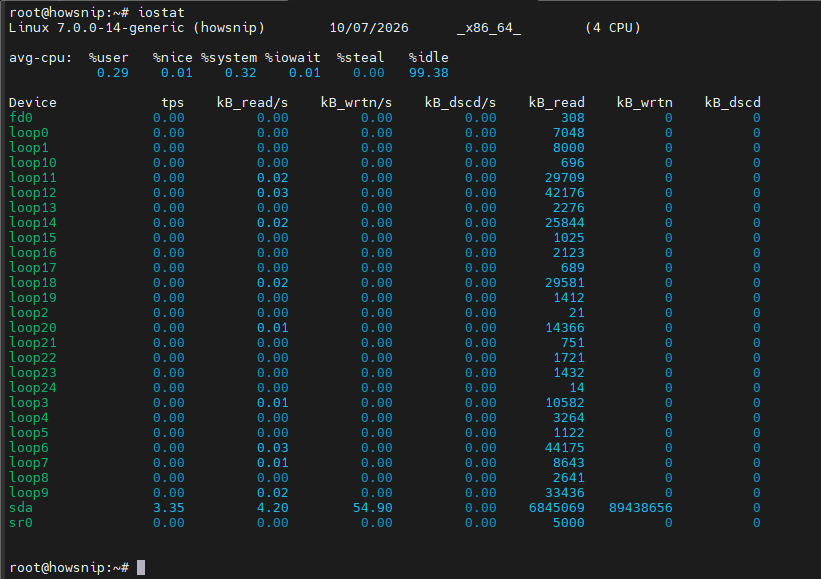
Display updated statistics every two seconds:
iostat 2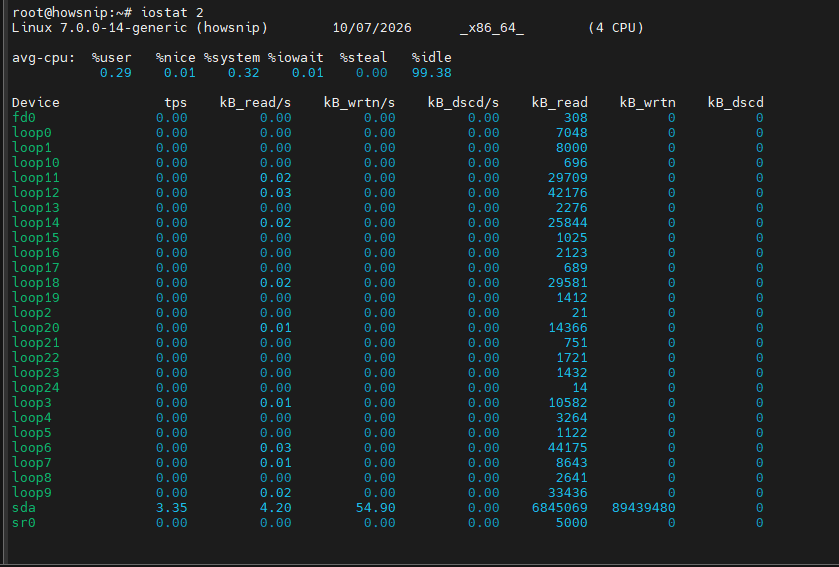
The `iostat` utility is typically provided by the `sysstat` package on distributions that use this packaging arrangement. Install the relevant package if the command is unavailable.
Common storage troubleshooting workflow
Check filesystem utilization:
df -h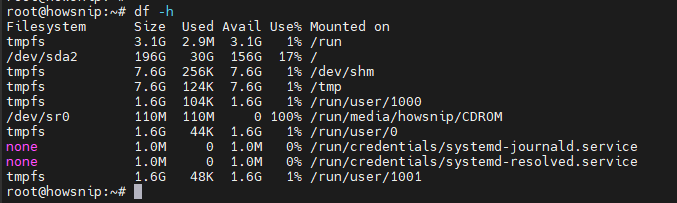
Inspect directory sizes:
du -sh /var/*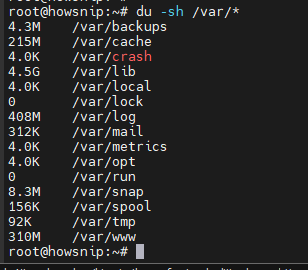
List block devices:
lsblk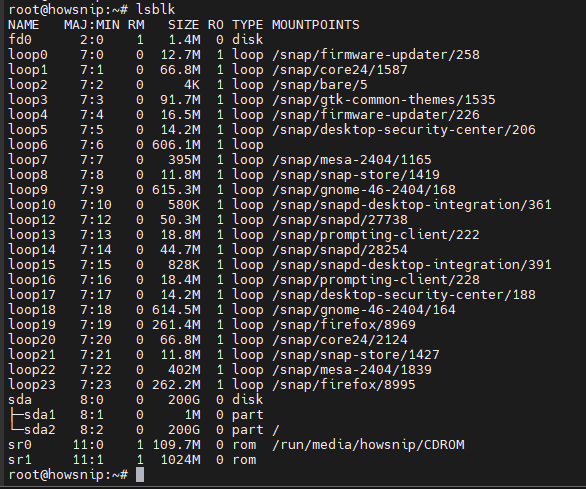
Review partition information before a mount operation:
sudo fdisk -l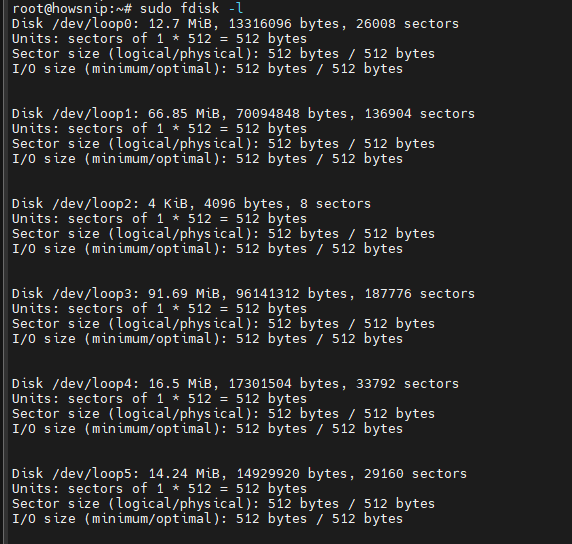
Mount a verified filesystem:
sudo mount /dev/sdb1 /mntStorage best practices
- Monitor disk utilization and investigate unexpected growth.
- Prefer stable filesystem identifiers in persistent mount configurations.
- Back up important data before partition or filesystem changes.
- Review large directories carefully before removing data.
14. Linux Redirection, Pipes, and Wildcards
Redirection, pipes, and wildcards are fundamental shell features. They let you save command output, connect utilities together, and operate on groups of files.
a) Redirect output with `>`
The `>` operator sends standard output to a file, replacing its previous contents if the file already exists.
ls -lah > files.txt
Use it when saving directory listings, command results, or diagnostic output.
b) Append output with `>>`
The `>>` operator appends standard output to the end of a file.
echo "Backup completed successfully" >> backup.log
This is useful when adding new entries to a simple log or recording repeated command results.
c) Redirect errors with `2>`
The `2>` operator redirects standard error to a file.
find /root -name "*.conf" 2> errors.log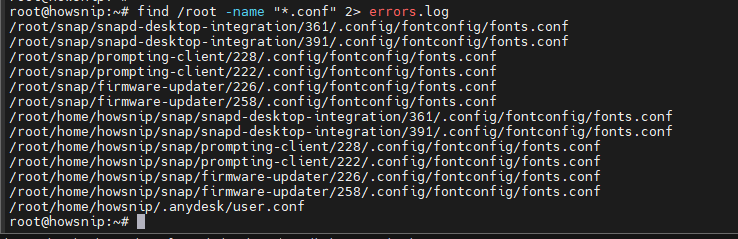
This saves error messages, such as permission errors, to `errors.log` while leaving standard output separate.
d) Redirect standard output and errors together
command > output.log 2>&1
Replace `command` with the command you want to run. This redirects standard output to `output.log` and then redirects standard error to the same destination.
e) Combine commands using pipes
The pipe operator (`|`) sends one command’s standard output to another command’s standard input.
Find processes associated with Nginx:
ps aux | grep nginx
Sort directory-size summaries:
du -sh * | sort -h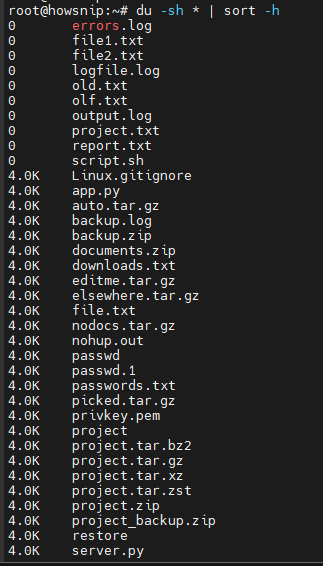
Count lines containing the word `error`:
grep "error" application.log | wc -l
Display the first ten lines of process output:
ps aux | head -10
Pipes make it possible to combine simple commands into practical troubleshooting workflows.
f) Use wildcards to match files
The asterisk (`*`) matches zero or more characters in shell filename expansion.
List files ending in `.log`:
ls *.logCopy text files into a backup directory:
cp *.txt /backup/
Delete matching log files:
rm *.log
Warning: The final command deletes matching files in the current directory. Use `pwd` and `ls *.log` first to verify the location and matched filenames.
The question mark (`?`) matches exactly one character in shell filename expansion.
ls file?.txt
For example, it can match `file1.txt` and `fileA.txt` if those files exist.
g) Generate filename patterns with brace expansion
Brace expansion generates multiple strings from a pattern before the command runs.
Move a group of numbered image files:
mv image_{1..5}.png images/
Create multiple directories:
mkdir -p project/{docs,images,scripts}
These examples assume the relevant source files or destination structure are appropriate for the operation. Brace expansion is a shell feature, not a feature implemented by `mv` or `mkdir` themselves.
Practical redirection and pipe examples
Save a package inventory on Debian-based systems:
dpkg -l > installed_packages.txt
Check listening sockets associated with port 22:
ss -tuln | grep :22
Identify large entries under `/var`:
du -sh /var/* | sort -hr | head -5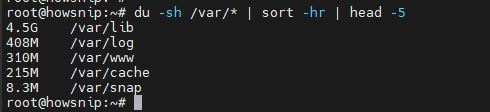
Count failed SSH password attempts in an Ubuntu authentication log:
grep "Failed password" /var/log/auth.log | wc -l
The final example depends on the log file’s existence, access permissions, and logging configuration. On other distributions, authentication events may be stored elsewhere or queried through the system journal.
Conclusion
Learning Linux commands makes system administration, development, and troubleshooting more efficient.
Start with the commands you use most frequently, practice them in a safe environment, and consult their manual pages when you need more advanced options. Before running commands that delete files, modify permissions, change accounts, or affect storage, verify the target and understand the expected result.
With regular practice, this Linux commands cheat sheet can become a practical reference for everyday Linux administration and technical troubleshooting.