
The tar command is one of the most commonly used tools in Linux for packaging files and directories into a single archive. It can also work with compression tools such as gzip, bzip2, xz, and zstd to create smaller archive files that are easier to store and transfer.
In this tutorial, you’ll learn how to create, compress, list, extract, update, and verify tar archives with practical examples.
Understanding tar Command Options
Many tar commands combine multiple options into a single string. For example:
tar -czvf backup.tar.gz projectEach letter performs a separate function:
- -c = Create a new archive
- -z = Compress using gzip
- -v = Show files being processed (verbose mode)
- -f = Specify the archive filename
A useful way to remember this is to treat every option as a separate task rather than reading them as a single word.
Common tar Operations
tar -cf backup.tar project
The above command creates a new archive.
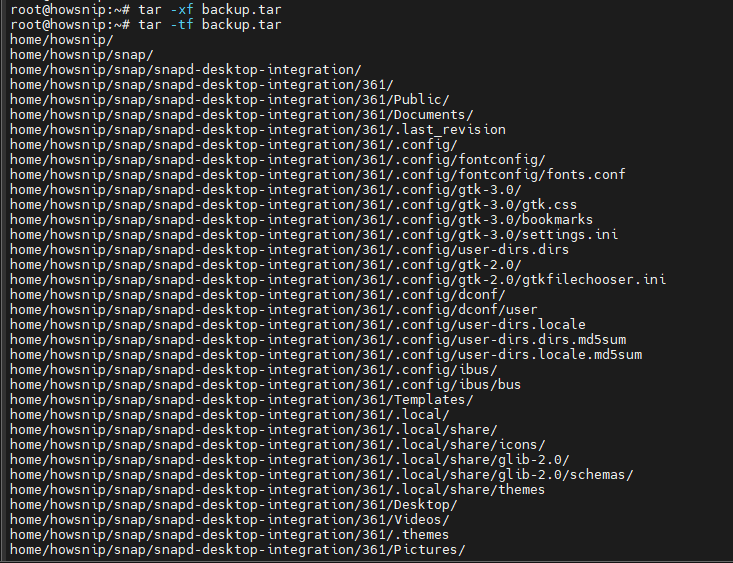
tar -xf backup.tarIt extracts an archive.
tar -tf backup.tarThis command lists archive contents.
tar -rf backup.tar newfile.txt
It appends a file to an existing archive.
tar --delete -f backup.tar old.txt
The above command removes a file from an archive.
Important: The -f option must be followed by the archive filename because it tells tar which file to create or use.
How tar Archives Work
A tar archive combines files and directories into a single file while preserving important metadata such as:
- File paths
- Permissions
- Ownership information
- File sizes
- Modification timestamps
Unlike ZIP files, tar itself does not compress data. Compression is typically handled by another utility such as gzip or xz, which is why compressed archives often use extensions like:
- .tar.gz
- .tar.bz2
- .tar.xz
- .tar.zst
Create a Tar Archive
To create a basic tar archive:
tar -cvf project.tar project
What this command does
- -c creates the archive.
- -v displays files as they are added.
- -f specifies the archive filename.
- project is the directory being archived.
The original directory remains unchanged, and the archive contains the complete directory structure.
Create Compressed Tar Archives
Compression reduces archive size and makes files easier to transfer.
Create a gzip Archive
tar -czf project.tar.gz project

Create a bzip2 Archive
tar -cjf project.tar.bz2 project

Create an xz Archive
tar -cJf project.tar.xz project

Create a zstd Archive
tar --zstd -cf project.tar.zst project
Each command creates the same archive content but uses a different compression method.
Note: Compression ratios and speeds vary depending on your data.
Automatically Select Compression Format
Instead of manually specifying a compression option, you can allow tar to choose based on the filename extension.
tar -caf auto.tar.gz project
Verify the archive type:
file auto.tar.gzUsing -a is especially helpful in scripts because the compression format matches the file extension automatically.
Archive Files from Another Directory
Use the -C option to change directories before collecting files.
tar -czf elsewhere.tar.gz -C /tmp/tarprobe VERSIONList the archive contents:
tar -tzf elsewhere.tar.gzOutput:
VERSION

The archive is created from files in the specified directory, but the archive itself is still written to your current location.
Archive Files Listed in a Text File
When dealing with many files, you can provide a file list instead of typing every name manually.
Contents of files.txt:
file1.txt
file2.txt
file3.txt
Create the archive:
tar -czf picked.tar.gz -T files.txtView the archive:
tar -tzf picked.tar.gz
It avoids long command lines and makes automation easier.
Exclude Files and Directories
To skip files during archive creation, use –exclude.
tar -czf nodocs.tar.gz --exclude='project/docs' projectCheck the archive contents:
tar -tzf nodocs.tar.gz
You can also exclude file types using patterns:
tar -czf project.tar.gz --exclude='*.md' projectThis excludes all Markdown files within the archive.
View Archive Contents Without Extracting
The -t option lets you inspect an archive without writing anything to disk.
Show File Names Only
tar -tf project.tarShow Detailed Information
tar -tvf project.tar
Example output:
drwxr-xr-x root/root 0 2026-09-25 15:07 project/
-rw-r–r– root/root 18 2026-09-25 15:07 project/test.txt
The listing includes:
- File permissions
- File owner
- Group owner
- File size
- Modification date
- Filename
This information is useful when inspecting archives from another system.
Extract Tar Archives
Use the -x option to extract files.
mkdir -p restored
tar -xvf project.tar.gz -C restored
What Happens?
- The archive is extracted into the restored directory.
- Existing archive structure is preserved.
Extract a Single File
To extract only one file from an archive:
tar -xf project.tar project/src/schema.sql -C one
Verify:
find one -type fOutput:
one/project/src/schema.sql
The path specified must exactly match the path stored inside the archive.
Extract Files Using Wildcards
By default, tar expects exact file paths. To use pattern matching, enable wildcards.
tar -xf project.tar --wildcards '*/schema.sql' -C wild
Without –wildcards, the pattern is treated as a literal filename and extraction fails.
Display a File Without Extracting It
To view a file directly from an archive, use the -O option.
tar -xzf project.tar.gz -O project/VERSION
Instead of writing the file to disk, tar sends its contents to standard output. This is useful for quickly checking configuration files, version files, or logs inside an archive.
Remove Leading Directories During Extraction
Many archives contain a top-level project folder. To remove leading path components during extraction, use:
tar -xzf project.tar --strip-components=1 -C flat
This extracts files directly into the target directory instead of recreating the entire directory tree.
Add Files to an Existing Archive
The -r option appends files to an archive.
tar -rvf project.tar project/CHANGELOG.md
Example output:
project/CHANGELOG.md
This updates the archive without recreating it from scratch.
Remove Files from an Archive
To delete a member:
tar --delete -f project.tar project/VERSION
Verify the result:
tar -tf project.tarImportant: File deletion only works on uncompressed .tar archives.
Why Compressed Archives Cannot Be Updated Directly
The following command fails:
tar --delete -f project.tar.gz project/VERSION
Output:
tar: Cannot update compressed archives
tar: Error is not recoverable: exiting now
Compressed archives use a continuous compressed stream. Changing data in the middle would require rebuilding the compressed file.
Workaround
First decompress the archive:
gunzip -k editme.tar.gzModify the archive:
tar --delete -f editme.tar project/VERSIONCompress it again:
gzip -f editme.tarVerify:
tar -tzf editme.tar.gz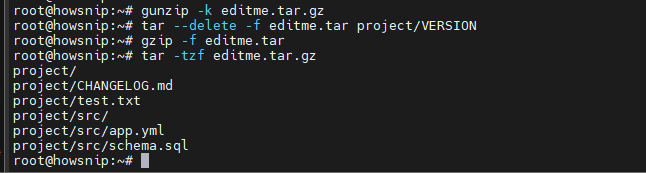
Verify an Archive Before Deleting the Original Files
Before removing the source data, confirm the archive is readable and not corrupted.
Test a gzip Archive
tar -tf project.tar.gz > /dev/null && echo listing okgzip -t project.tar.gz && echo integrity okTest a bzip2 Archive
tar -tf project.tar.bz2 > /dev/null && bzip2 -t project.tar.bz2 && echo bzip2 okTest an xz Archive
tar -tf project.tar.xz > /dev/null && xz -t project.tar.xz && echo xz ok
A listing confirms that tar can read the archive structure. The compression utility test verifies the compressed data stream and helps detect corruption or incomplete transfers.
Warning: Always verify backups before deleting the original files.
Conclusion
The Linux tar command is a powerful tool for creating and managing archives.
By understanding key operations such as creating, listing, extracting, compressing, and verifying archives, you can efficiently handle backups, file transfers, and system administration tasks.
Start with basic archive creation, then explore advanced options like exclusions, wildcard extraction, and archive validation to make the most of tar in your daily Linux workflow.