
Managing disk space is an essential part of Linux system administration. Whether you’re monitoring a personal machine, managing a server, or troubleshooting storage issues, the df command provides a quick way to view filesystem usage and available storage.
In this tutorial, you’ll learn how to use the Linux df command through practical examples. We’ll cover everything from basic disk usage checks to inode monitoring, filesystem filtering, real-time monitoring, and common troubleshooting scenarios.
Prerequisite: Open a terminal and ensure you have permission to run system commands. Some examples use sudo.
What Is the df Command?
The df (Disk Filesystem) command displays information about mounted filesystems, including:
- Total disk space
- Used space
- Available space
- Percentage of space used
- Mount points
Syntax
df [OPTIONS] [FILESYSTEM]If no filesystem is specified, df displays information for all currently mounted filesystems.
1. Check Overall Disk Space Usage
Use the df command without additional options to view filesystem usage across the system.
sudo df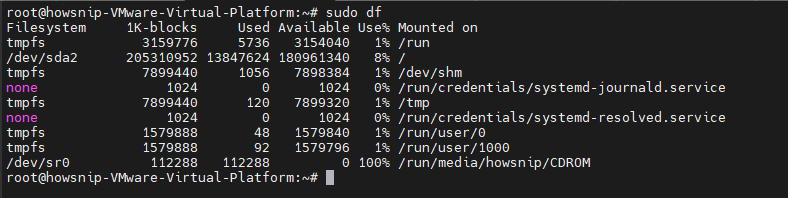
This command displays raw filesystem statistics, including device names, total blocks, used space, available space, and mount locations.
Why Use It?
Raw block values are useful when writing scripts because they are easier to parse programmatically.
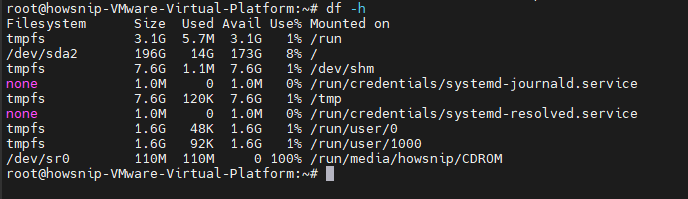
2. Display Disk Space in Human-Readable Format
For everyday administration tasks, you’ll usually want storage values displayed in KB, MB, GB, or TB.
df -h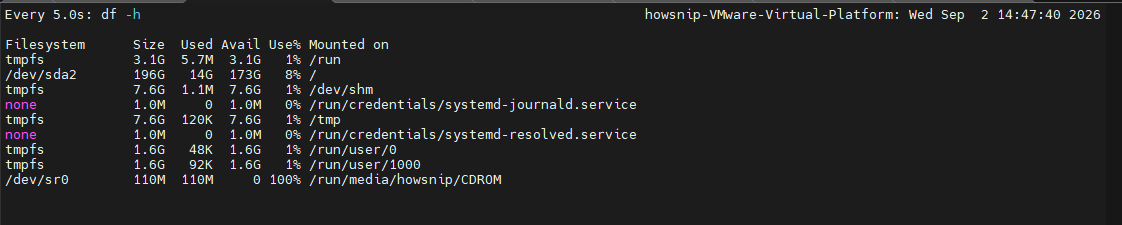
The -h (human-readable) option automatically selects the most appropriate unit size.
Pro Tip: If a filesystem exceeds 85% usage, investigate storage consumption. When usage reaches 95% or higher, applications may experience write failures and other issues.
3. Show All Filesystems Including Pseudo Filesystems
By default, some virtual or pseudo filesystems are hidden. To display everything:
df -a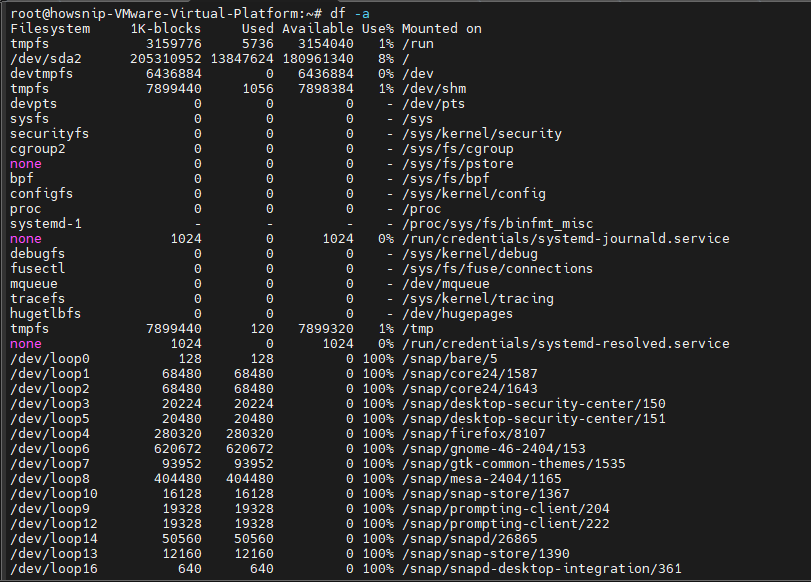
This includes entries such as:
- tmpfs
- proc
- sysfs
- devtmpfs
This option is particularly helpful when troubleshooting:
- Containers
- Chroot environments
- Systemd mount issues
- Virtual filesystem problems
4. Display Filesystem Types Along With Disk Usage
To see both storage usage and filesystem types in one command:
df -Th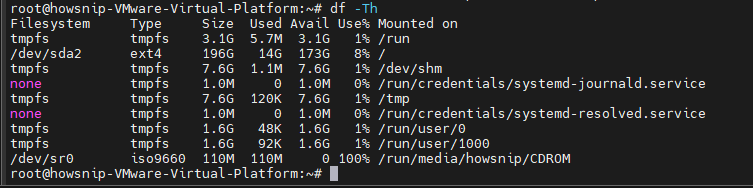
The options used are:
- -T → Show filesystem type
- -h → Human-readable output
You’ll see filesystem types such as:
- ext4
- xfs
- btrfs
- vfat
This information is useful when planning filesystem maintenance, resizing, or repairs.
5. Check Disk Usage for a Specific Directory or Partition
To check the filesystem associated with a particular path:
df -hT /home
This displays:
- Filesystem type
- Available space
- Disk usage statistics
You can also check multiple locations at once:
df -h / /home /var
This helps identify which partitions back specific directories.
6. Display Disk Usage in Kilobytes
To view sizes in 1024-byte blocks (KB):
sudo df -k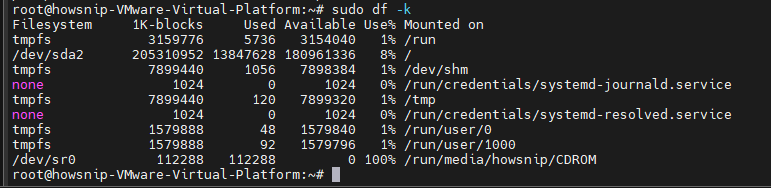
The -k option is equivalent to:
df --block-size=1KKilobyte-based output can be useful when working with scripts or tools that require fixed-size units.
7. Display Disk Usage in Megabytes
To show all filesystem sizes in megabytes:
sudo df -m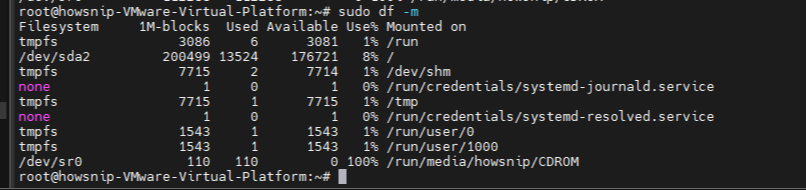
The -m option forces values to be displayed in MB.
Fixed-unit measurements make reporting and comparisons easier across filesystems.
8. Display Disk Usage in Gigabytes
To force all values into gigabytes:
sudo df -BG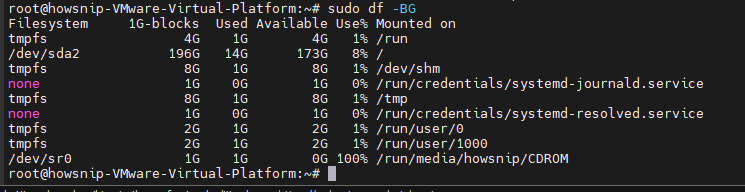
The -B option sets the output unit size.
Examples:
- df -BG
- df -BM
- df -BK
Note: Small filesystems may display as 0G when using -BG.
9. Check Inode Usage
Disk space isn’t the only limit a filesystem can reach. Linux filesystems also have inode limits. To view inode usage:
df -ih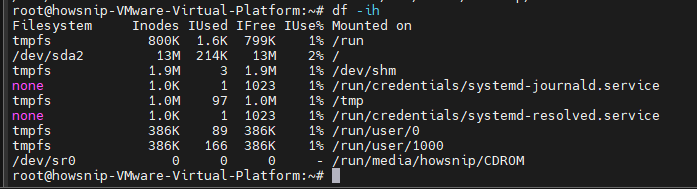
Inodes store metadata about files, such as:
- Ownership
- Permissions
- Timestamps
- Location of data blocks
A filesystem can run out of inodes even if free disk space still exists.
Warning: If inode utilization approaches or exceeds 90%, applications may encounter “No space left on device” errors despite available disk space.
10. Filter Output by Filesystem Type
To display only a specific filesystem type, use -t.
Example for ext4 filesystems:
df -t ext4 -h
This hides unrelated filesystem types and helps focus on the storage you care about.
11. Exclude a Filesystem Type
To hide a specific filesystem type:
df -x tmpfs -h
This excludes all tmpfs entries from the output. Many Linux systems contain multiple temporary memory-based filesystems that can clutter reports.
12. Display Custom Output Columns
The –output option allows you to control which columns appear.
df -h --output=source,fstype,size,used,avail,pcent,target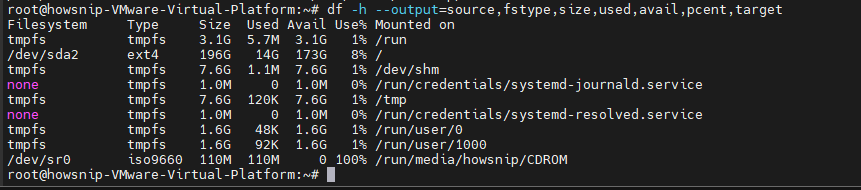
This option is especially useful when building:
- Monitoring scripts
- Reports
- Automated dashboards
13. Monitor Disk Space in Real Time
To continuously refresh disk usage information every five seconds:
watch -n 5 df -hThis is useful when monitoring:
- Large file transfers
- Database backups
- Log growth
- Data migrations
14. Sort Filesystems by Usage Percentage
To quickly identify the most heavily used filesystems:
df -h | sort -k5 -rn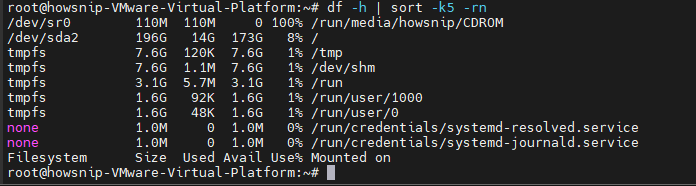
Where,
- df -h generates disk usage information.
- sort arranges the results.
- -k5 sorts using the fifth column (Use%).
- -rn performs reverse numeric sorting.
The filesystem with the highest usage appears first.
Create a Helpful Alias
Add the following line to your ~/.bashrc file:
alias dfs='df -h | sort -k5 -rn'
After reloading your shell, you can run:
dfsfor a quick storage check.
15. View All Available df Command Options
To display available command-line options:
df --help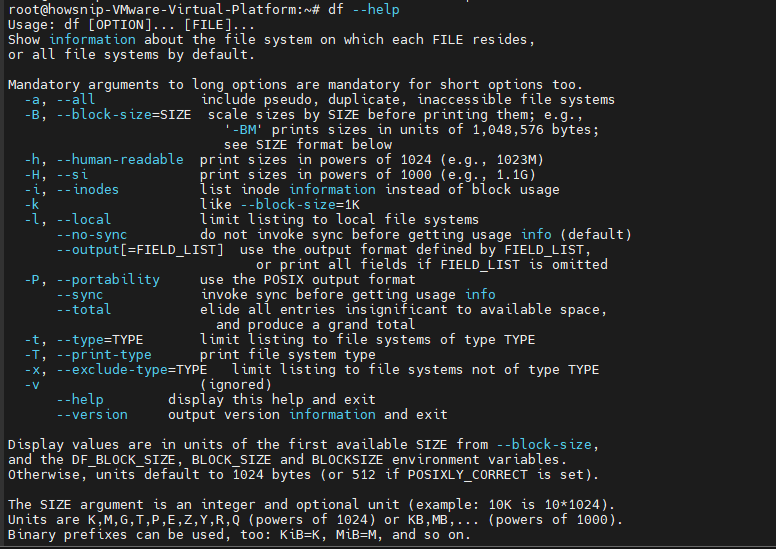
For complete documentation, use:
man dfThis is the fastest way to explore additional features supported by your system’s version of df.
Troubleshooting Common df Command Scenarios
Scenario 1: Disk Appears Full but You Can’t Find the Files
Sometimes df -h shows a partition nearly full, but directory-level checks reveal much less data than expected.
A common cause is a deleted file that remains open by a running process.
Use:
lsof +L1 | grep /var
This command identifies processes that still hold deleted files open.
Solution
Restart the affected application or service to release the file handle and recover the disk space.
Scenario 2: “No Space Left on Device” Despite Free Disk Space
If applications report:
No space left on device
but regular disk checks show available storage, inspect inode usage.
df -ih /var
If the IUse% value is close to 100%, the filesystem has exhausted its available inodes.
Common Causes
- Mail queues
- Session storage files
- Cache directories
- Container overlay layers
- Temporary file accumulation
Cleaning up excess small files usually resolves the issue.
Conclusion
The Linux df command is one of the most important tools for monitoring filesystem health and storage capacity. From checking overall disk usage with df -h to analyzing inode consumption, filtering filesystem types, and monitoring storage in real time, these examples cover the most common tasks Linux administrators perform every day.
For most users, df -h will be the go-to command, while advanced options such as df -Th, df -ih, and df –output provide deeper insight when troubleshooting storage and filesystem-related issues.