
Managing storage devices is a common task for Linux administrators and desktop users alike. Whether you need to identify partitions, check available disk space, find UUIDs for mounting drives, or inspect hardware details, Linux offers several built-in tools that make the job straightforward.
In this guide, you’ll learn how to view disk partitions and storage information in Linux using both command-line and graphical tools. Each method serves a different purpose, so understanding when to use each one can help you troubleshoot storage issues more effectively.
Prerequisites
- A Linux system with terminal access.
- Administrative privileges (sudo) for commands that require root access.
- Basic familiarity with terminal commands.
Method 1: List Disk Partitions Using the fdisk Command
The fdisk utility is one of the most commonly used tools for viewing and managing disk partition tables. It provides detailed information about disks, partitions, sectors, and partition table types.
List All Disks and Partitions
Run the following command to display partition information for all attached disks:
sudo fdisk -l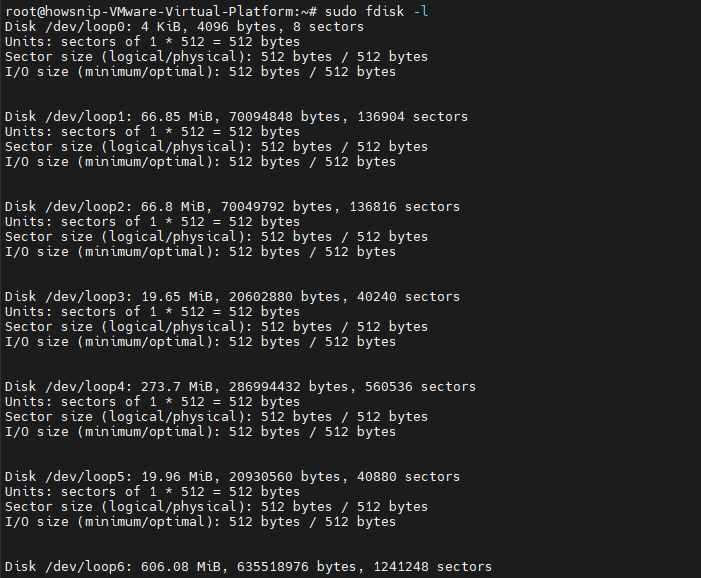
The -l option tells fdisk to list all available disks and their partition layouts. Since disk information requires elevated permissions, sudo is typically necessary.
View a Specific Disk
If you only want information about a particular disk, specify its device name:
sudo fdisk -l /dev/sda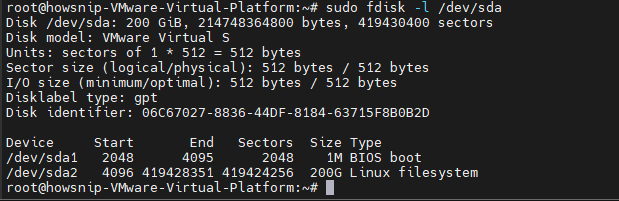
This command shows detailed partition information for the /dev/sda disk only.
Check the Partition Table Type
To identify whether a disk uses GPT or MBR partitioning:
sudo fdisk -l | grep "Disklabel type"
It filters the output and displays the partition table type used by each disk.
When to Use fdisk
- Check bootable partition flags.
- View detailed partition sector information.
- Identify GPT or MBR partition tables.
- Verify disk layouts before creating disk images with tools such as dd.
Method 2: View Disks and Partitions with lsblk
The lsblk command displays block devices in a clean tree structure, making it one of the easiest ways to understand disk layouts.
Display All Block Devices
lsblk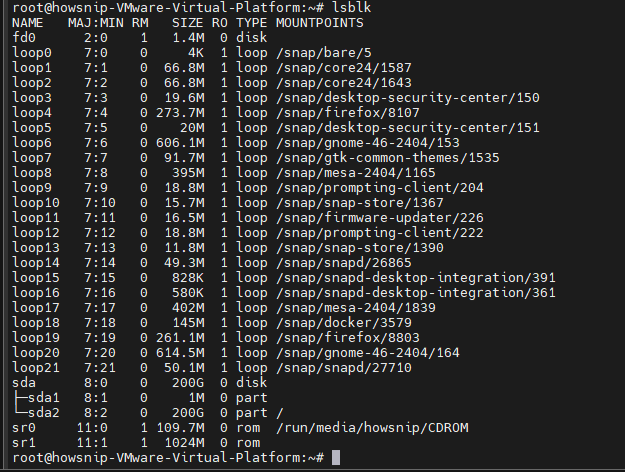
The above command lists all disks, partitions, and mount points in a hierarchical format.
Show Filesystem Types and UUIDs
lsblk -f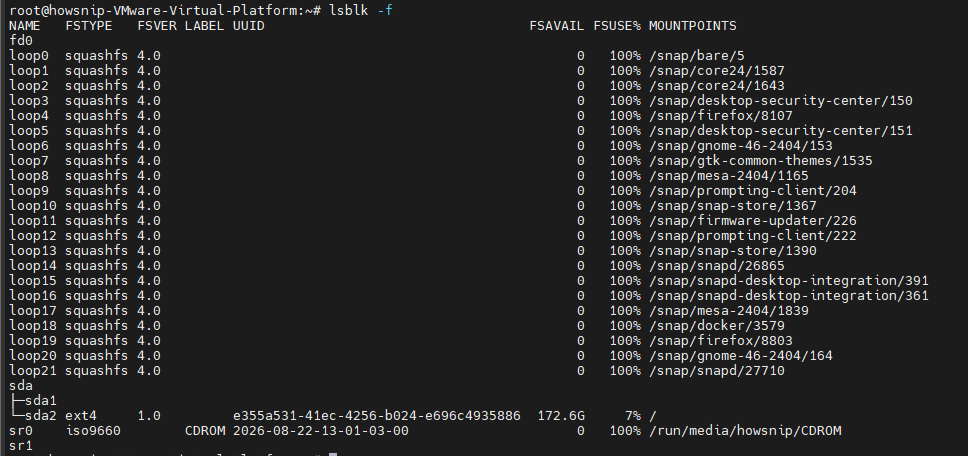
It displays filesystem information, labels, UUIDs, and mount points.
Show Full Device Paths
lsblk -p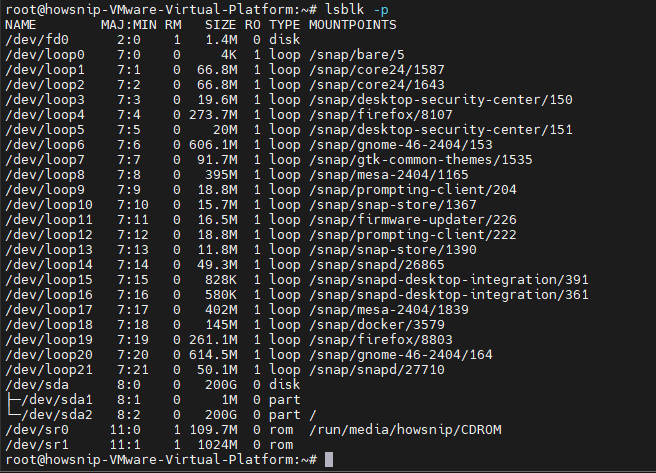
It displays the complete device path, such as /dev/sda1, instead of shortened names.
Display Ownership and Permissions
lsblk -m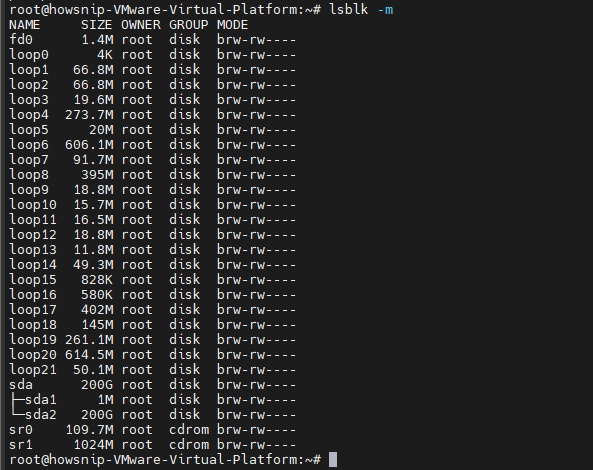
This shows device ownership, group information, and permissions.
Display All Devices
lsblk -a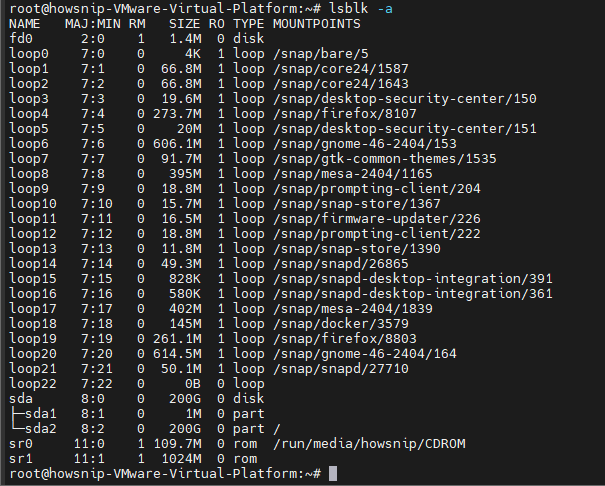
It includes empty or inactive devices that are normally hidden.
When to Use lsblk
- Get a quick overview of disk and partition hierarchy.
- Identify removable USB devices.
- See which partitions are mounted.
- Check partition sizes without requiring root access.
Method 3: Find UUIDs and Filesystem Types with blkid
The blkid command is used to display block device attributes such as UUIDs, filesystem types, and partition labels. This tool is especially useful when configuring automatic mounts in /etc/fstab.
Display All Block Device Attributes
sudo blkid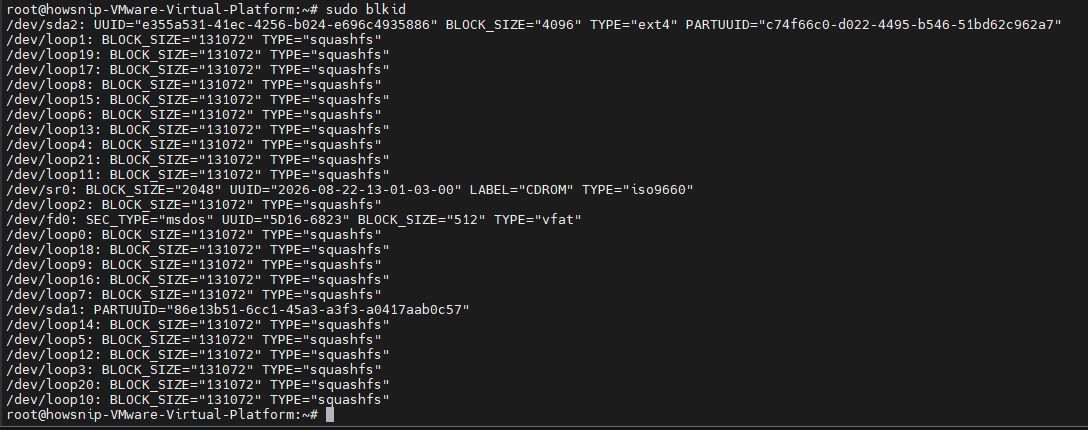
This command lists all detected block devices along with UUIDs and filesystem information.
Display Information in List Format
sudo blkid -o list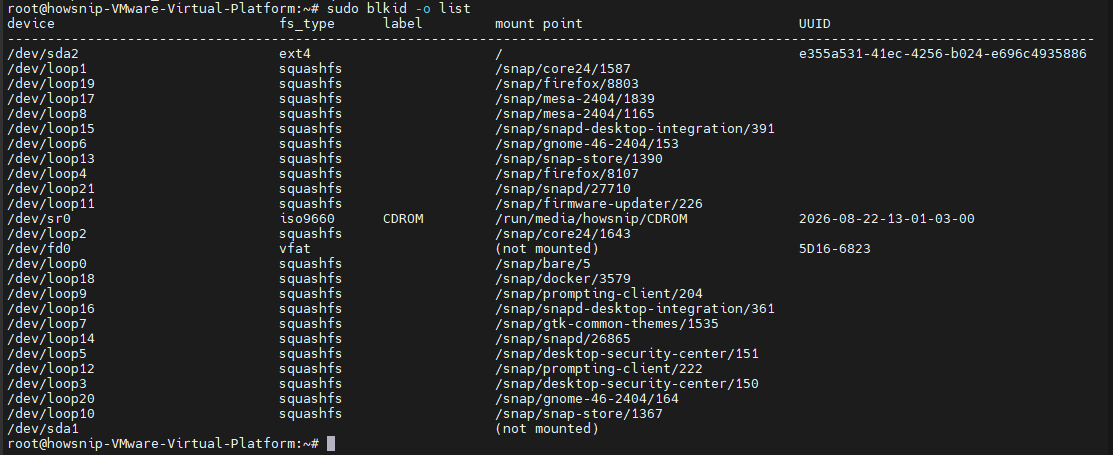
It presents device information in a more readable table-like format.
Find the UUID of a Specific Partition
sudo blkid /dev/sda1
It displays detailed information for the specified partition only.
Find All ext4 Partitions
sudo blkid -t TYPE=ext4
This command filters results to show only partitions using the ext4 filesystem.
Show Only UUID Values
sudo blkid -s UUID
It displays only UUID information for detected devices.
When configuring entries in /etc/fstab, using UUIDs is generally preferred over device names such as /dev/sda1. Device names can change when disks are added or removed, while UUIDs remain consistent.
When to Use blkid
- Retrieve UUIDs for /etc/fstab.
- Identify filesystem types before mounting.
- Check partition labels.
- Verify partition information after formatting a drive.
Method 4: View Partition Information with parted
parted is a powerful partition management utility that supports both MBR and GPT partition tables. It is particularly useful for modern systems and large disks.
List All Disks and Partitions
sudo parted -l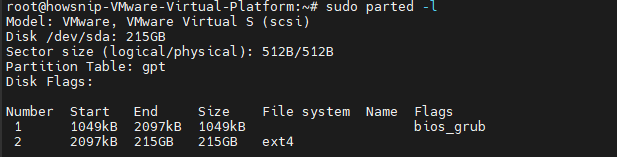
This command displays all connected disks, their partition tables, and partition information.
View Information for a Specific Disk
sudo parted /dev/sda print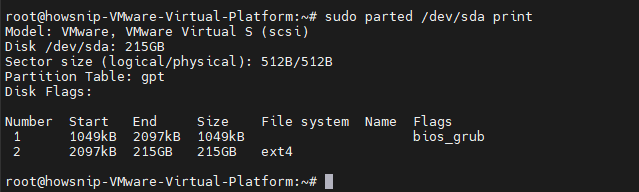
It prints detailed partition information for the selected disk.
Check if a Disk Uses GPT or MBR
sudo parted /dev/sda print | grep "Partition Table"
This command displays the partition table format currently in use.
Start Interactive Mode
sudo parted /dev/sda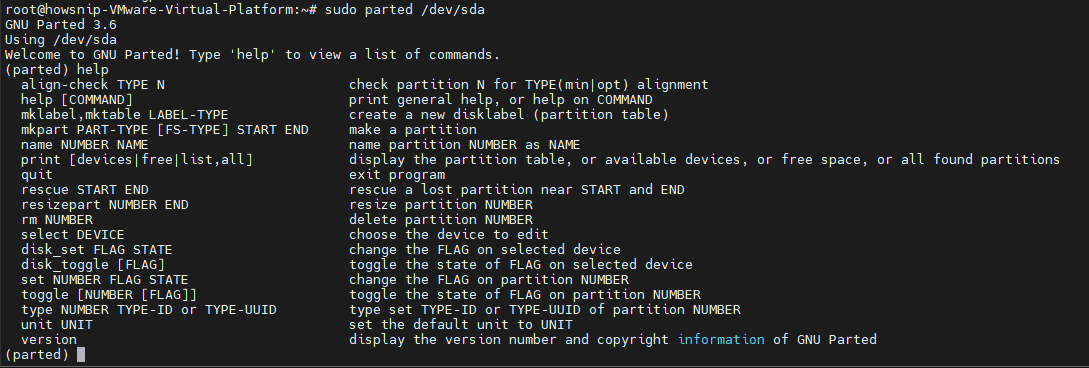
It opens the interactive parted shell, allowing you to inspect and manage partitions directly.
When to Use parted
- Work with GPT partition tables.
- Manage disks larger than 2TB.
- Create or resize partitions.
- Verify SSD partition alignment.
- Handle systems where GPT support is required.
Method 5: Check Disk Usage Using df
The df (Disk Free) command reports the amount of used and available disk space on mounted filesystems.
Show Disk Usage
df -h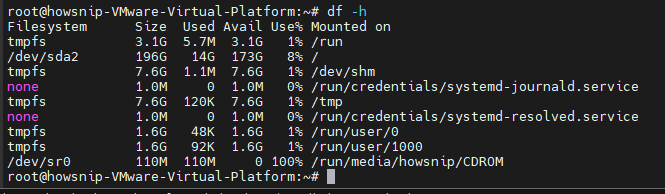
This command displays disk usage in a human-readable format using MB, GB, and TB units.
View Inode Usage
df -i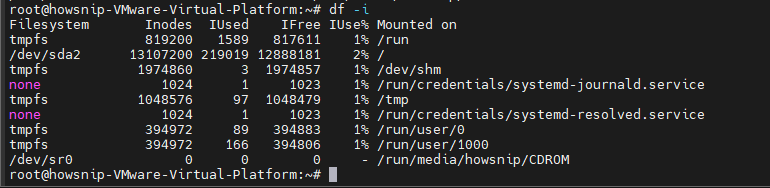
It displays inode usage instead of storage capacity.
Show Filesystem Types
df -T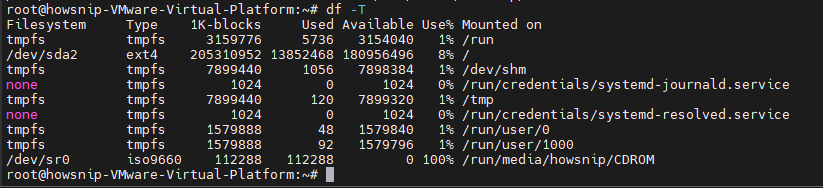
This command displays the filesystem type for each mounted partition.
View Only ext4 Filesystems
df -t ext4
It restricts output to ext4 filesystems.
Exclude Specific Filesystem Types
df -x tmpfs -x devtmpfs -h
This hides temporary and virtual filesystems from the report.
When to Use df
- Check free space before installing software.
- Monitor disk usage.
- Identify storage-related issues.
- Verify mounted filesystems and available capacity.
Method 6: View Hardware Disk Details with hwinfo
The hwinfo utility provides detailed hardware information, including storage device specifications.
Install hwinfo
Depending on your Linux distribution, use one of the following commands:
sudo apt install hwinfo            #Debian, Ubuntu, Linux Mint
sudo yum install hwinfo            #RHEL, CentOS, Fedora, Rocky Linux, AlmaLinux
sudo emerge -a sys-apps/hwinfo     #Gentoo Linux
sudo pacman -S hwinfo              #Arch Linux
sudo zypper install hwinfo         #OpenSUSE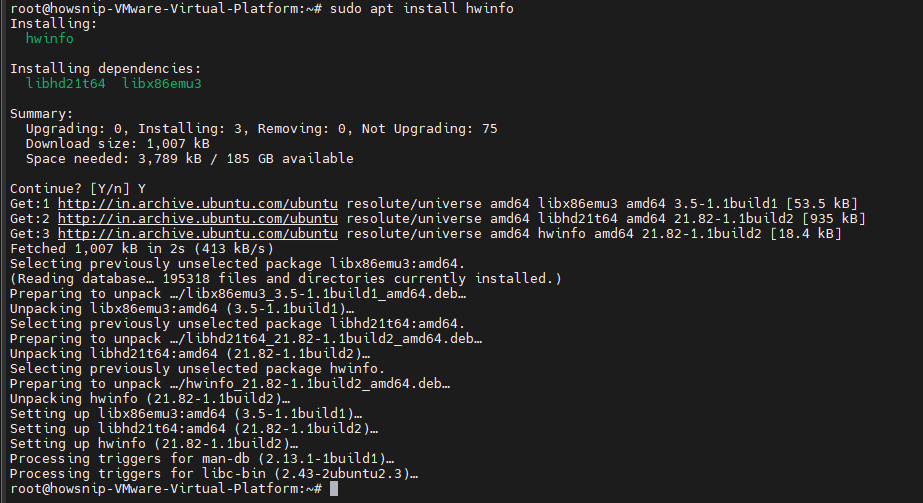
Display Detailed Disk Information
sudo hwinfo --disk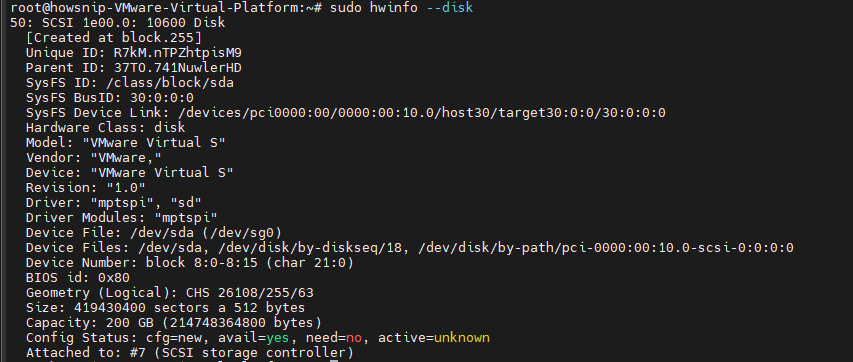
This command shows comprehensive information about installed storage devices, including model and hardware details.
View a Summary of Block Devices
sudo hwinfo --short --block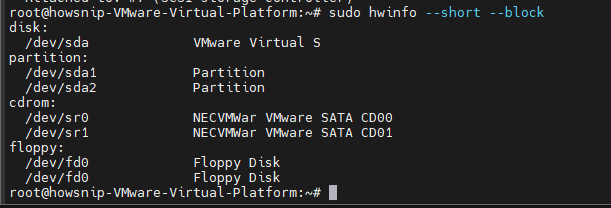
It provides a concise overview of detected block devices.
Display a Short Disk Summary
sudo hwinfo --disk --short
This command lists disks in a simplified format.
When to Use hwinfo
- Identify disk make and model.
- Verify hardware detection.
- Check kernel driver usage.
- Retrieve vendor information.
- Troubleshoot storage hardware issues.
Method 7: View Disk Partitions Using GNOME Disks
If you prefer a graphical interface, GNOME Disks offers an easy way to inspect disks and partitions without using the command line.
- Open GNOME Disks
- Open your application menu.
- Search for Disks.
- Launch the application.
The interface displays available disks, partitions, filesystem details, and mount information.
Key Features of GNOME Disks
- Visual disk and partition management.
- SMART health monitoring.
- Disk benchmarking tools.
- Drive formatting and partitioning.
- Disk image creation and restoration.
- Mount and unmount operations.
- Detailed partition properties.
KDE Alternative: KDE Partition Manager
Users running KDE Plasma can use KDE Partition Manager for similar functionality.
Install KDE Partition Manager
sudo apt install partitionmanager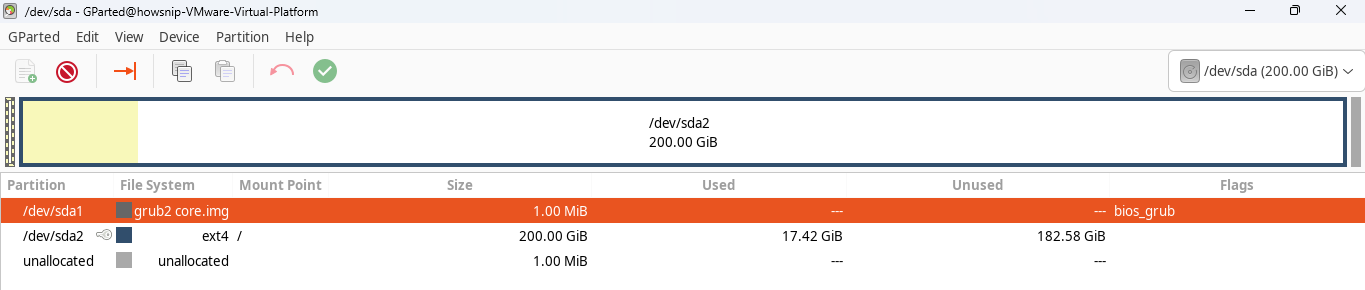
It installs KDE’s graphical partition management utility on Debian-based distributions.
When GUI Tools Are Useful
- You prefer a visual interface.
- You need SMART health information.
- You want to benchmark disk performance.
- You need to format or partition disks without command-line tools.
- You want a graphical overview of disk layouts.
Conclusion
Linux provides several ways to view disk partitions and storage information, ranging from simple commands like lsblk and df to advanced tools such as fdisk, blkid, parted, and hwinfo.
For desktop users, GNOME Disks and KDE Partition Manager offer convenient graphical alternatives. By understanding what each tool does and when to use it, you can efficiently inspect disks, identify partitions, monitor storage usage, and troubleshoot disk-related issues on any Linux system.