

Protecting SSH access is one of the most important steps when securing a Linux server. Fail2Ban helps reduce brute-force login attempts by monitoring authentication failures and automatically blocking suspicious IP addresses for a defined period.
In this tutorial, you’ll learn how to install and configure Fail2Ban on Ubuntu, create a dedicated SSH jail, validate the configuration, test bans safely, troubleshoot common issues, and harden SSH security further.
Note: Throughout this guide, keep your current SSH session open and verify that you can open a second SSH session before making security-related changes.
Prerequisites
Before starting, ensure that:
- You’re running Ubuntu.
- SSH is installed and active.
- You have sudo privileges.
- You can establish a second SSH connection to the server.
- SSH key authentication is configured if possible.
Step 1: Verify Ubuntu Version and SSH Access
Before installing Fail2Ban, confirm your operating system version and ensure SSH is running correctly.
Check the Ubuntu version:
cat /etc/os-release
This displays details about your Ubuntu installation and confirms you’re running Ubuntu 24.04.
Check whether SSH is active:
systemctl is-active sshBefore modifying SSH security settings:
- Keep your current SSH session connected.
- Open a second SSH session from your normal workstation.
- Confirm the second session connects successfully.
This provides a recovery path if a configuration mistake causes access issues.
You should confirm:
- Ubuntu reports the same version.
- SSH service is active.
- A second SSH session can connect successfully.
Step 2: Install Fail2Ban
Update package information and install Fail2Ban from the Ubuntu repository.
Update package metadata:
sudo apt update
This refreshes the package index with the latest available software information.
Install Fail2Ban:
sudo apt install -y fail2ban
The -y option automatically confirms the installation prompt.
Check the installed package version:
apt-cache policy fail2ban
This displays the installed version and package repository information.
Enable Fail2Ban to start automatically at boot:
sudo systemctl enable fail2ban
Check the installed Fail2Ban version:
fail2ban-client --versionConfirm the service is enabled:
systemctl is-enabled fail2banImportant: Installing the package does not automatically enable SSH protection. You must configure and enable an SSH jail.
Step 3: Create a Local SSH Jail Configuration
Avoid editing the default configuration file:
/etc/fail2ban/jail.confLocal overrides are recommended because package updates can safely update default settings without overwriting your custom configuration.
Create a dedicated SSH jail file:
sudo nano /etc/fail2ban/jail.d/sshd.local
Add the following configuration:
[sshd]
enabled = true
backend = systemd
port = ssh
bantime = 1h
findtime = 10m
maxretry = 5
The systemd backend reads events directly from the journal and does not rely on /var/log/auth.log.
If your SSH server runs on a custom port, replace: port = ssh with the actual port number.
Verify the configuration:
sudo cat /etc/fail2ban/jail.d/sshd.localStep 4: Configure Trusted IP Addresses (Optional)
Fail2Ban allows trusted IP addresses to bypass bans using the ignoreip setting.
Only whitelist:
- Static office IPs
- VPN subnets you control
- Permanent administrative addresses
Avoid whitelisting temporary ISP, mobile, hotel, or shared office addresses.
Create a defaults file:
sudo nano /etc/fail2ban/jail.d/00-local-defaults.local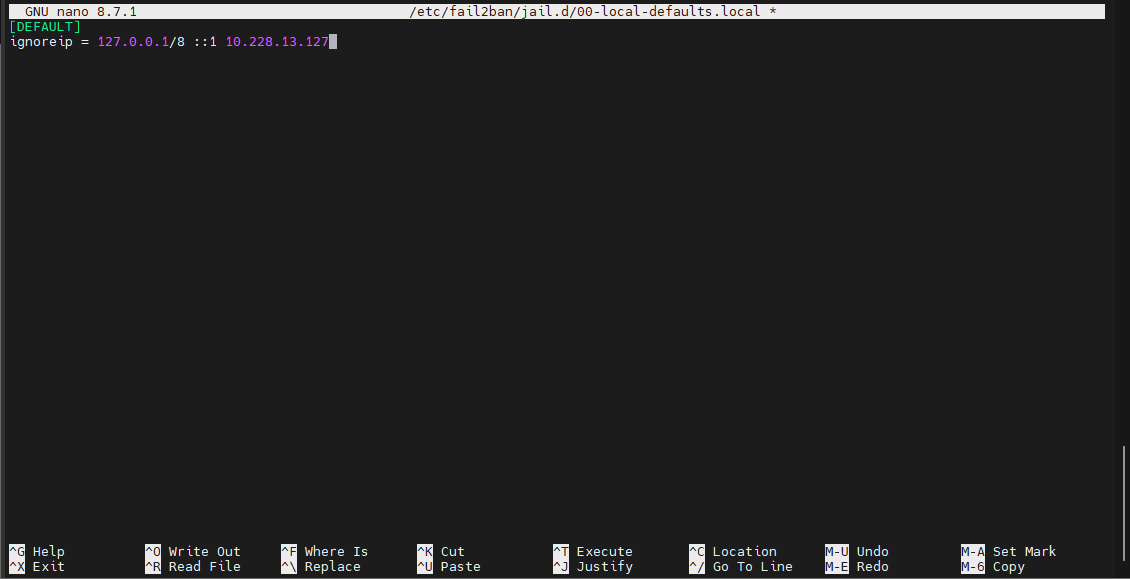
Example configuration:
[DEFAULT]
ignoreip = 127.0.0.1/8 ::1 203.0.113.10
Replace 203.0.113.10 with an IP address you own and control.
After configuration testing, run:
sudo fail2ban-client -d | grep -i ignoreipConfirm only intended addresses appear.
Step 5: Validate the Configuration
Always validate the configuration before restarting Fail2Ban.
Run:
sudo fail2ban-client -tThis checks the complete configuration for syntax or logic errors.
To inspect the resolved SSH jail configuration:
sudo fail2ban-client -d | grep -A 20 "'sshd'"If the configuration test reports errors:
- Fix them first.
- Do not restart Fail2Ban until validation succeeds.
- Verify
The test should complete successfully and indicate the configuration is valid.
Step 6: Start Fail2Ban and Verify the SSH Jail
Restart Fail2Ban to load the new configuration.
Restart the service:
sudo systemctl restart fail2banCheck service status:
systemctl is-active fail2ban
List active jails:
sudo fail2ban-client statusInspect the SSH jail specifically:
sudo fail2ban-client status sshd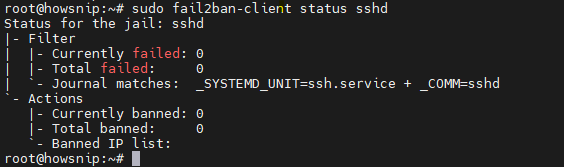
The SSH jail status includes:
- Current failures
- Total failures
- Current bans
- Total bans
- Banned IP addresses
A new server may legitimately show zero bans.
Step 7: Confirm Journal Monitoring Is Working
Check recent SSH authentication logs:
sudo journalctl -u ssh --since '30 minutes ago' --no-pager
Review Fail2Ban’s SSH jail status:
sudo fail2ban-client status sshd
Check Fail2Ban logs:
sudo journalctl -u fail2ban -n 100 --no-pager
A jail showing zero failed attempts is not necessarily a problem if no failed SSH logins have occurred recently.
Step 8: Test Ban Functionality Safely
Never test bans against your own administrative IP address.
Inspect the resolved SSH jail configuration:
sudo fail2ban-client -d | grep -A 40 "sshd"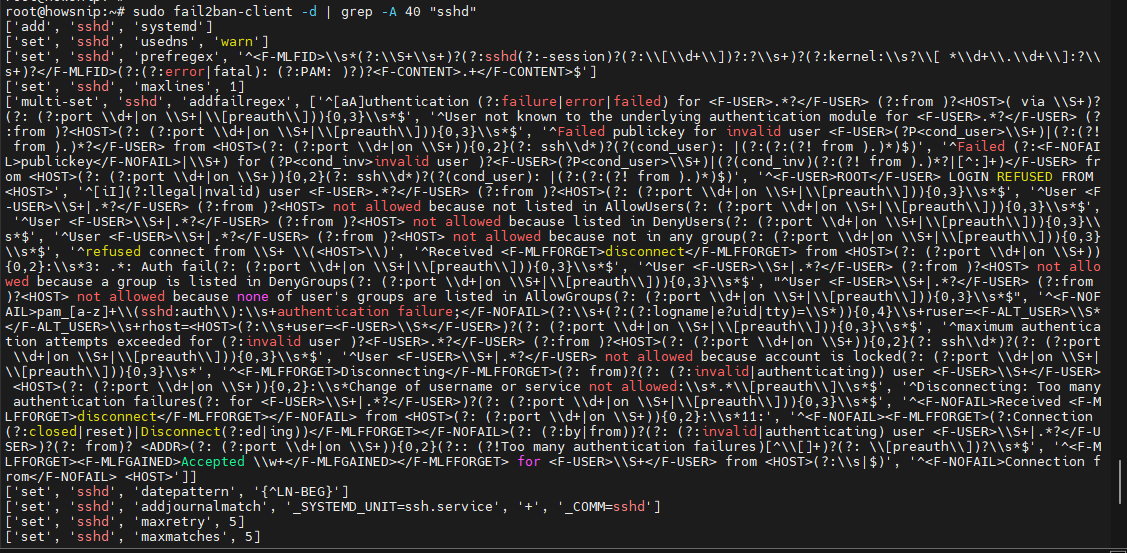
Check loaded actions:
sudo fail2ban-client get sshd actions
Create a manual test ban using a documentation-only IP address:
sudo fail2ban-client set sshd banip 198.51.100.25
Verify the ban:
sudo fail2ban-client status sshd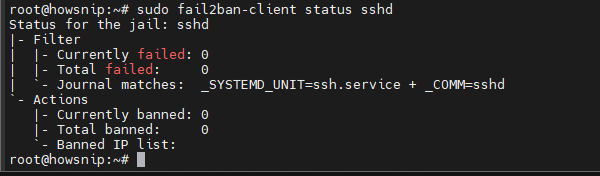
The IP address should appear in the banned list.
If the active action uses nftables, inspect the rules:
sudo nft list ruleset | grep -i -A 8 f2bRemove the test ban:
sudo fail2ban-client set sshd unbanip 198.51.100.25The test IP should:
- Appear in the banned list.
- Match the firewall action being used.
- Disappear after unbanning.
Step 9: Adjust Ban Settings Carefully
Current jail settings are:
bantime = 1h
findtime = 10m
maxretry = 5
This means:
- Five failed login attempts
- Within ten minutes
- Result in a one-hour ban
There is no universal best configuration. Aggressive settings can accidentally block legitimate users, administrators, automation systems, or users behind shared NAT connections.
Enable Incremental Ban Times
Edit:
sudo nano /etc/fail2ban/jail.d/00-local-defaults.local
Add:
[DEFAULT]
bantime.increment = true
bantime.factor = 2
bantime.maxtime = 1d
This gradually increases the ban duration for repeat offenders.
Validate and reload:
sudo fail2ban-client -t
sudo systemctl restart fail2ban
Check the effective ban duration:
sudo fail2ban-client get sshd bantimeStep 10: Manage Bans and Review Activity
View SSH jail status:
sudo fail2ban-client status sshd
Manually ban an address:
sudo fail2ban-client set sshd banip 203.0.113.50
Remove the ban:
sudo fail2ban-client set sshd unbanip 203.0.113.50Review recent activity:
sudo journalctl -u fail2ban --since today --no-pager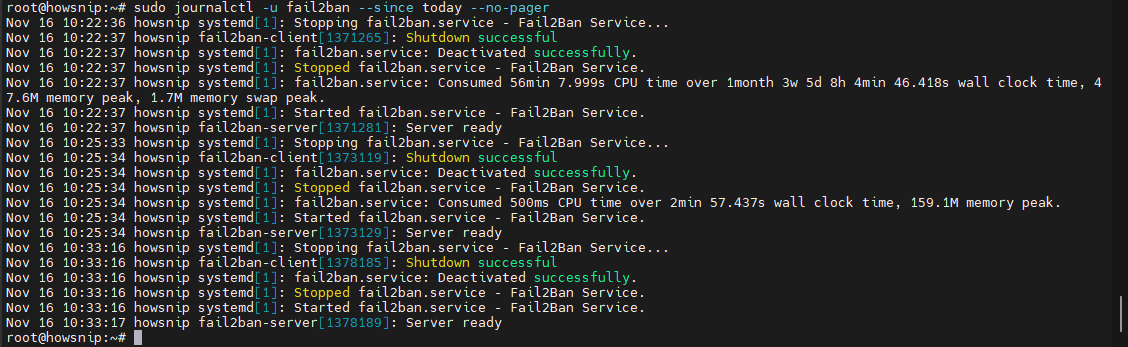
Ban counts alone do not indicate how secure a server is. Activity levels vary depending on:
- Internet exposure
- SSH configuration
- Retry thresholds
- Authentication methods
- Background scanning activity
Step 11: Harden SSH Beyond Fail2Ban
Fail2Ban reduces brute-force attacks but does not replace proper SSH security practices.
Review your effective SSH configuration:
sudo sshd -T | grep -E 'passwordauthentication|permitrootlogin|pubkeyauthentication'
Validate SSH configuration changes:
sudo sshd -tReload SSH after successful validation:
sudo systemctl reload sshSSH Security Recommendations
- Use SSH key authentication.
- Disable password authentication only after testing key-based access.
- Restrict open ports with a firewall.
- Keep Ubuntu updated.
- Always verify access from a second session before disconnecting.
Step 12: Troubleshoot Common Fail2Ban Issues
a) Fail2Ban Won’t Start
Validate configuration:
sudo fail2ban-client -t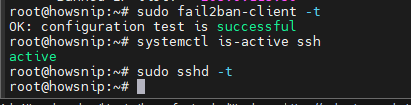
Check service logs:
sudo journalctl -u fail2ban -n 100 --no-pagerb) SSH Jail Is Missing
Inspect the jail configuration:
sudo cat /etc/fail2ban/jail.d/sshd.localCheck active jails:
sudo fail2ban-client statusc) SSH Failures Are Not Being Detected
Verify SSH events are appearing in the journal:
sudo journalctl -u ssh --since '30 minutes ago' --no-pagerFor:
backend = systemd
do not configure:
logpath
The systemd backend uses journal matching rather than log files.
d) Bans Exist But Traffic Is Not Blocked
Check the active action:
sudo fail2ban-client get sshd actionsInspect nftables rules:
sudo nft list ruleset | grep -i -A 8 f2b
Troubleshooting should follow this order:
- Configuration
- Service status
- Jail status
- Log source
- Firewall actions
Step 13: Perform a Final Verification
Run a final health check.
Check Fail2Ban:
systemctl is-active fail2ban
sudo fail2ban-client status
sudo fail2ban-client status sshd
Validate configuration:
sudo fail2ban-client -t
Confirm SSH health:
systemctl is-active ssh
sudo sshd -t
Review warnings:
sudo journalctl -u fail2ban -p warning --since today --no-pager
Optional final ban test:
sudo fail2ban-client set sshd banip 198.51.100.25
sudo fail2ban-client status sshd
sudo fail2ban-client set sshd unbanip 198.51.100.25
Verify
- Fail2Ban is active.
- SSH is active.
- The sshd jail is loaded.
- Configuration validation succeeds.
- Manual ban and unban work as expected.
Step 14: Disable or Remove Fail2Ban Safely
a) Disable Only the SSH Jail
Move the local jail override:
sudo mv /etc/fail2ban/jail.d/sshd.local \
/etc/fail2ban/sshd.local.disabled
Validate configuration:
sudo fail2ban-client -tRestart Fail2Ban:
sudo systemctl restart fail2banVerify the jail is no longer active:
sudo fail2ban-client statusb) Stop Fail2Ban Completely
Remove all current bans:
sudo fail2ban-client unban --allDisable and stop the service:
sudo systemctl disable --now fail2banc) Remove Fail2Ban Entirely
Purge the package:
sudo apt purge -y fail2ban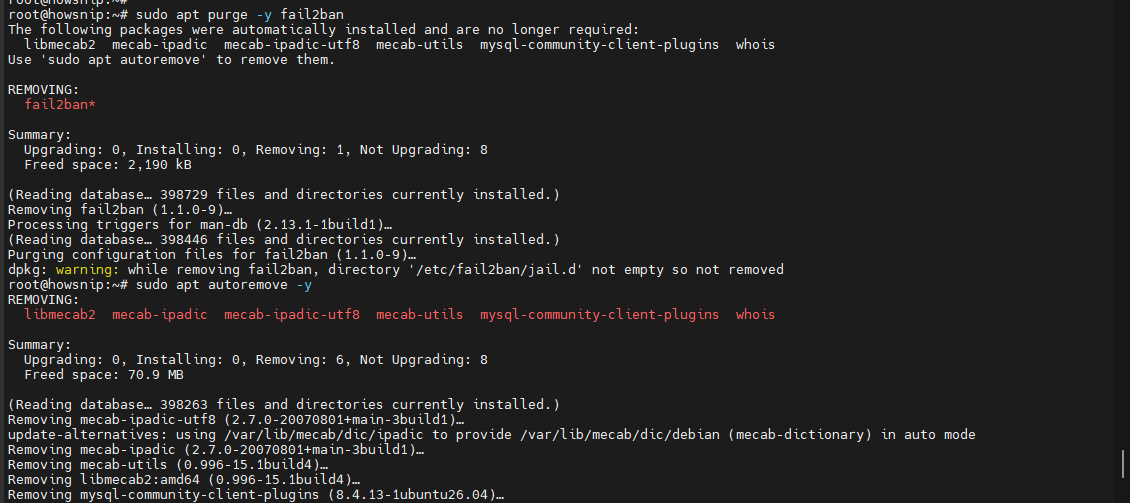
Remove unused dependencies:
sudo apt autoremove -y
Warning: Removing Fail2Ban should not affect SSH key authentication or firewall protections. These security controls serve different purposes and should remain in place.
Conclusion
You have successfully installed and configured Fail2Ban on Ubuntu to protect SSH from brute-force login attempts. The setup uses a dedicated local SSH jail, the systemd backend for journal monitoring, custom ban thresholds, configuration validation, safe ban testing, and ongoing monitoring tools.
While Fail2Ban is an effective layer of defense, it should be combined with SSH key authentication, firewall rules, regular system updates, and careful access management to create a stronger overall security posture for your Ubuntu servers.