The Windows Management Instrumentation Command-line (WMIC) utility has been a useful tool for IT professionals and users for many years. However, as part of Microsoft’s strategy to modernize and streamline Windows, WMIC has been deprecated and is now disabled by default in Windows 11. Despite its deprecation, some enterprise applications like Tiger Store and Tiger Spaces Client still rely on WMIC utility for essential operations.
If you need to enable WMIC on a Windows 11 system, this guide will walk you through the steps in clear, easy-to-follow language.
What is WMIC?
WMIC (Windows Management Instrumentation Command-line) is a command-line tool that provides a straightforward way to interact with WMI, a powerful framework that enables management and automation of Windows-based systems. It lets you to retrieve data about your computer, manage devices, monitor system events, and more.
Many system management utilities and scripts depend on WMIC to query system information, perform configurations, and automate administrative tasks.
With Windows 11, Microsoft has removed certain legacy components in favor of newer, more secure, and modern management methods, such as PowerShell and Windows Admin Center. As a result, WMIC is deprecated and not installed by default on new Windows 11 machines.
The good news is that Microsoft still allows users to re-enable WMIC if their workflow or critical applications demand it.
Before you start, ensure you have the following:
- Administrative privileges on the machine. You will need to run PowerShell as an administrator.
- Active internet connection or a network connection to your organization’s Windows Server Update Services (WSUS) if the system is managed centrally.
Step-by-Step Instructions to Install WMIC on Windows 11
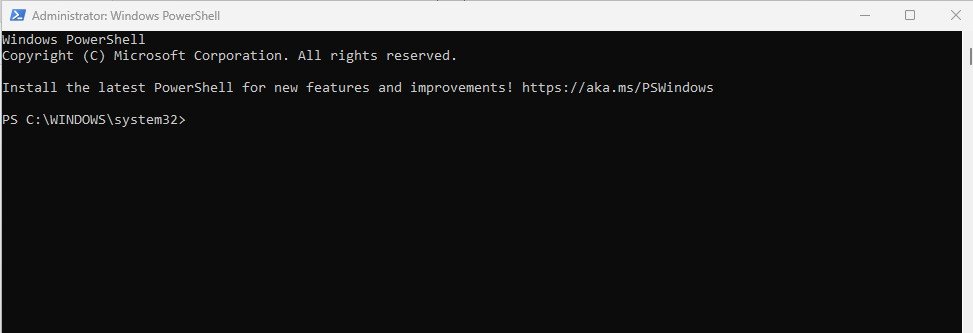
1. Launch PowerShell as Administrator
You must use PowerShell with elevated privileges to adjust system capabilities.
- Click the search icon or press Windows + S.
- Type “PowerShell” into the search bar.
- Right-click on Windows PowerShell from the results.
- Select Run as administrator.
- If prompted by User Account Control (UAC), click “Yes” to grant permission.
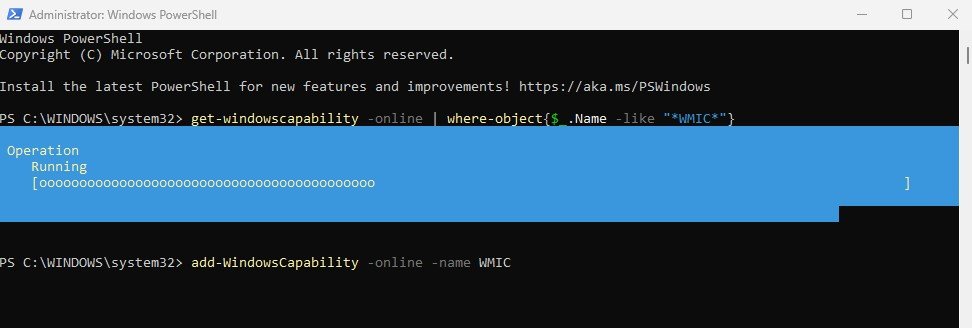
2. Check if WMIC Capability is Already Present
Some enterprise builds or managed machines may have WMIC already present. To check:
Command: get-windowscapability -online | where-object{$_.Name -like "*WMIC*"}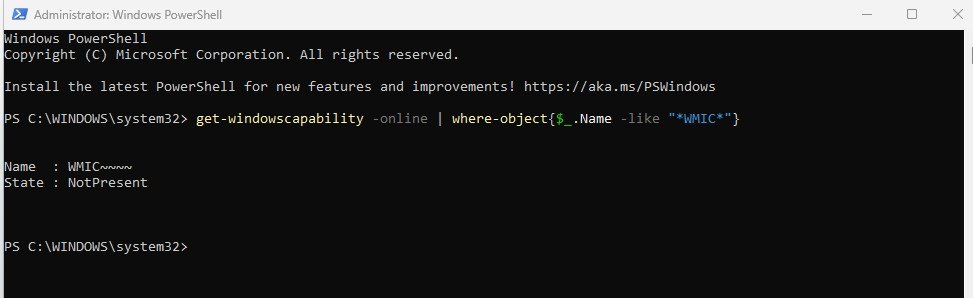
If you see the output similar to:
Name : WMIC~~~~
State : NotPresent
This means WMIC is not installed and you can proceed with the next steps. If the State is Installed, then WMIC is already available and you can start using it immediately.
3. Add the WMIC Package to Windows 11
To add the WMIC capability, run the following PowerShell command:
Command: add-WindowsCapability -online -name WMICThis command tells Windows to download and install the WMIC capability package onto your system. The process typically takes a few seconds to a few minutes, depending on network speed.
4. Verify Installation Results
When the installation completes, PowerShell should display output similar to:
Name: WMIC~~~~
State: Installed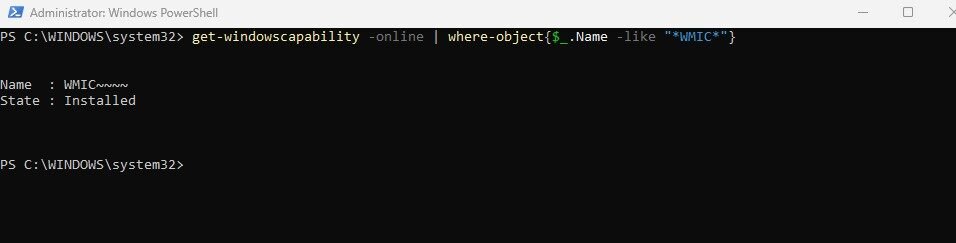
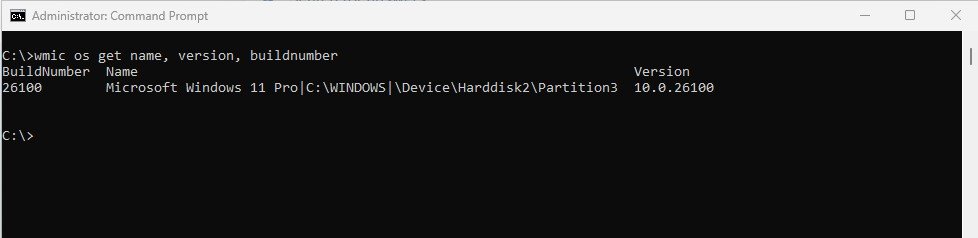
5. Test WMIC Access
To confirm successful installation:
- Open Command Prompt (press Windows + R, type cmd, and press Enter).
- Type wmic os get name, version, buildnumber.
It’s recommended to migrate away from WMIC for new developments and use PowerShell or Windows Admin Center. Since Microsoft has marked WMIC as deprecated, it’s possible future major Windows versions might remove it permanently. Stay aware of updates and plan for eventual migration.